Editing your Project
Sigil gives you all the tools you need to edit and format your eBook. You will find these tools in the Formatting Toolbar and the Tool menu.
Here are some instructions on:
Basic Formatting
Many of Sigil's formatting tools work the same as the formatting tools in a word processor. Although it helps to be familiar with XHTML to edit and make changes to your EPUB, you can also use the formatting tools in the toolbar. With these buttons, you can control:
- headings
- bold
- italics
- underline
- strikethrough
- subscript and superscript
- paragraph alignment
- bullet point lists
- numbered lists
- indents
- lower / upper / title casing
To make changes, highlight the text you want to format in your Sigil project and click one of the formatting tools in the toolbar. Formatting will be applied.
- To undo, you can click the same button again or hit Edit > Undo (CTRL Z).
- To redo, you can click Edit > Redo (CTRL Y).
- You also have the Edit > Copy (CTRL C), Paste (CTRL V), and Cut (CTRL X) features available, again, much the same as a word processor.
You will notice that in the code view, code will be added automatically when you use these formatting tools. In the following section, Working with XHTML, we will provide more information on using XHTML as well as some common tags.
Working with XHTML
Sigil uses XHTML to build Ebooks. Tags, which modify text, are part of XHTML code. Below are some of the most commonly used tags when working with XHTML:
- <b>bold</b> - bold - Makes text between the tags bold
- <i>italics</i> - italics - Italicizes the text
- <u>underline</u> - underline - Underlines the text
- <p>paragraph</p> - All text within this tag will be a separate paragraph
Two other tags worth noting: <head> and <body>. Information about the document is stored in between <head> and </head>, such as the title (appearing between <title></title>). The main content (that is, your story) will exist in the body tag, between <body> and </body>.
XHTML is similar to HTML (which you may have already heard of and even worked with), but XHTML has more formatting rules. Some things to keep in mind when using XHMTL to format your Ebook: elements and attribute names must always be in lowercase, all tags must be closed, and elements must always be properly nested.
This guide to the differences between HTML Versus XHTML also provides useful examples on how to properly format tags in XHTML.
Adding Paragraphs
If your document has been formatted properly, paragraphs will be automatically created upon importing into Sigil.
To make a new paragraph, enclose the desired paragraph text between the following tags:
<p>All the text that is supposed to be in a particular paragraph.</p>
You can also highlight the text you want to be in a paragraph and click the heading icon and select "Normal". The keyboard shortcut to this is CRTL 7.
Creating Chapters
In order to be identified and linked in the Table of Contents, each chapter or section in your book should be contained in a separate .xhtml file. This also makes it easier to edit and debug eBooks with hundreds of pages rather than working from a single .xhtml file. There are two ways that you can create your chapters: Split at Cursor and Split Markers.
- Please note: Once you split a manuscript, you cannot undo it, so it is important to save your EPUB before splitting.
Split at Cursor
To split your current file into two files where the cursor is currently positioned:
- Place your cursor at the position where you want the split to occur. Ex. Left of the chapter heading.
- Click on the Split At Cursor icon.
Split at Markers
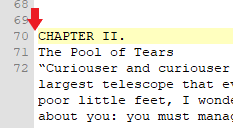
To split all files at previously inserted chapter markers, you will need to insert Split Markers first to let Sigil know where to split your document.
- Click Insert > Split Marker and place a marker at the beginning of each section. Ex. If you have 15 chapters, insert a split marker right before each chapter.
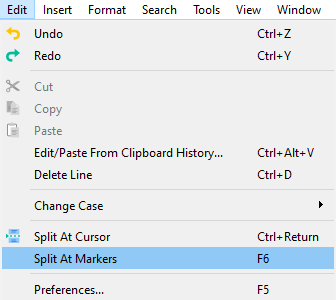
- Split Markers will look like horizontal lines throughout your document. Click on Edit > Split At Markers to create new .xhtml files for each of your chapters.

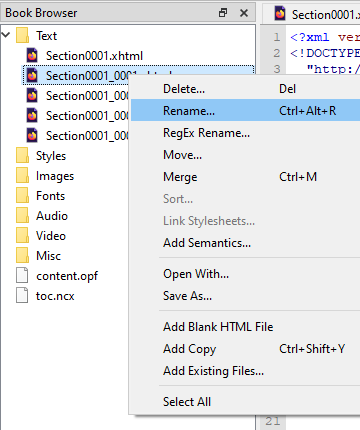
You should now see newly generated .xhtml files in the Book Browser. These can be renamed at any time by right-clicking on the file name and selecting Rename.
Adding a Cover
Do you have an image to place as the cover of your book? Add a cover by selecting the menu item Tools > Add Cover. Next, select the image you would like to use and click ok. Your cover will be created and it will show up as a seperate XHTML page, just like your chapters.
Creating Headers
Headers are used to indicate titles, alter the font/boldness of text and to dictate to Sigil how you want to divide your table of contents. (see the next section on how to generate a table of contents)
Text that you want to stand out should be a header. Most headers are larger and bolder than normal text. The size ranges from the largest (h1) to the smallest (h6).
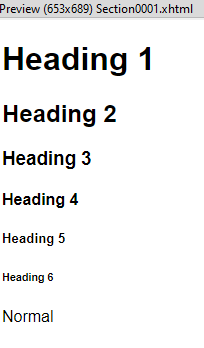
To add a header to your text, highlight the word or phrase you want to add the header to and then click the Heading button to add the Heading of your choice.
Be sure to apply the H1 style to the title of each chapter or section. Sigil generates a Table of Contents that is based on the heading structure in the .xhtml document, so it is possible to include up to five subheadings within each chapter that will appear nested in the Table of Contents file. You also have the option of disabling certain headings later on if you plan on using some for visual styling only. See next section for table of contents instructions.
Adding a Table of Contents
The Table of Contents window in Sigil gives you a dynamic view of your table of contents. To open the Table of Contents window if it is not already open select the menu item View > Table of Contents.
In order to create a Table of Contents automatically you first need to define the headings or chapters in your book. In Book View you can create headings by selecting the text you want to make into a heading, and then selecting the level of the heading you want from the Format > Heading menu, or more easily using the buttons on the toolbar.
Start your Table of Contents generation by clicking the Generate Table of Contents button or selecting the menu item Tools > Table Of Contents > Generate Table Of Contents then select the headings you want included in the book’s Table of Contents.
The name given to the entry in the table of Contents will mirror the highlighted text that you used on that Header.
GLITCH ALERT: do not attempt to rename your entry in the Table of Contents window, it will crash Sigil and you will lose any unsaved work. As always save often.
Check any name that you want to be included in the Table of Contents, and uncheck any entry that you do not want included.
Adding Links
Adding Links
You can add links that take the reader to other parts of your eBook, or to website URLs.
To add a link, highlight the text where you want the link to be and click on the Insert Link icon in the Toolbar. If you are linking internally, select a page from the list. Otherwise, type a web URL in the target box.
You can also use XHTML to link somewhere. If you wanted to link to the VPL website, you could type
- <a href="https://www.vpl.ca">Text linking to the website</a> and text that is not linked.
and it would look like
- Text linking to the website and text that is not linked.
Adding Metadata
The Metadata Editor allows you to add or edit details about your book – like author, title and language, as well as hundreds of other entries defined by the EPUB standard. Edit your book details by clicking the Metadata Editor button or selecting the menu item Tools > Metadata Editor.
Metadata Properties *
- Contributor - Person who contributed to the publication
- Coverage - Area or time covered by the publication
- Creator - Person responsible for making the publication
- Date - Time associated with the publication
- Description - Account of publication
- Format - File format, physical medium, or dimensions of the publication
- Identifier - Reference to resource within a context
- Language - The language of the resource
- Publisher - Entity responsible for making the publication available
- Relation - A related resource
- Rights - Information about rights held on the publication
- Source - Related resource from where the publication was derived
- Subject - Publication's topic
- Title - Name given to publication
- Type - Nature of genre of resource
* Buse, Jarret W. EPUB from the Ground up a Hands-on Guide to EPUB 2 and EPUB 3. McGraw Hill Education, 2014.
Using Spellcheck
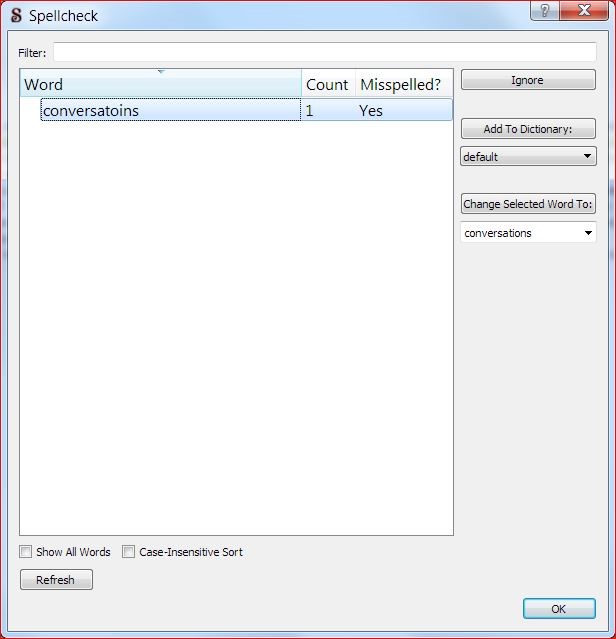
Sigil's spell check tool can save you a lot of time by identifying any misspellings and mistakes in your eBook. To open the Spellcheck dialog, click the Spellcheck button or use the menu item Tools > Spellcheck > Spellcheck.
- Select the word that you want to change from the left side of the Spellcheck list.
- Click on the drop-down menu on the right to to type or select the correct spelling.
- Click on "Change Selected Word To" to change all the occurrences of the selected word.
- Once you have applied the changes you need, click OK.
