Saving Your Work
Saving a Premiere Pro Project
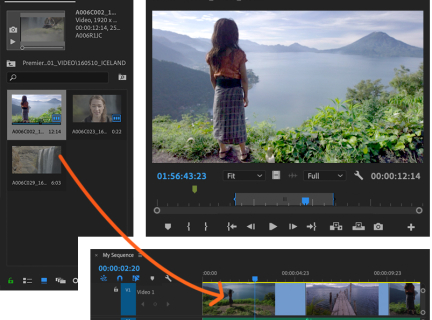
Saving a Premiere Pro project means you are able to do more editing with your work. An easy way to do this is to go File > Save, or, if you want to make a different version of your project, go File > Save As. Doing this will create a Premiere Pro project file (.pproj), which can only be opened with Premiere Pro.
If you are finished editing and want to share your video, you will need to export it. The guides below will detail how to do this.
Export Time
Videos, especially when edited with effects and titles, can become large files. Large files may also take a while to save.
File sizes and saving times can vary wildly depending on the file format selected:
| File format Types | file size | estimated saving time |
|---|---|---|
| 20 minute video, small format (eg. MOV, Mp4, MPEG2) | 1-5 GB | 10-40 minutes* |
| 20 minute, large format (eg. uncompressed AVI) | 25-30GB | 10-12 minutes |
*mp4 is the smallest (most compressed) format and takes the longest to save at 40 minutes.
Additional time will also be required if you wish to burn any of these projects onto a disc (10-15 minutes for a 20 minute video).
How to Export
How to Export
1. When you're ready to export your video, click on the Timeline to ensure the panel is selected.
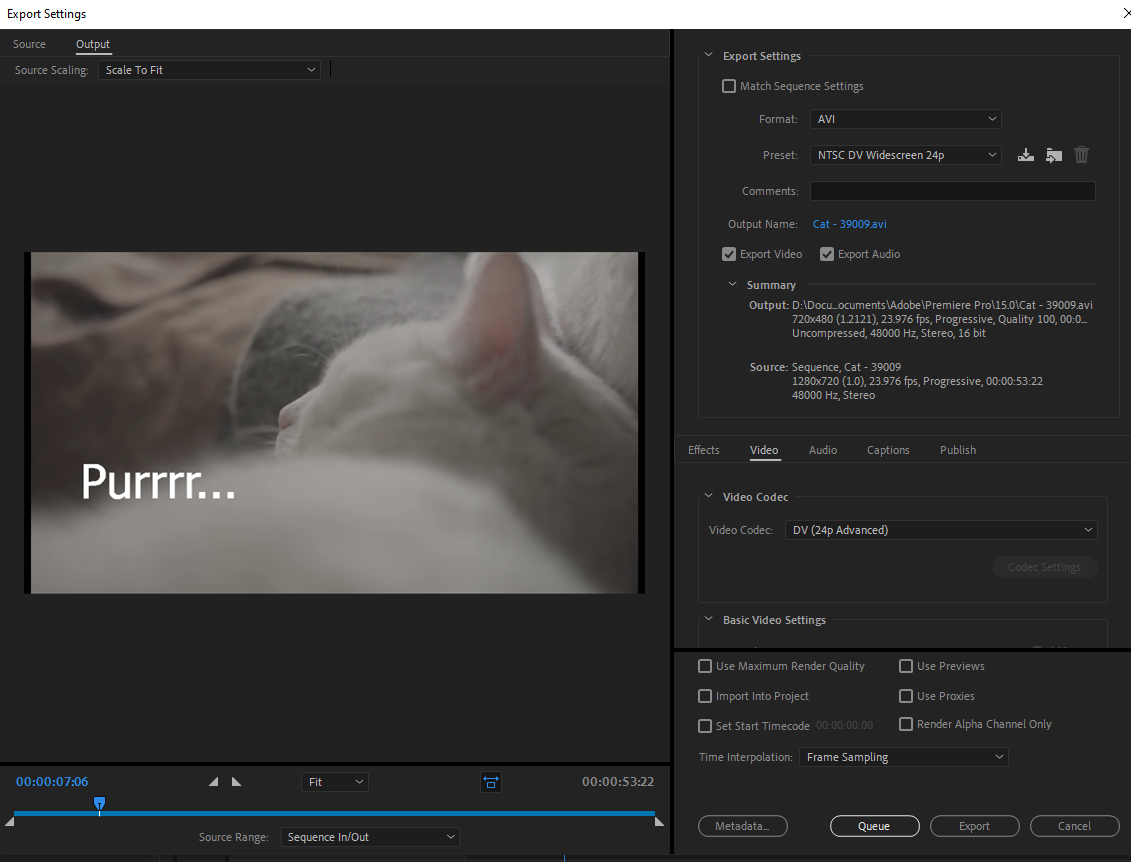
2. Either go to File > Export > Media or use the keyboard shortcut CTRL+M. This brings up the Export Settings window, where you can select the desired settings/presets for your video.
Before exporting, determine how the video will be viewed (ex. uploaded to YouTube/Vimeo, burned to DVD, on a mobile device). This is key in determining which settings to choose. Most delivery destinations will require specific codecs that may be different than those of the native file, which the presets account for.
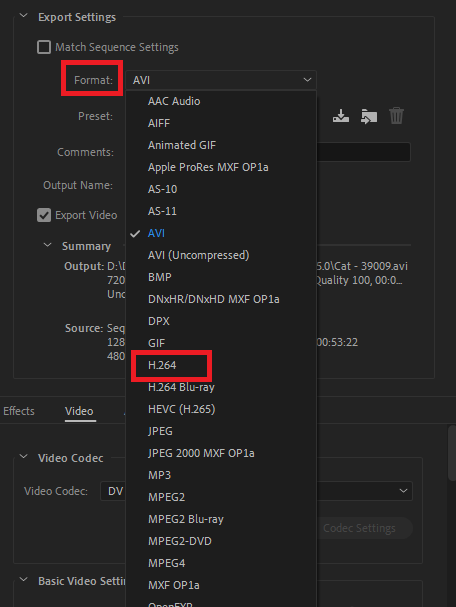
3. The best setting for web playback is the H.264 codec, so choose that from the Format menu.
4. Below the Format drop-down is Preset. Here you can select a preset that matches your sequence and desired output. If you find you have custom presets you use frequently, you can save them by clicking that first icon directly to the right of the Preset drop-down.
5. Click Output Name if you want to name the exported video something different. This is also where you can change the export location.
6. Check both Export Video and Export Audio.
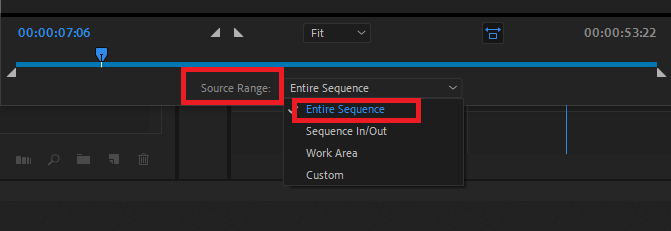
7. On the bottom left side of the window in the Source Range drop-down menu, select Entire Sequence.
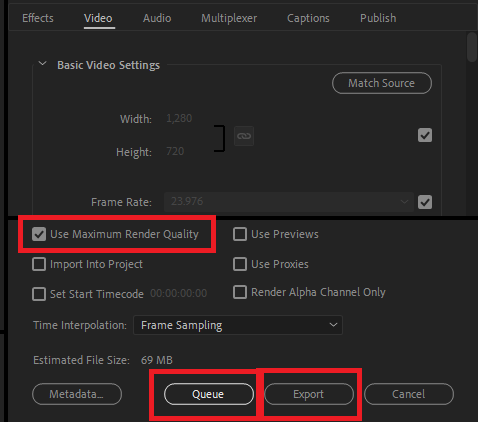
8. Back on the right side of the window near the bottom, you can tick the box beside Use Maximum Render Quality. It will take longer to export but, unless you’re just creating a rough video to preview, the quality is worth it.
9. At this point, you can select one of two export options: Queue or Export. Queue allows you to add multiple sequences to a queue to export at the same time. This is useful if you want to continue working in Premiere Pro while the export takes place in the background. Export, on the other hand, will export the sequence directly from this window, and you can’t use Premiere Pro while this takes place.
10. Depending on your project, it could take a while to encode and export your video. If so, take a break! Have a donut. Go for a walk. Pet a nice kitty. You deserve it.
