Getting Started with Adobe Premiere Pro
Files and Formats
Premiere Pro supports (will import and use) common formats including MP4, AVI, MOV, and MPEG, MP3, and WAV. For a complete list of supported file formats, see this Adobe page on supported file formats.
Some filename extensions such as MOV or AVI are container file formats rather than specific audio, video, or image data formats. What this means is that Premiere Pro can import these files, but the ability to use these files depends on the codecs, which may or may not be installed. Therefore, although usually MOV and AVI files should work without issue in Premiere Pro, it is also possible a file with these extensions may not be something Premiere Pro can work with.
If you need to export your file as an .mp4 optimized for web viewing, please refer to the Saving Your Work tab in this guide.
Video files that are purchased from online stores such as the iTunes Music Store generally have copy protection or digital rights management (DRM). They cannot be used in Adobe Premiere Pro.
Lastly, if you've used any other Adobe CC program, you may be familiar with some of the tools, as there are many similarities across most Adobe programs. Adobe’s CC programs also speak to each other and integrate well. For example, Adobe Photoshop files can preserve their layers when opened in Premiere Pro; they can be opened directly from Premiere Pro to be edited in Photoshop; any changes will immediately be updated when the Photoshop file is saved and focus returns to Premiere, etc. You can work across multiple platforms (for example, start a project on Windows and finish it on a Mac), but keep in mind some formats are supported on one and not the other, and some functions may change.
File Management & Creating a New Project
Before jumping in, Adobe Premiere Pro project files as well as source files (video and audio clips) all need to be stored together in the same folder or on the same drive while you edit.
1. On your external storage device (USB or external hard drive), create a New Folder with a descriptive name to hold your new Premiere Pro project (ex. "Tour Venice Documentary Project").
2. Move all project files and source files in this new folder. It is a good idea to create subfolders to keep audio and video files separate and organized in case you need to find them later.
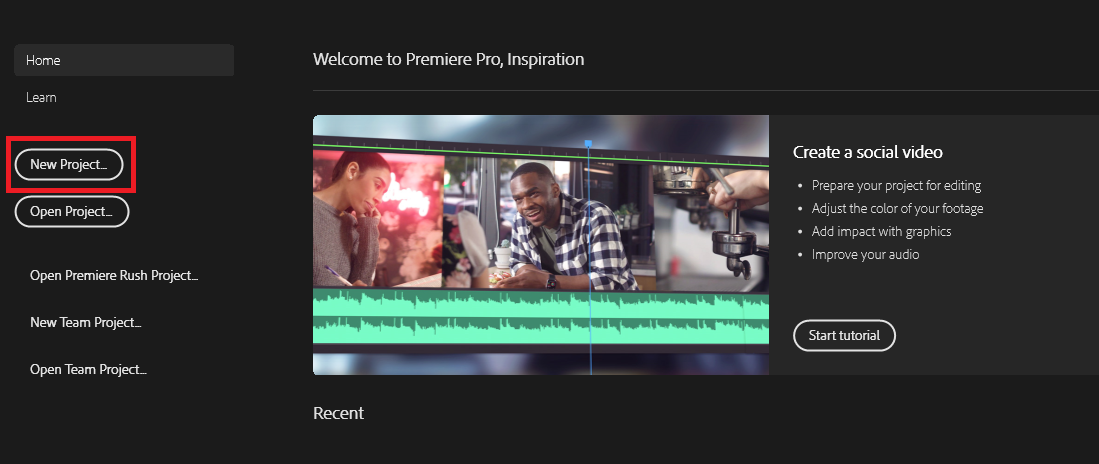
3. Now that you've organized your project, open Adobe Premiere Pro CC 2021 and select New Project.

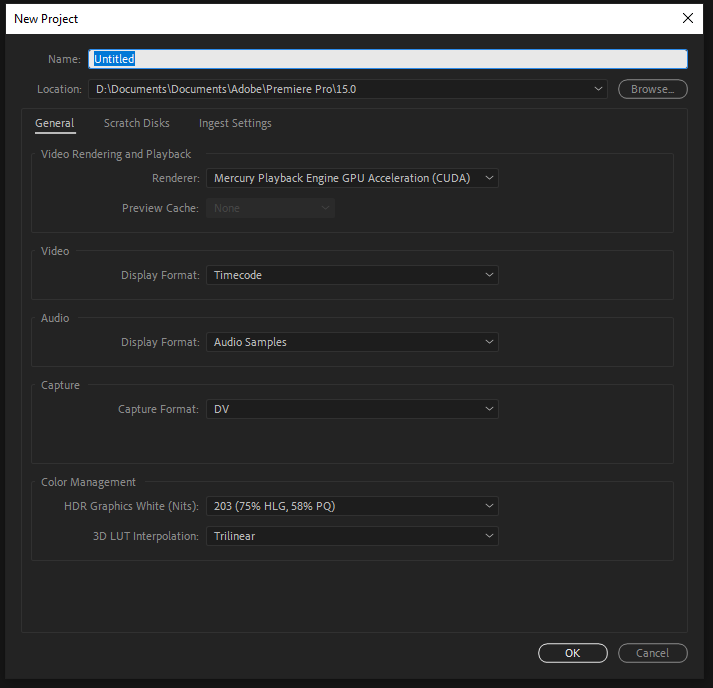
4. In the New Project Window, you'll find two tabs: the General tab, and the Scratch Disks tab.

General: Leave all default settings unless the footage requires an alternate setting.
Scratch Disks: You have the option of directing where Premiere Pro stores new created media files. The default is the same location as your project (ex. your USB or external hard drive), so it's fine to leave this as well.

