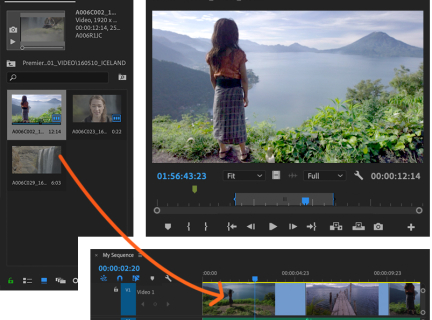
Importing Media & the Timeline
Now that you're familiar with the Premiere Pro workspace, let's bring media files into your project. You can import media in a few ways:
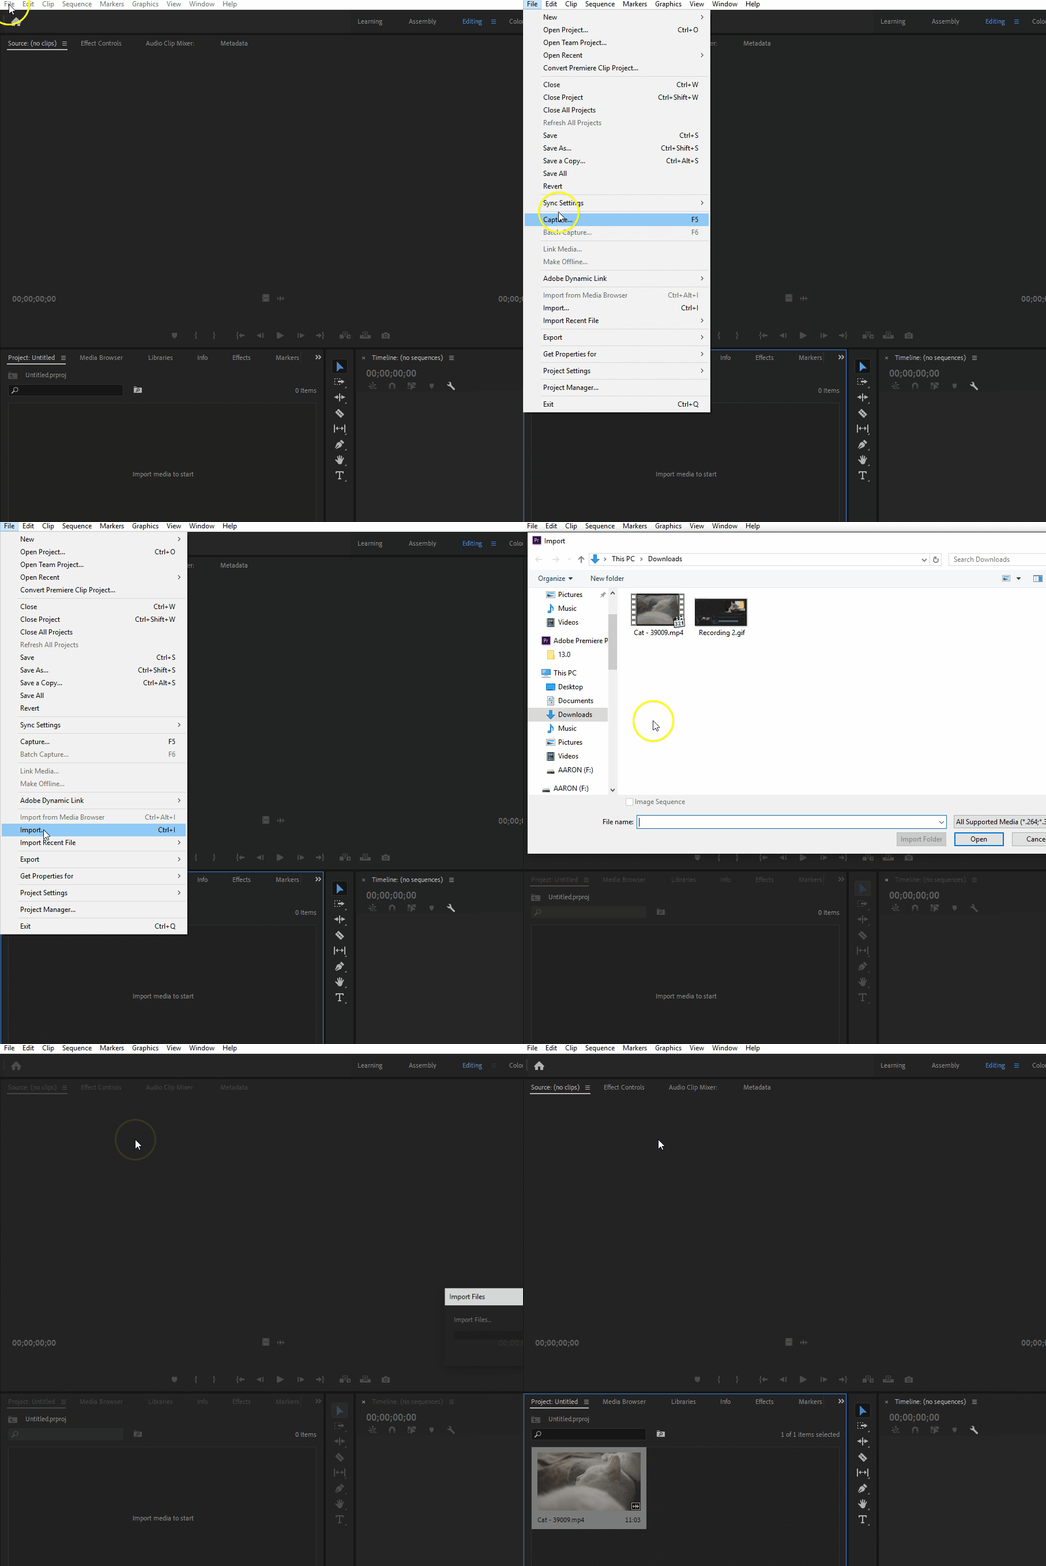
Option 1: File > Import > Select files
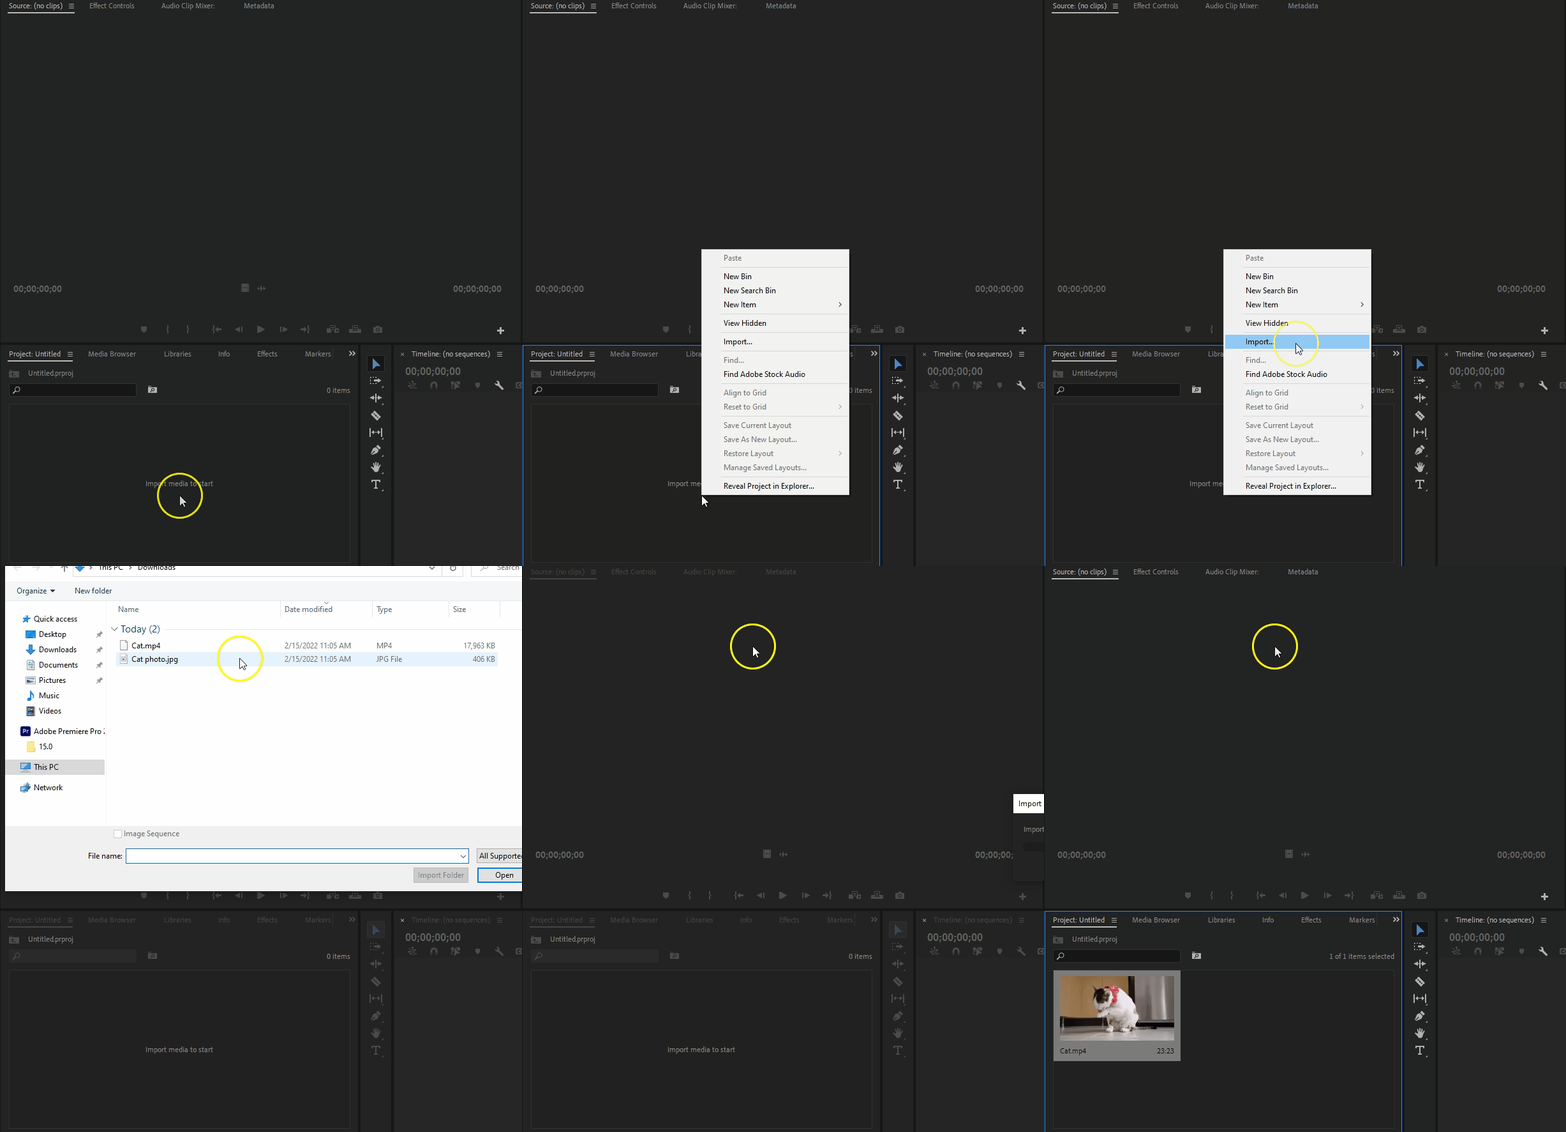
Option 2: Right Click in Project Panel > Import > Select files
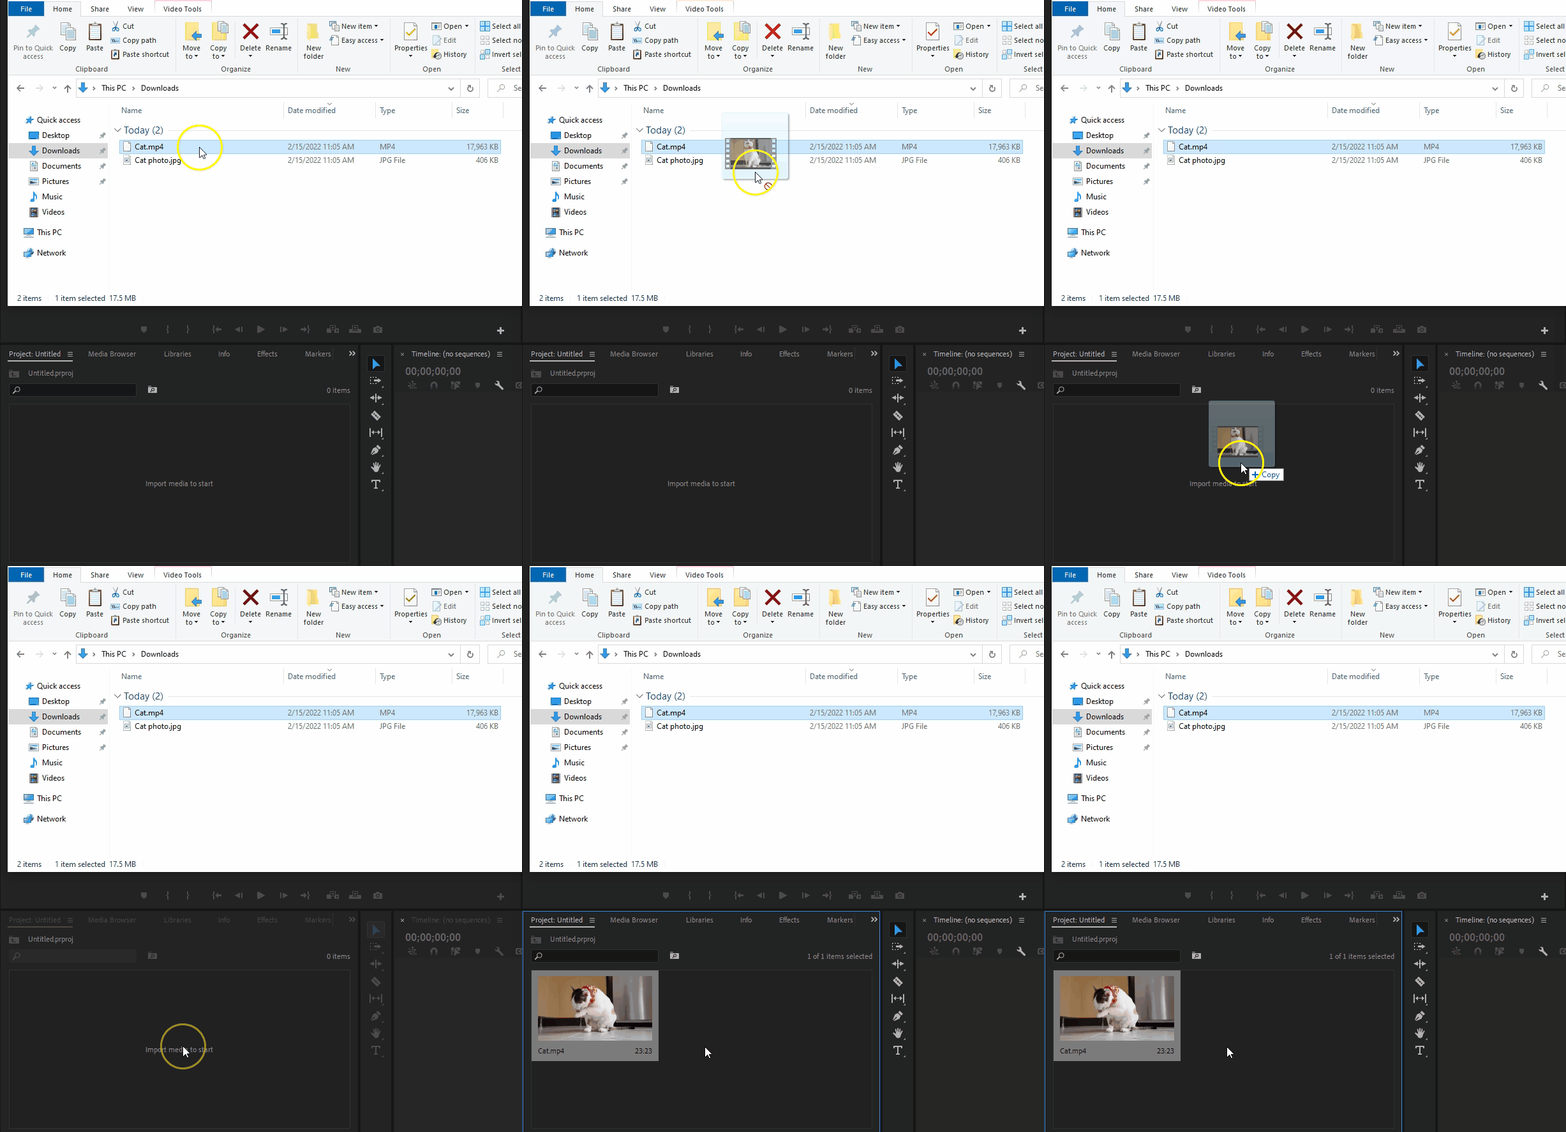
Option 3: Drag-and-drop media file into the Project Panel
Working in the Timeline
With your media now imported into your project, we'll move your clips into the Timeline sequence, where the bulk of editing is done. You can either add an entire clip or part of a clip.
Adding Clips
1. Double-clicking on files in the Project Panel (the bottom left window) will allow you view them in the Source Monitor (the top left window).
2. To use the clip in its entirety, click and drag the video image from the Source Monitor to the Timeline. The clip will appear in the channel it is dropped on (audio A1/video V1) in the sequence. When you do this, you will automatically create a Timeline sequence, which can consist of a combination of video, photo and audio clips.

V1, V2, V3, etc. channels are video channels. Video clips and stills will appear here. A1, A2, A3, etc. channels are audio channels. Audio clips such as narration or music will show here.
The blue vertical line is called the playhead. Whatever clip(s) directly on the playhead (ex. at that exact timestamp) is/are displayed in the Program Monitor. You can move the playhead a number of ways: by clicking and dragging the top of the playhead and moving it left and right (a.k.a. scrubbing); jumping to a precise point by clicking in the space on top with the short lines and timecodes; or using the arrow keys on the keyboard. Press spacebar to play the Timeline.
3. To use a section of a clip, set IN and OUT points in the Source Monitor to create a new clip. Use the slider on the ruler at the bottom of the panel to select a start point and type “I” for IN (start point) then “O” for OUT (end point). When IN and OUT points are set (indicated by the blue brackets), the selected portion remaining will be greyed out.
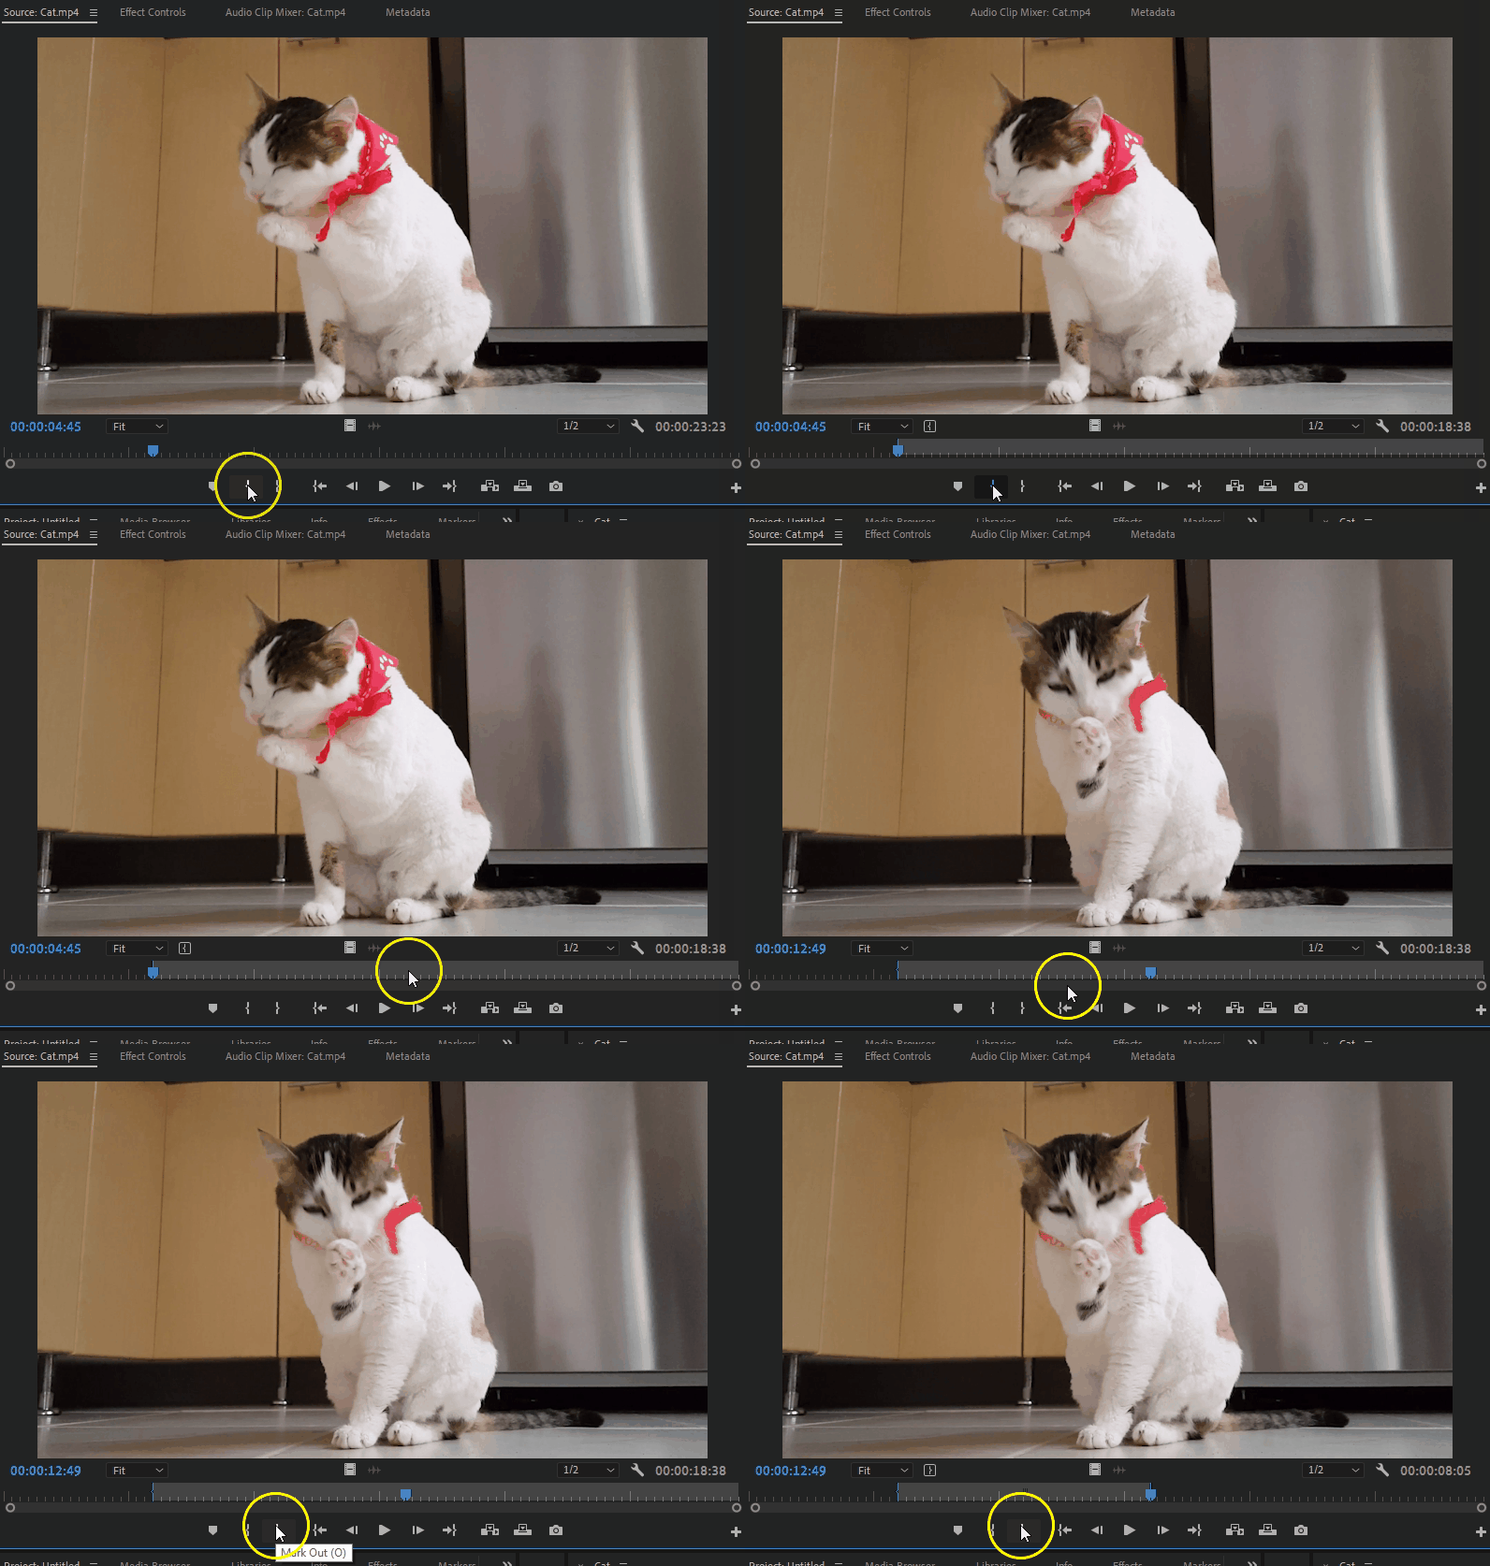
4. Click on the video image and drag from the Source Monitor to the Timeline. The clip will appear in the channel it is dropped on (audio A1/video V1) in the sequence.
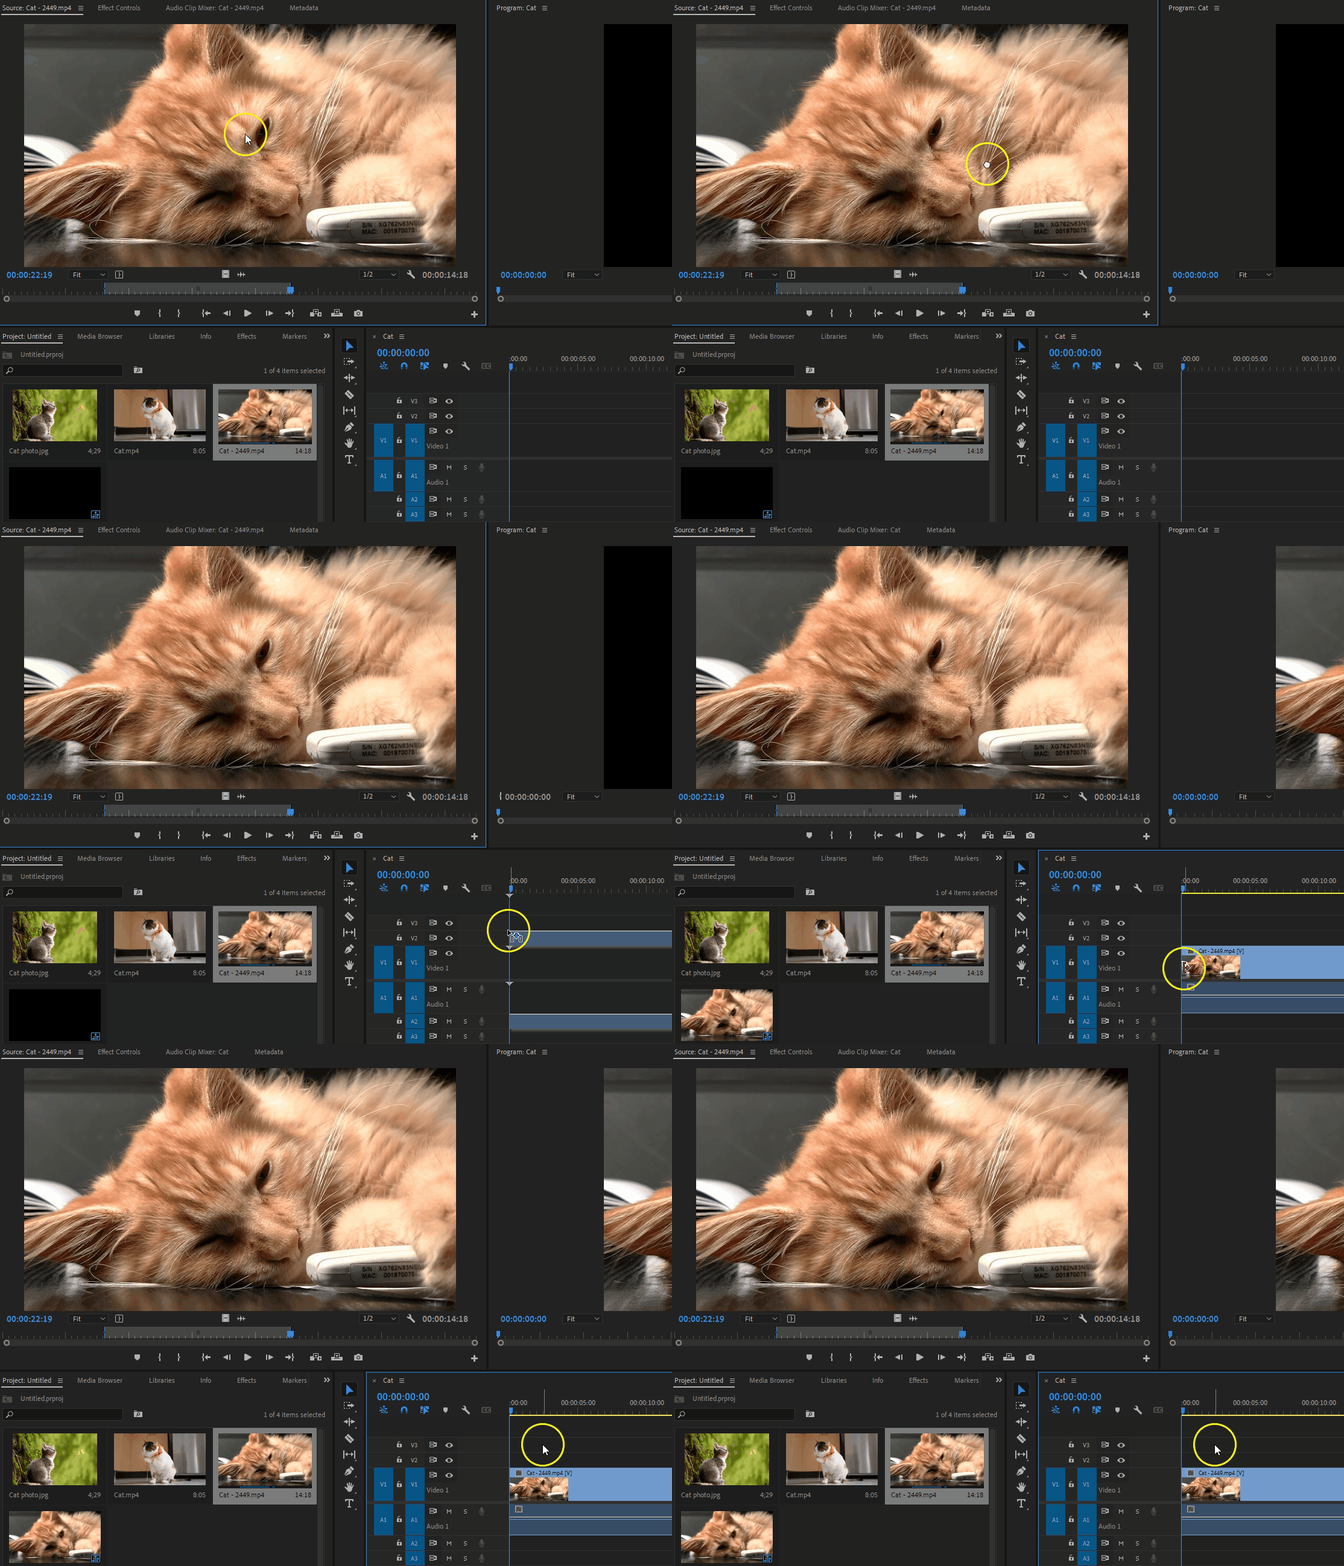
5. Add all of the clips to be used in the project to begin editing and fine tuning the project. Clips will attempt to “snap” logical points to avoid empty space/gaps between sequences.
Any video files with recorded audio will be automatically connected to each other once brought into the Timeline. To separate audio from video clips, right-click on the audio channel and select Unlink. The audio can now be moved and edited separately from the video clip.

