Software Tour
Let's familiarize ourselves with the workspace/layout of Premiere Pro as well as the most commonly used tools.
Workspace and Layout

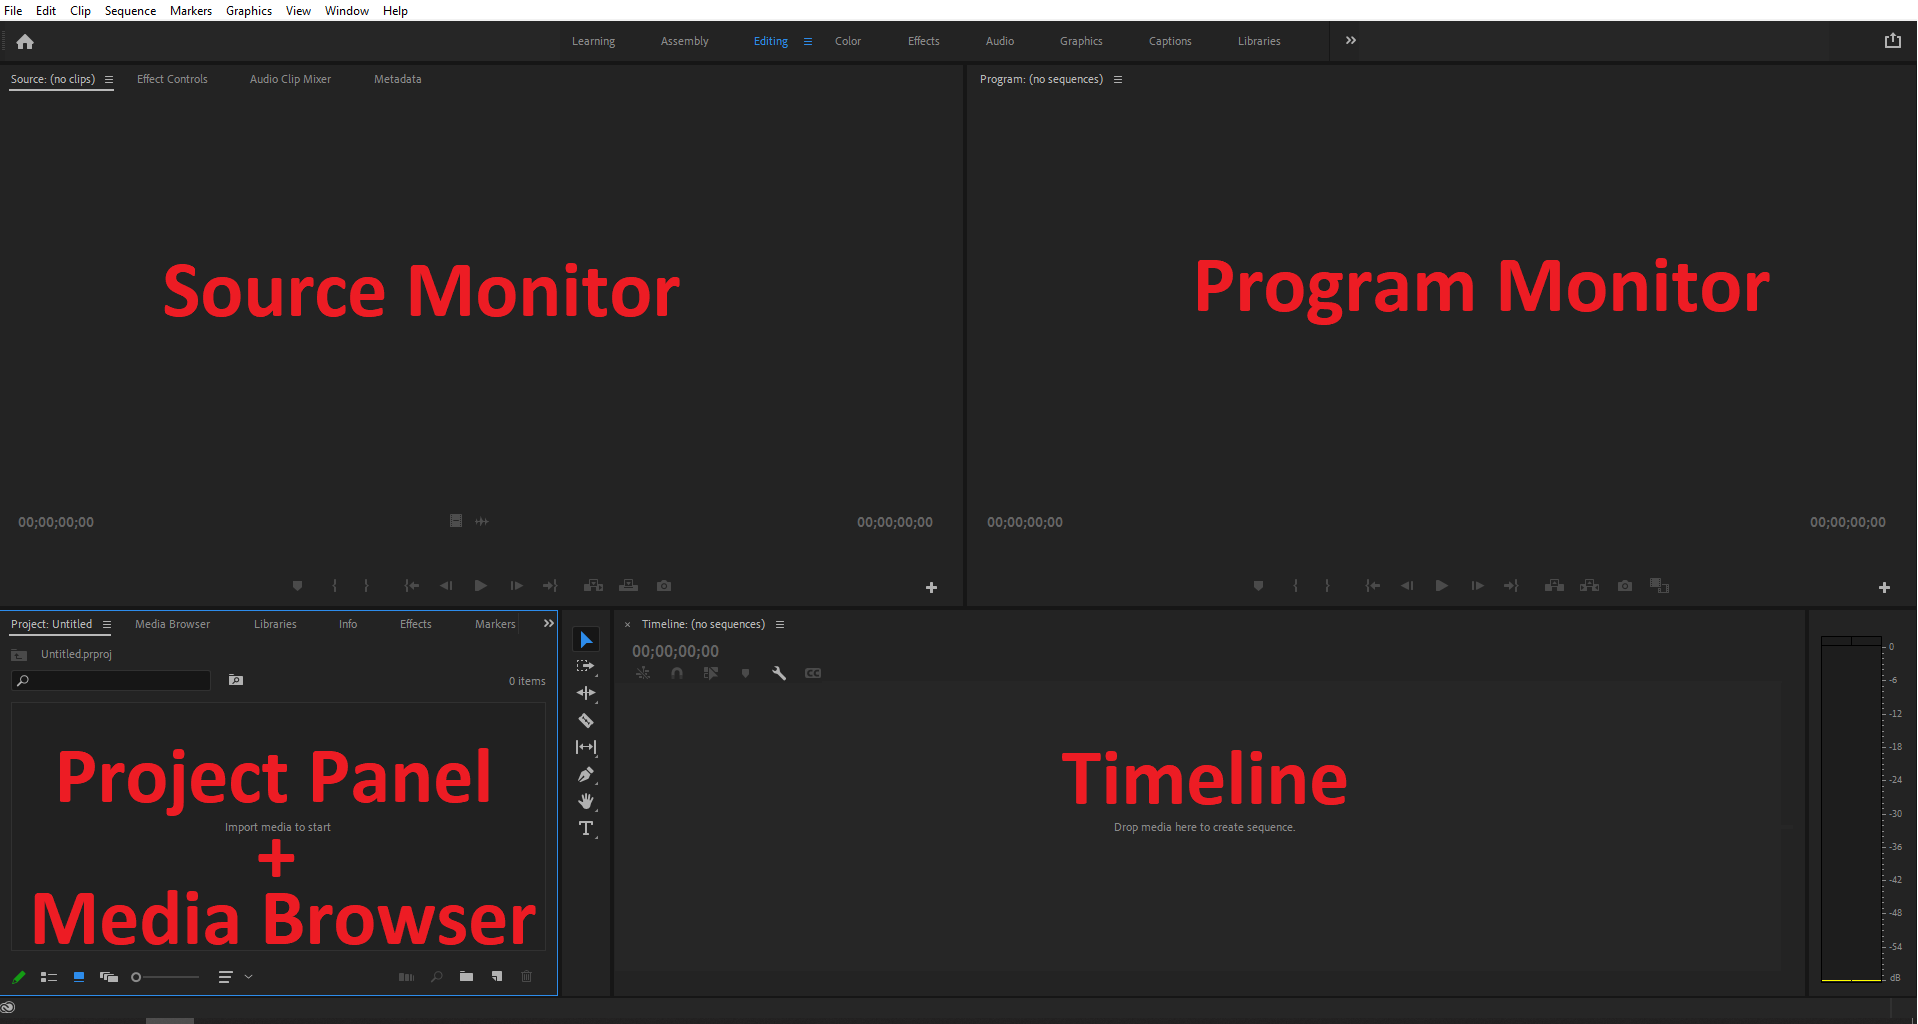
The Premiere Pro Software window is divided into four main panels:
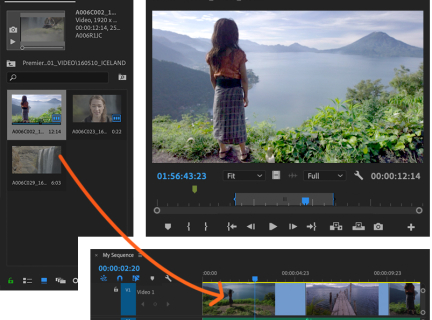
- Source Monitor: where you view raw clips and set In/Out points (start and end points of the section of clip you want to move into the Timeline sequence).
- Program Monitor: reflects what is happening in the edited sequence you are creating.
- Project Panel/Media Browser: where you will organize your source materials (bins are a way to organize your files within your Project).
- Timeline: where you assemble your sequence. The majority of your editing is done here. In the timeline, you can add clips, position them on the same or different tracks, change their properties, add effects/transitions. Each sequence has its own timeline, and each timeline will have its own tab within this space (sequences are useful for separating different scenes, especially for longer projects).
The currently selected/active panel is outlined in blue.
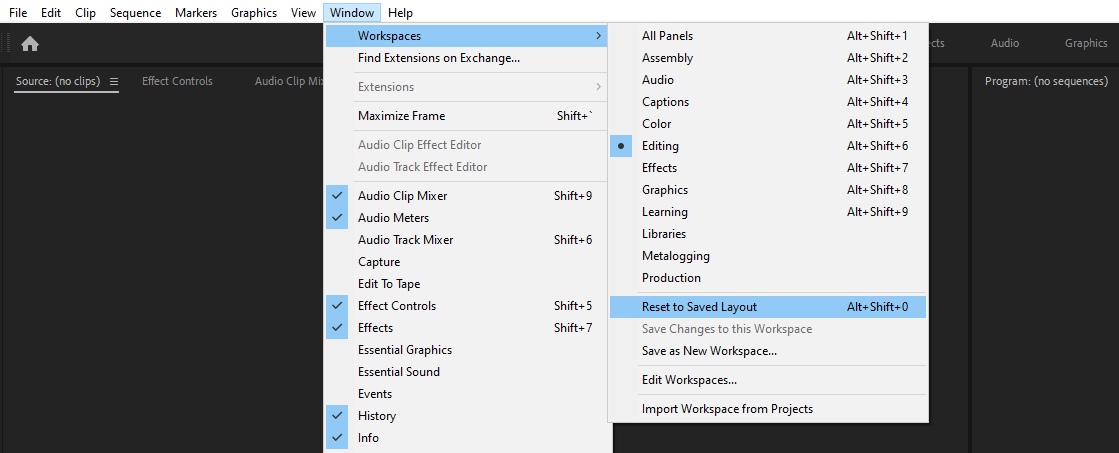
If your workspace does not have the Layout as below you may need to reset your workspace. To do so, go to the Window > Workspaces > Reset to Saved Layout

Tools
Tools
In between Project Panel and Timeline, you will see the Tools Panel. If you've used any other Adobe Creative Cloud program such as Photoshop or Illustrator, some of the tools will be familiar to you.
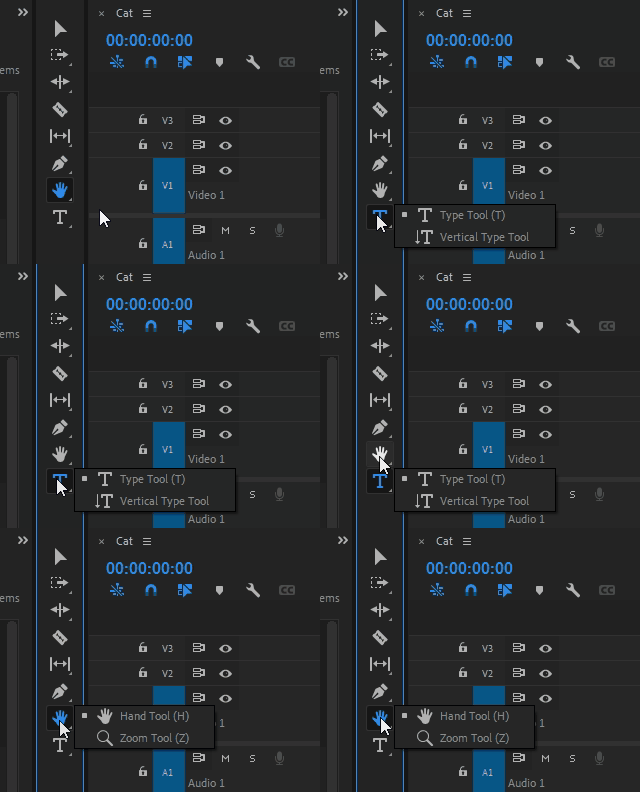
Tools allow you to modify clips in the Timeline. You’ll notice that beside each tool’s name is a letter in parentheses. This is the tool's shortkey; pressing the shortkey on the keyboard will activate the corresponding tool, if you prefer using the keyboard instead of the mouse. The cursor changes appearance based on the active tool, and the type of content the cursor is hovering above. Lastly, you'll notice a tiny triangle in the bottom right corner of some of the tools; this indicates that related tools are nested beneath. To access them, left click and hold for a second until the tools appear.

As you can see, there are several different tools in the Tool Panel. We won't go over all of them, but will mention three of the most commonly used tools: the Selection Tool, Razor Tool, and Type Tool. For a list and explanations of all the tools found in the Tool panel, consult Adobe's page: https://helpx.adobe.com/ca/premiere-pro/using/panels.html
|
Image
|
Selection Tool The Selection Tool (shortkey: V): select clips, menu items, buttons, objects in the user interface; the most frequently used tool, it is good practice to switch back to this tool as soon as you are done using the more specialized tools. |
|
Image
|
Razor Tool Razor Tool (shortkey: C): separates a single clip into two clips, to the left and right of where you click; Shift + Click to split all clips on all tracks at that same point in the Timeline; CTRL + Click to razor at current time. We go into more depth on using the Razor Tool to trim clips in the Edit Video Files section. |
|
Image
|
Type Tool Type Tool (shortkey: T): adds text/titles. We go over how to add basic titles using the Type Tool in the Other Editing Features section. |

