Other Editing Features
In addition to basic editing with audio and video, Adobe Premiere Pro is a powerful program that has many more advanced editing capabilities. We can't possibly go into every single feature of Premiere Pro, but here are some guides on a few commonly used advanced features: adding titles, transitions, and effects such as green screen effects.
For further learning, we recommend following along to video tutorials on LinkedIn Learning.
Titles
Titles are words that appear on screen. They can be simple text or more advanced text like rolling titles.
Adding a Basic Title
1. To add text basic title, in the Timeline, move the playhead, the vertical blue line, to the spot where you want to insert the text (while keeping an eye on the image in the Program Monitor where the text will appear). You can use the arrow keys on the keyboard to go frame by frame if needed.
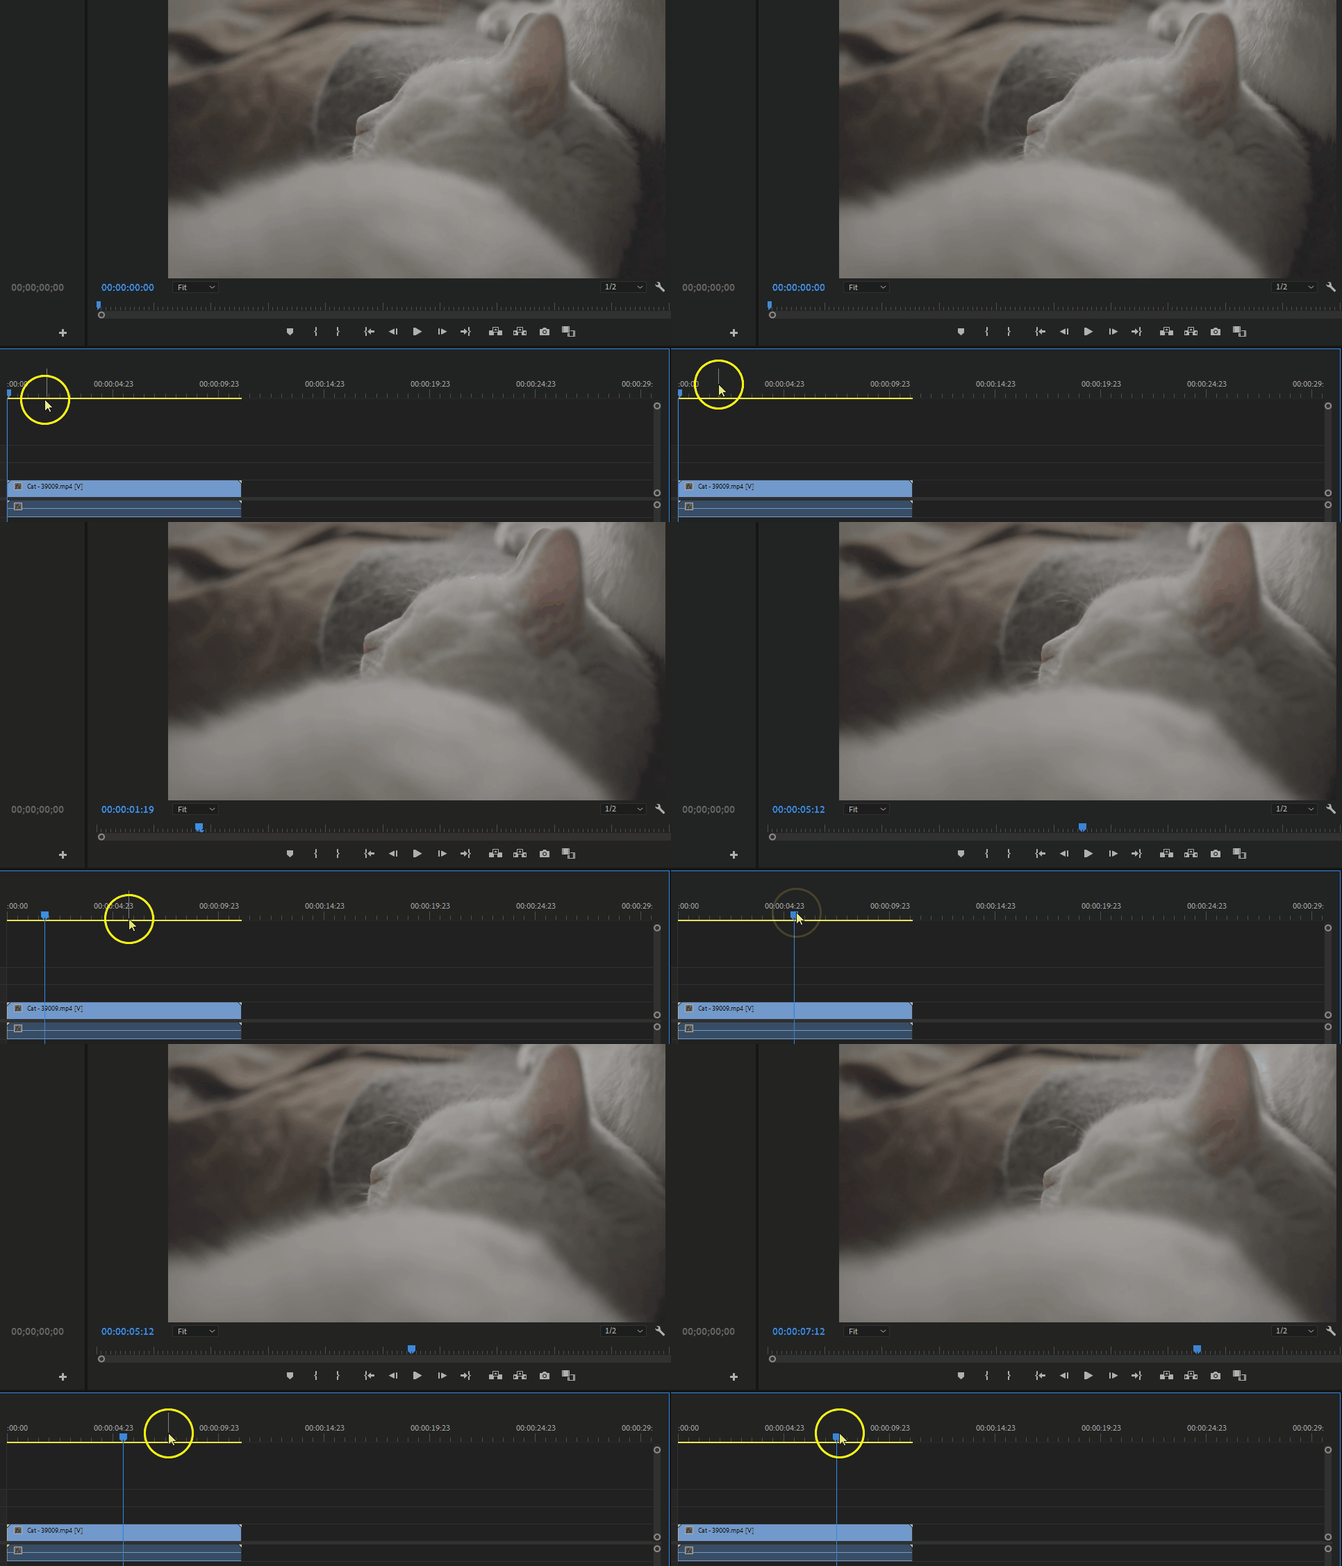
2. Click on the Type Tool (shortkey T) in the Tool Panel.
3. In the Program Monitor, click and drag to create a text box where you want the text to appear. Type in your text in the text box.
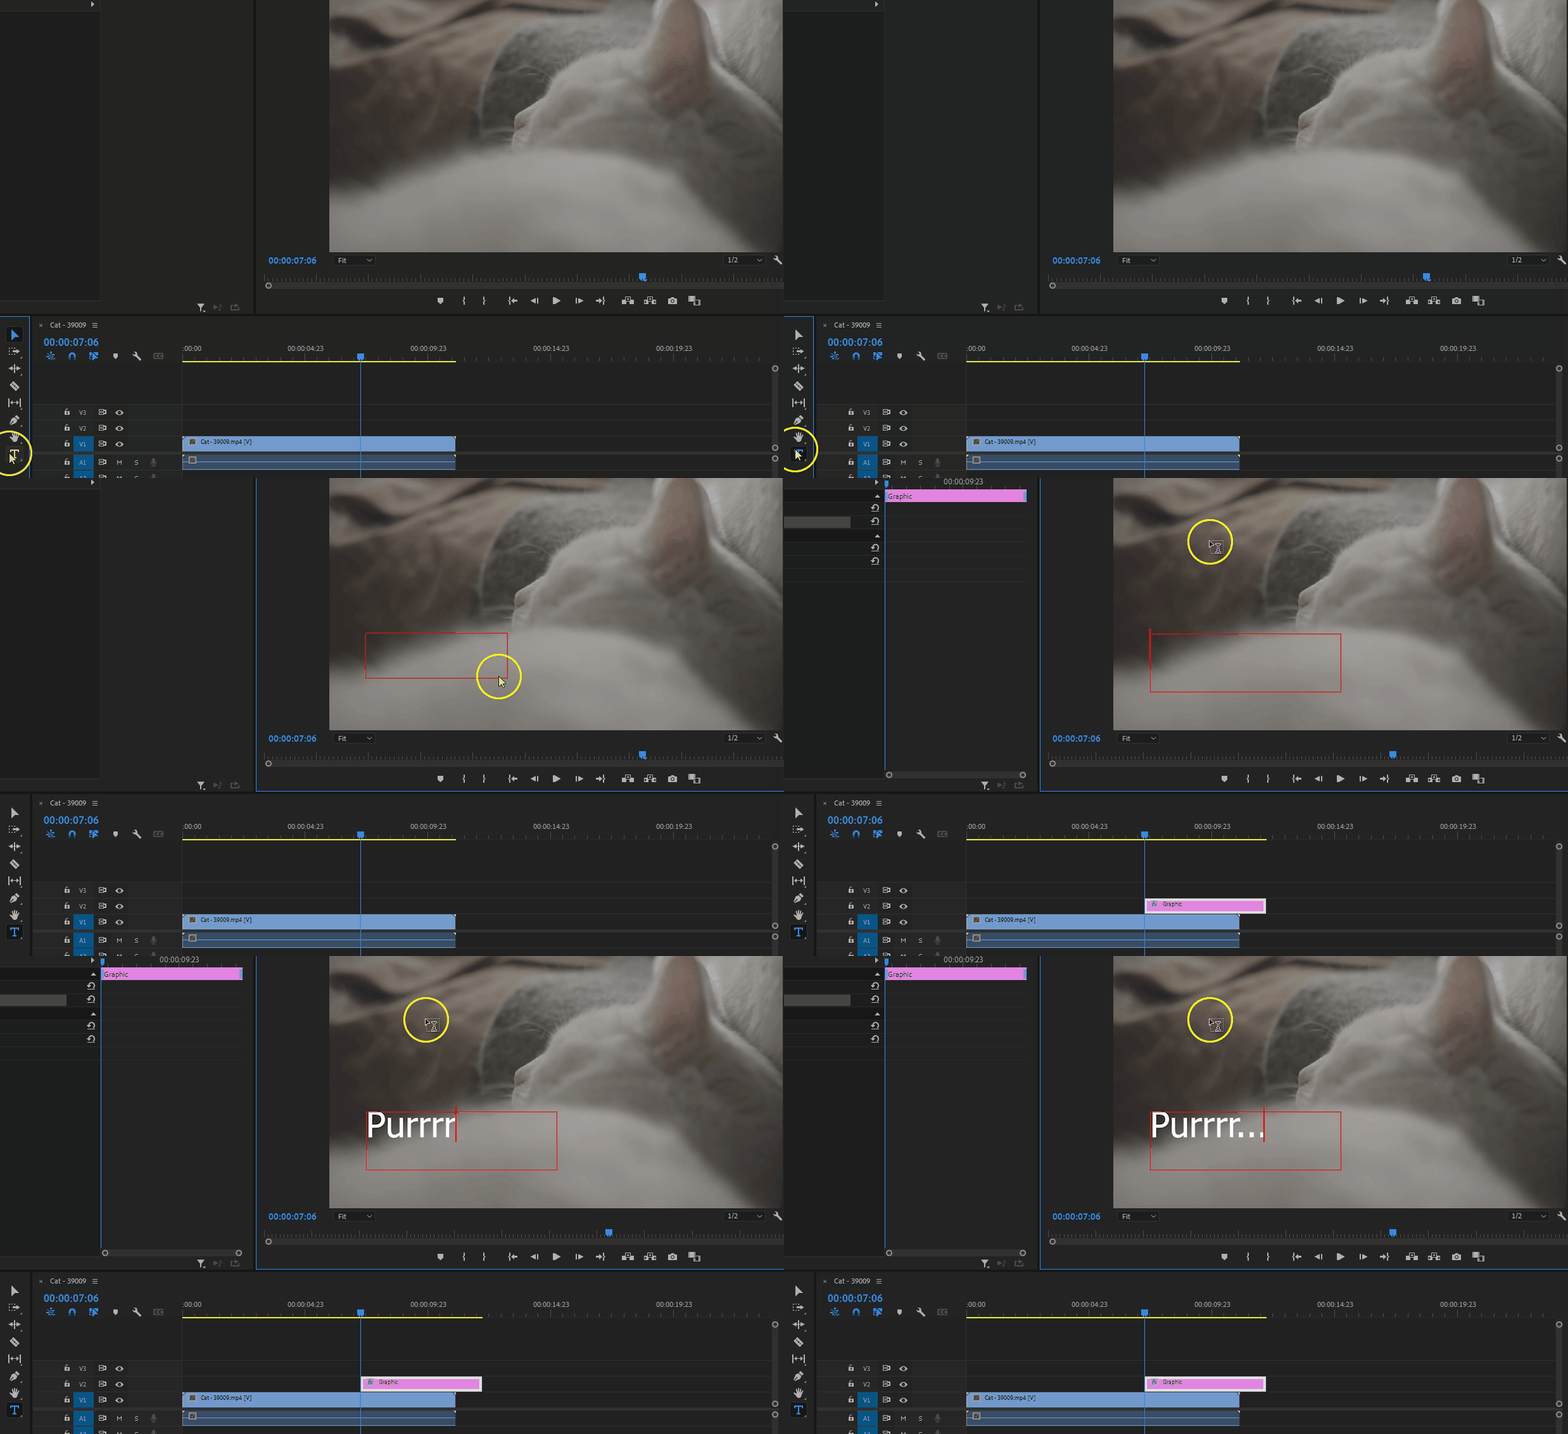
4. You will notice that creating a title also creates a clip in the Timeline which can then be edited and moved around. To edit the text, double-click on the new text clip in the Timeline. This will bring up the Effect Controls in the Source Monitor where you can modify font, size, etc.
5. To move the text, click on the Selection Tool and then click and drag the box in the Program Monitor to reposition it.
Adding a Rolling Title
A rolling title is text that scrolls, such as the credits at the end of a film. To create a rolling title, we will explore the Essential Graphics Panel.
1. As with creating a basic title, in the Timeline, move the playhead, the vertical blue line, to the spot where you want to insert the text (while keeping an eye on the image in the Program Monitor where the text will appear). You can use the arrow keys on the keyboard to go frame by frame if needed.
2. Click on the Essential Graphics Panel near the top of the screen, which has a modified workspace. There are different title templates you can explore and use.

2. Select the Type Tool (or shortkey T) from the Tools Panel, which is now located on the left of the Program Monitor.
3. In the Program Monitor, click and drag to create a text box where you want the text to appear.
4. Type in your text in the text box. You will notice that creating text also creates a media clip in the Timeline, which can then be further edited and/or placed at multiple points in the Timeline. You can click and move the text box around the image in the Program Monitor.
4. Your text may be off-centre. If you would like to centre it, click on the Center align text button in the Text section on the right.
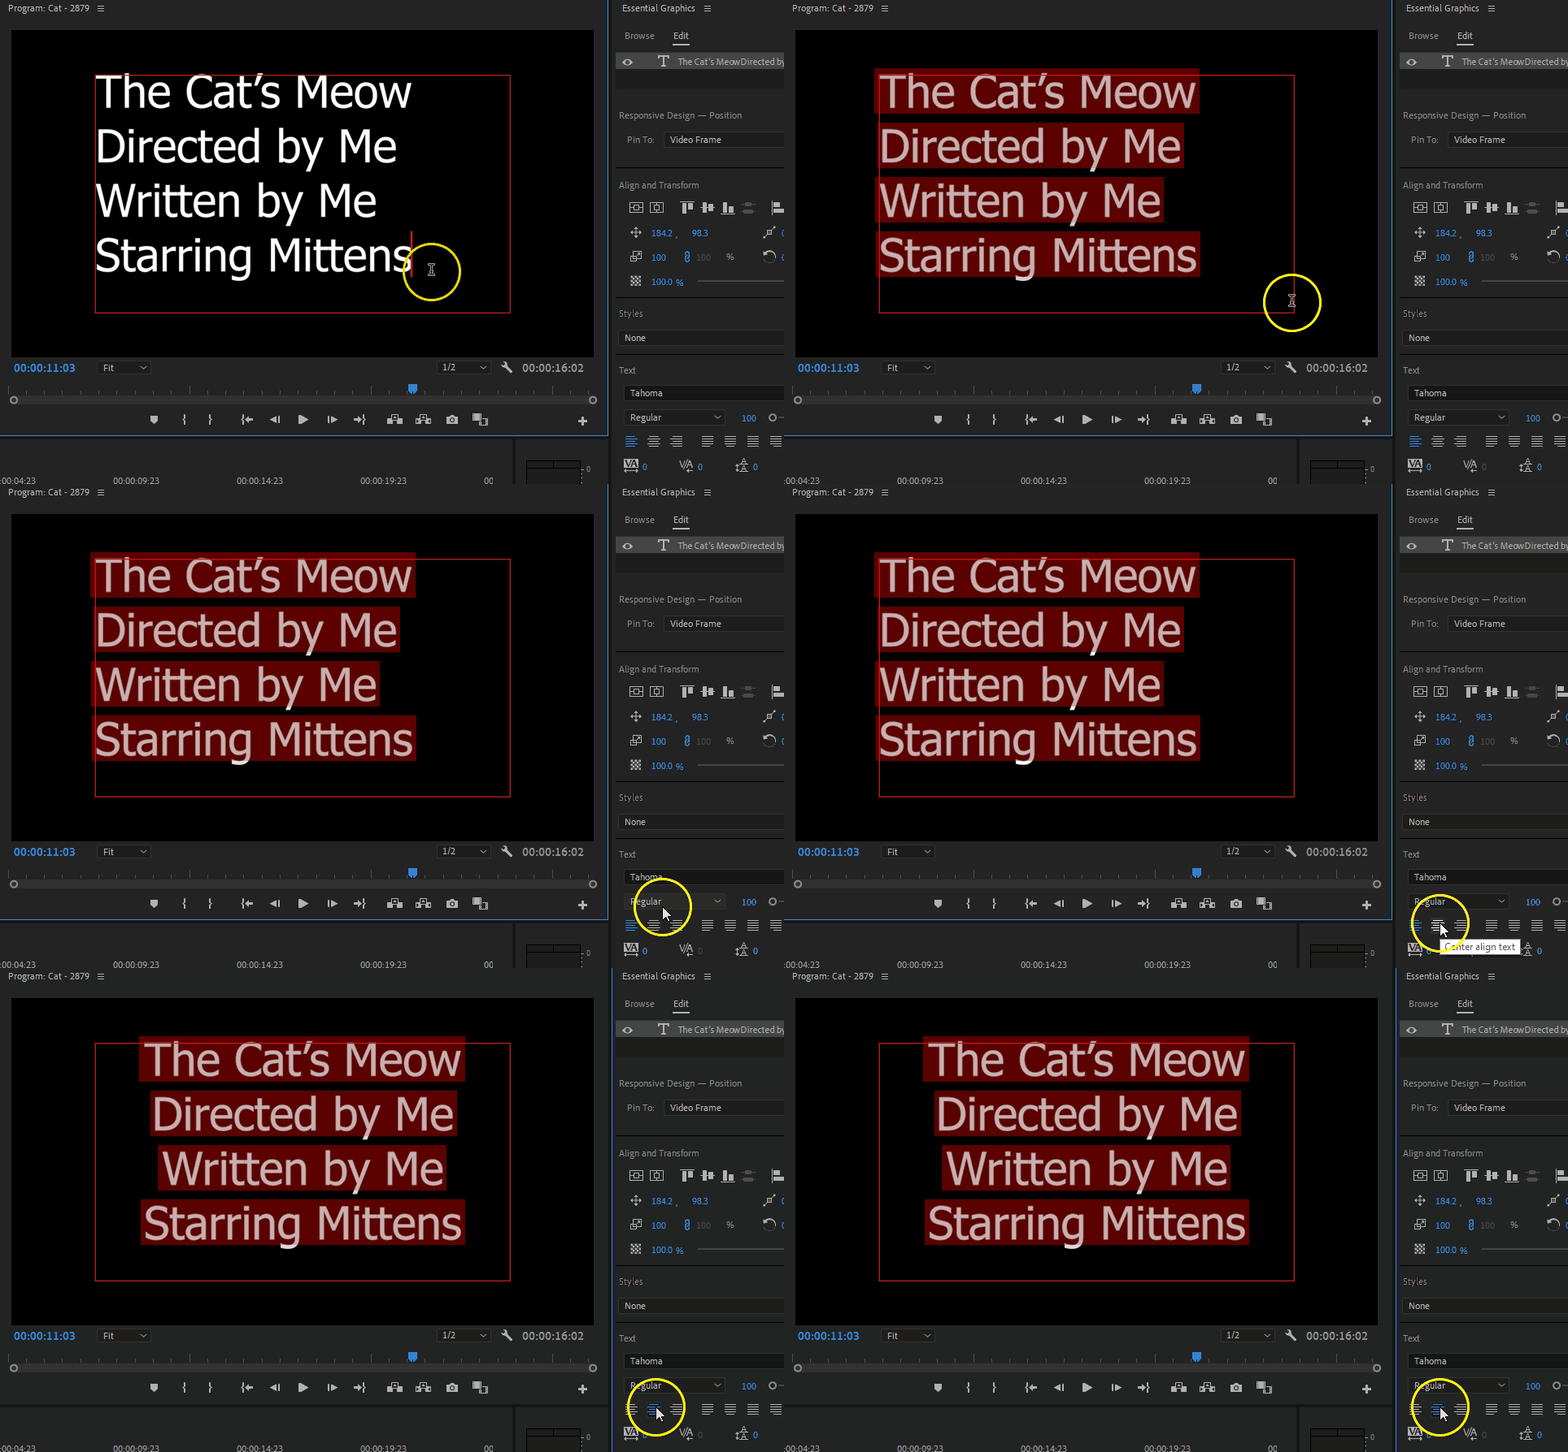
5. You can make further adjustments to the text itself like font, font size, style, and spacing in the same Text section on the right.
6. Click in the blank space outside of the text box in the Program Monitor to de-select the text box. Doing this will bring up the further options in the panel on the right.
7. Our title looks great but is still stationary. To make the text scroll, click on the Roll box.
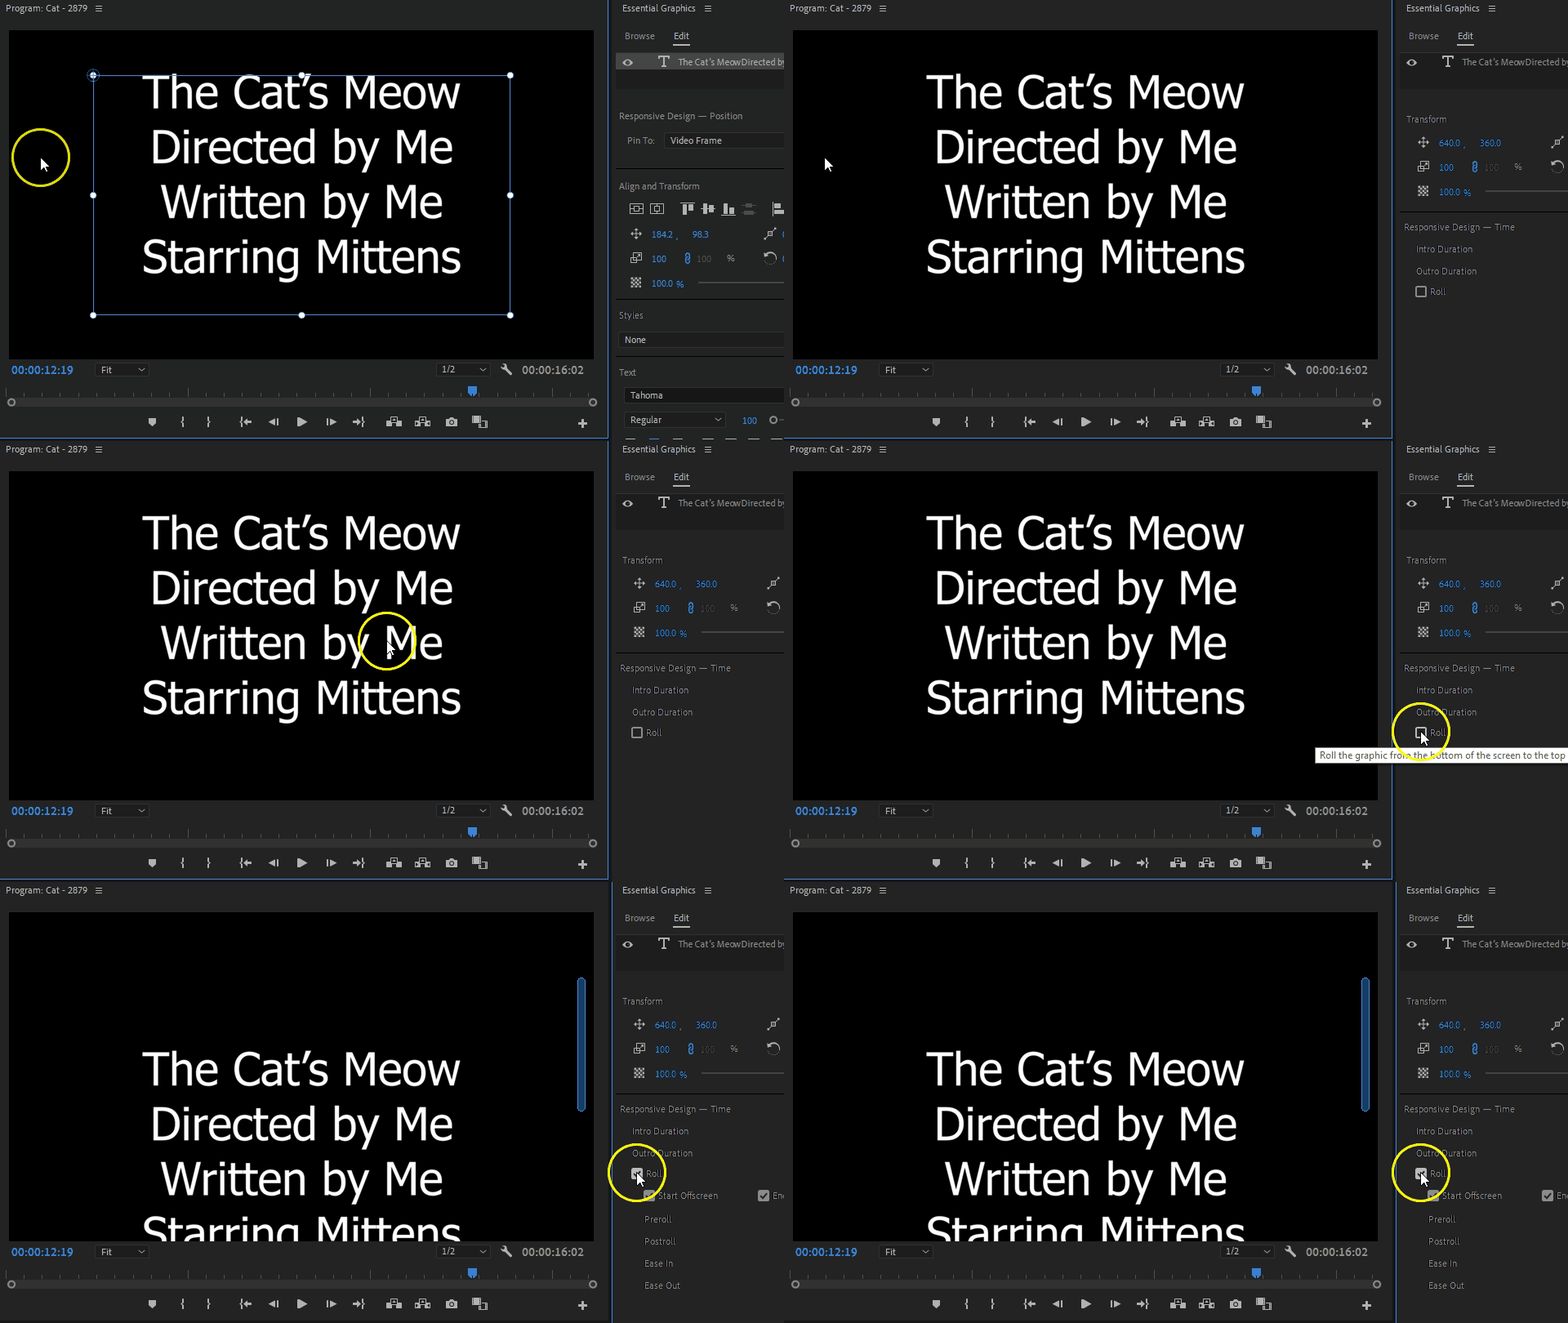
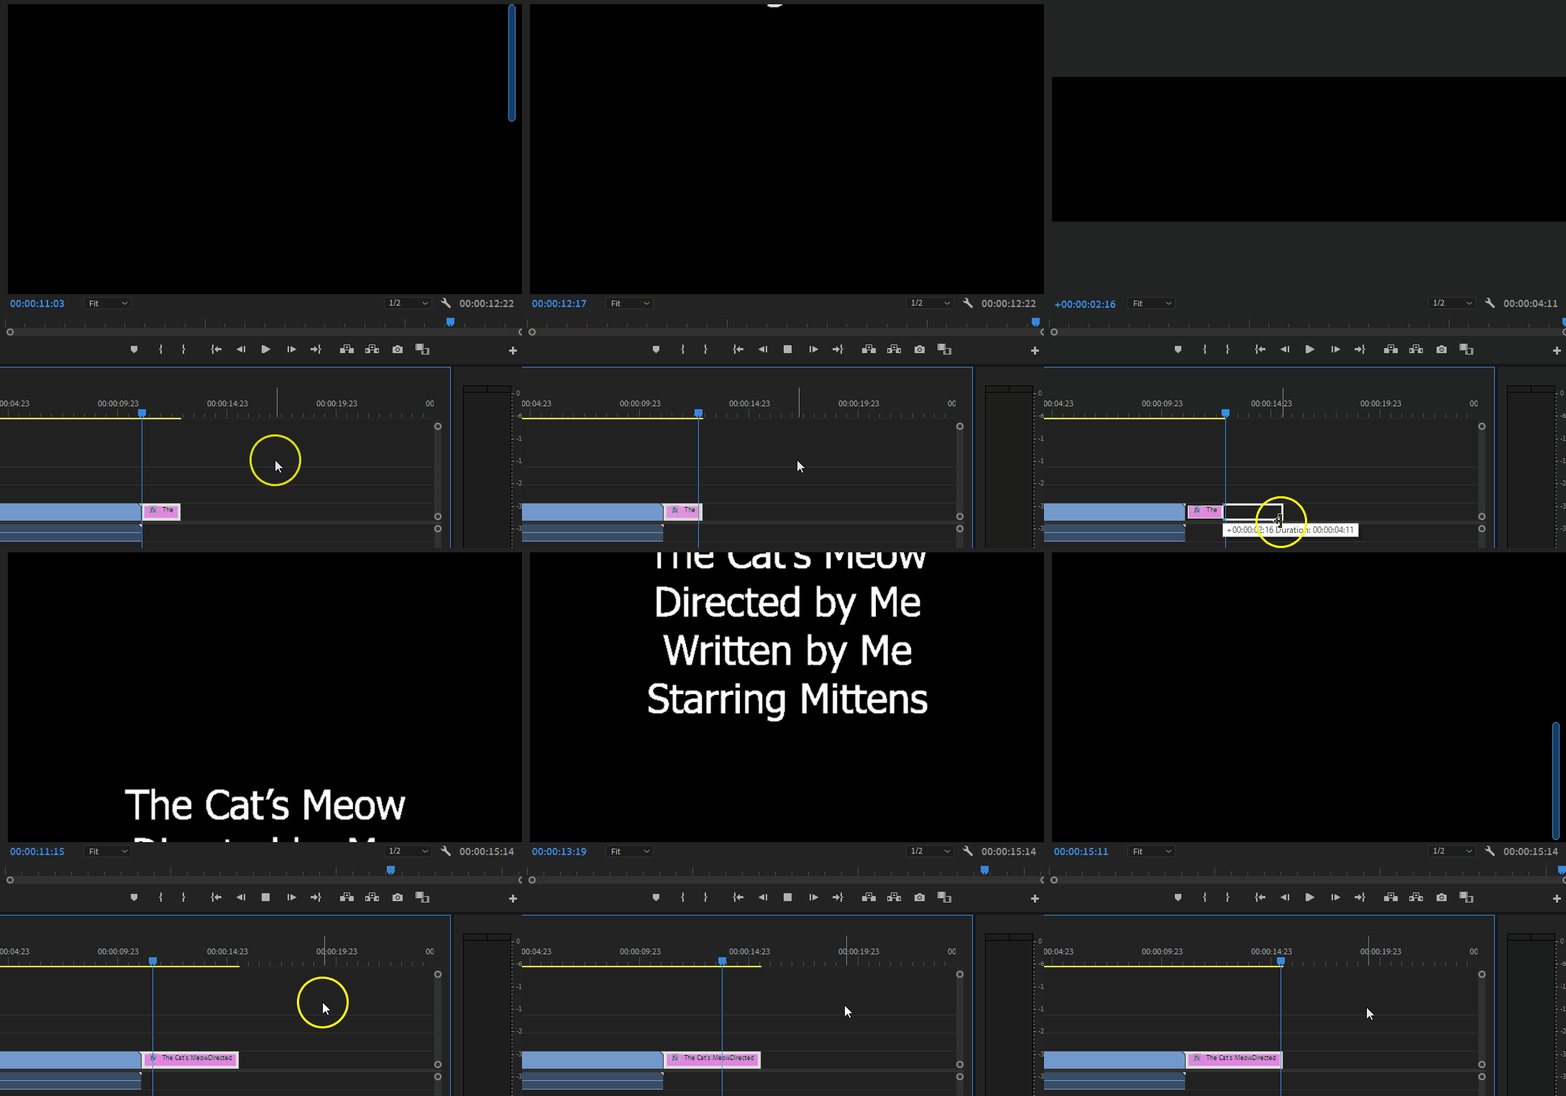
8. Our title now scrolls! You can further manipulate the duration and placement in the sequence of your title clip using the Selection Tool. The length of the title clip in the Timeline sequence determines the speed at which the titles roll or crawl across the screen; lengthen to slow the motion, shorten to speed up.
Effects and Transitions
Adding and Editing Effects in Adobe Premiere Pro can get complex, so this guide will not get into detail. We'll go through where to find effects and transitions, and how to apply them to clips in your Timeline.
Effects in the Effect Controls
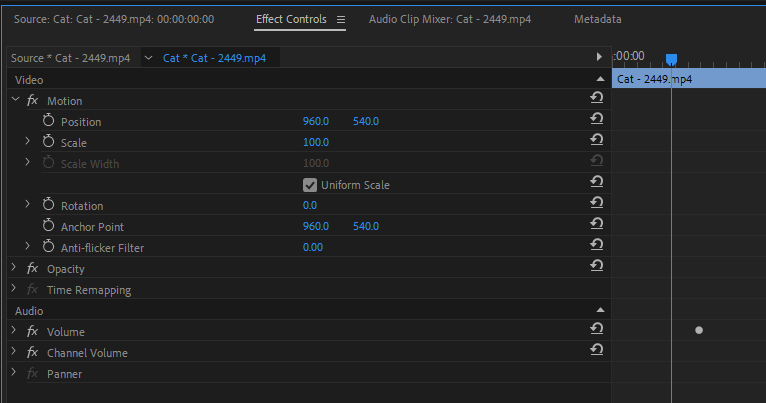
Basic Motion and Opacity effects can be added from the Effect Controls tab under the Source Monitor or more advanced effects and transitions from the Effects tab in the Project Panel.
Applying Effects
There are many video and audio effects and transitions available in Premiere Pro.
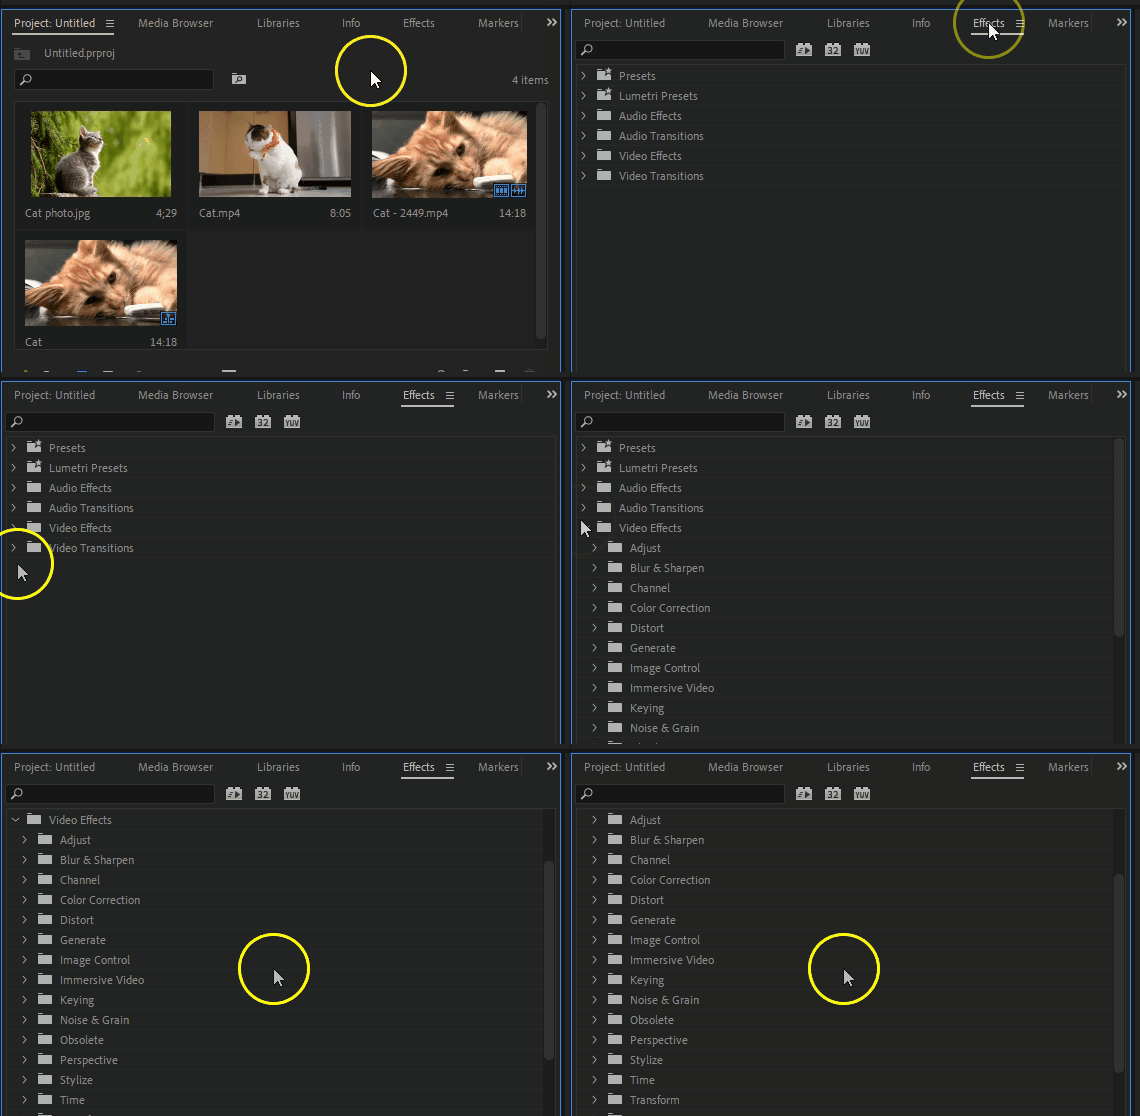
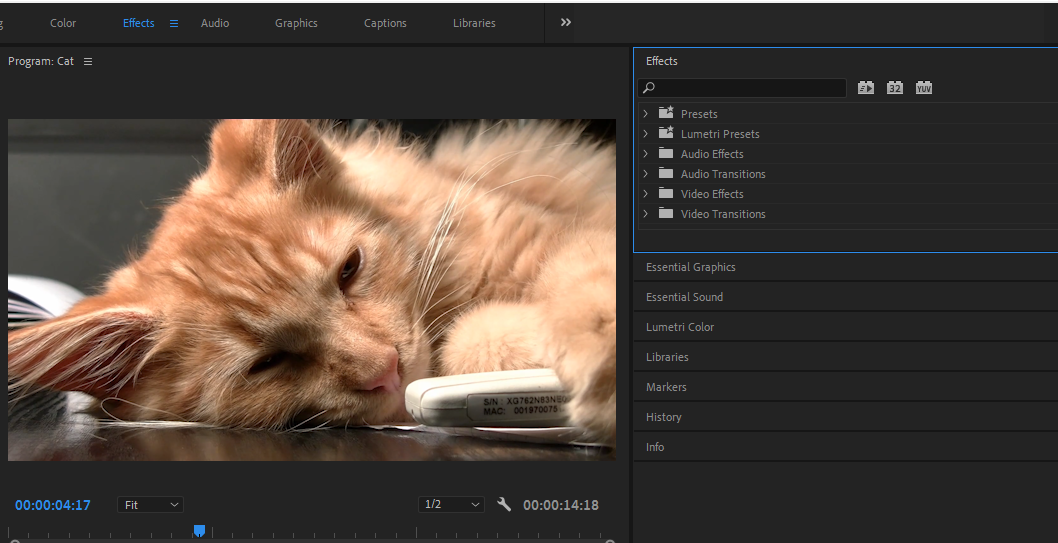
1. Here are two ways of searching for effects by keyword:
In the Effects tab in the Project Panel
In the Effects Panel
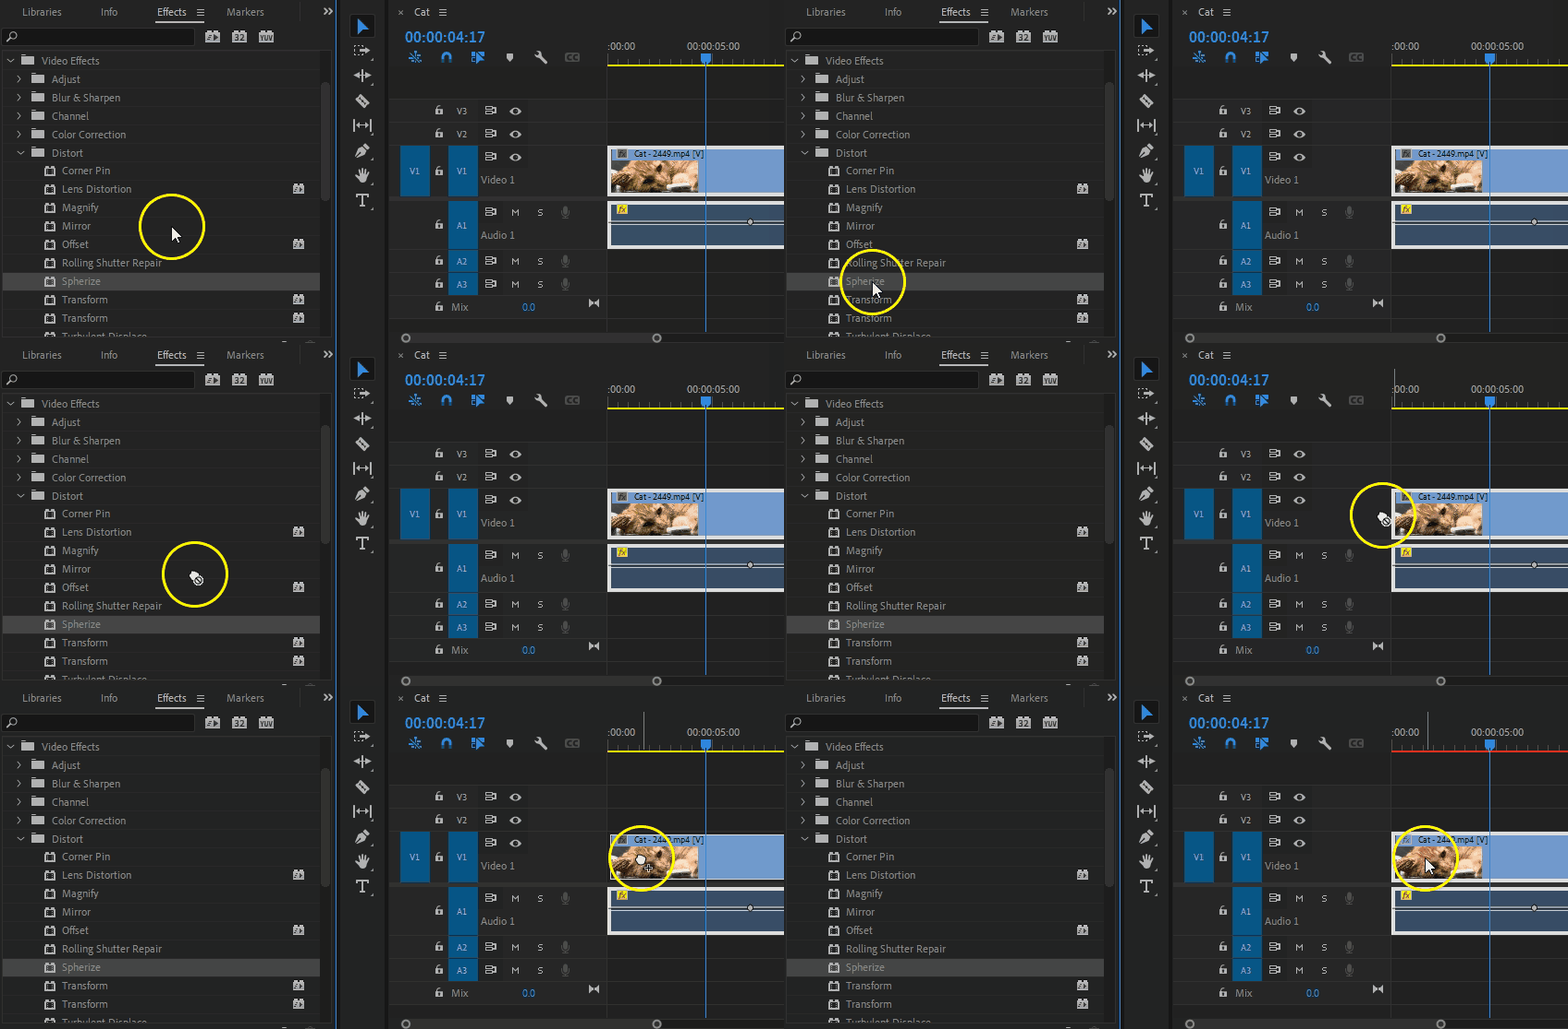
2. Once you locate the desired effect, click and drag it on the clip on the Timeline. Alternatively, you can select the clip first and double-click the effect.
To apply an effect to more than one clip:
1. Select the clips by holding CTRL and clicking each of the desired clips in the Timeline.
2. Drag one effect or a selected group of effects to any of the selected clips.
Applying Transitions
1. Place two clips adjacent to each other on the same track on the Timeline. The beginning of the second clip should snap to the end of the first clip, leaving no space between them.
2. You can either search for transitions by keyword in the Effects tab in the Project Panel, or by searching in the Effects Panel.
3. Drag a transition from the Effects Panel to the Timeline and drop it where the two clips meet.
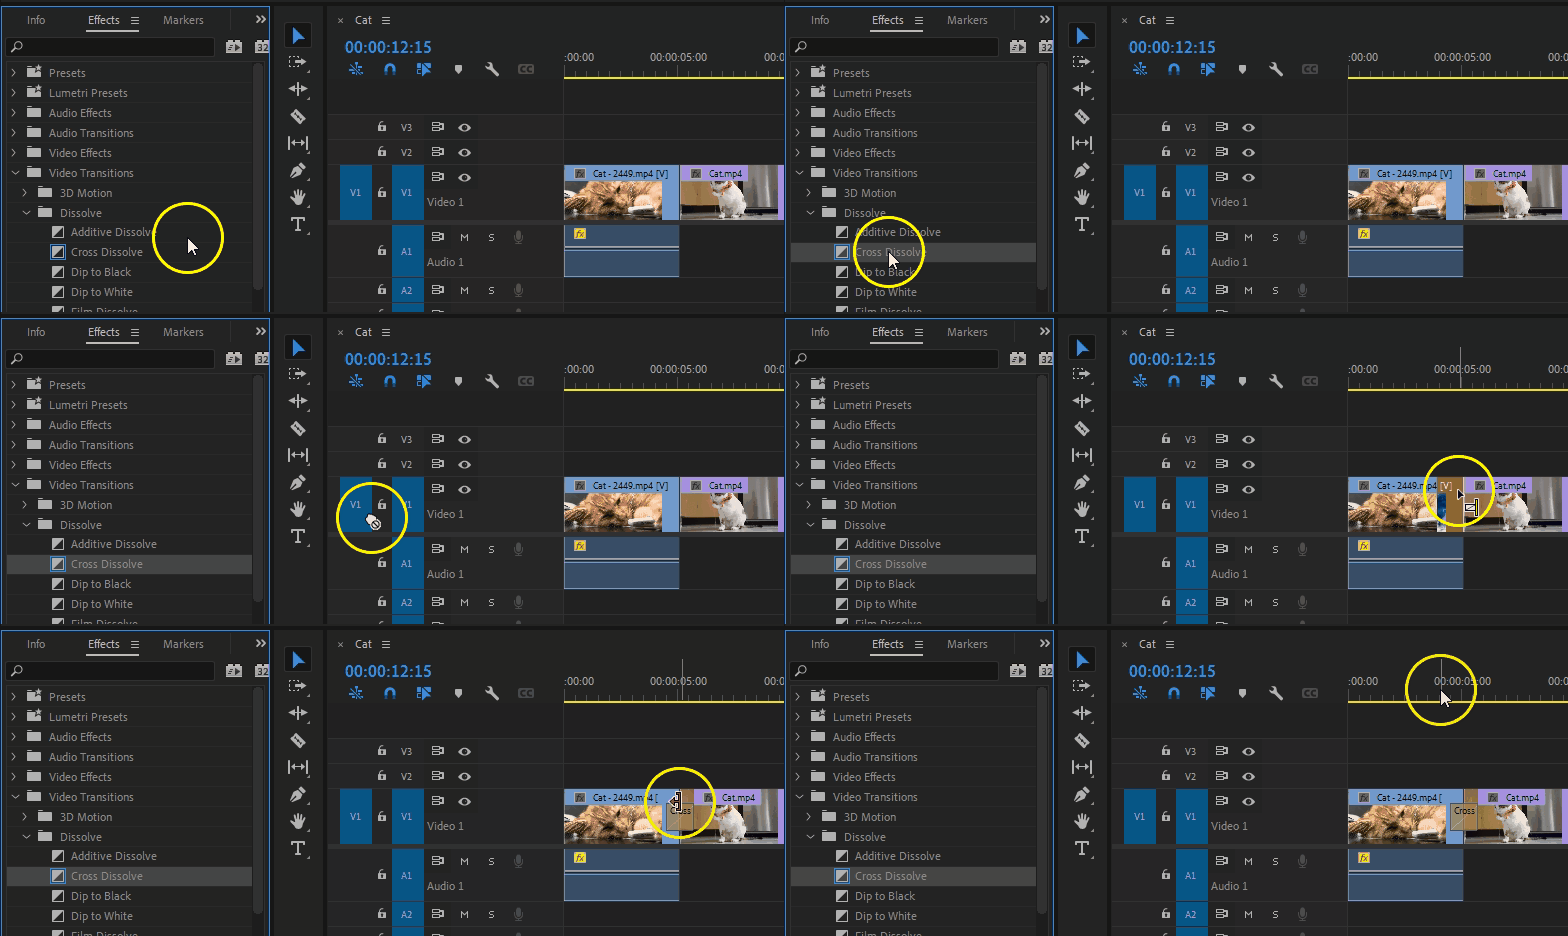
4. In the second tab in Source Monitor, Effects Control, you can manipulate relevant parameters for all the various effects and transitions applied to your files. You can also adjust the duration of both directly in the Timeline by hovering the cursor on the clip near the start/end of the overlaid effect. In addition, on any clip in the Timeline that you have applied effects to, a small “FX” box will appear on the left edge of the clip. Right-clicking it will bring up three sub-menus: Motion, Opacity and Time Remapping (Speed) where you can further edit and adjust the specifics of the effects applied.
In the Timeline, right-clicking the FX button on a clip will show a preview of effects for that clip in the Source Monitor.
Green Screen
If you have recorded footage with a green screen, you will want to a replace the green screen background with a different image or video. This involves using an effect called Ultra Key.
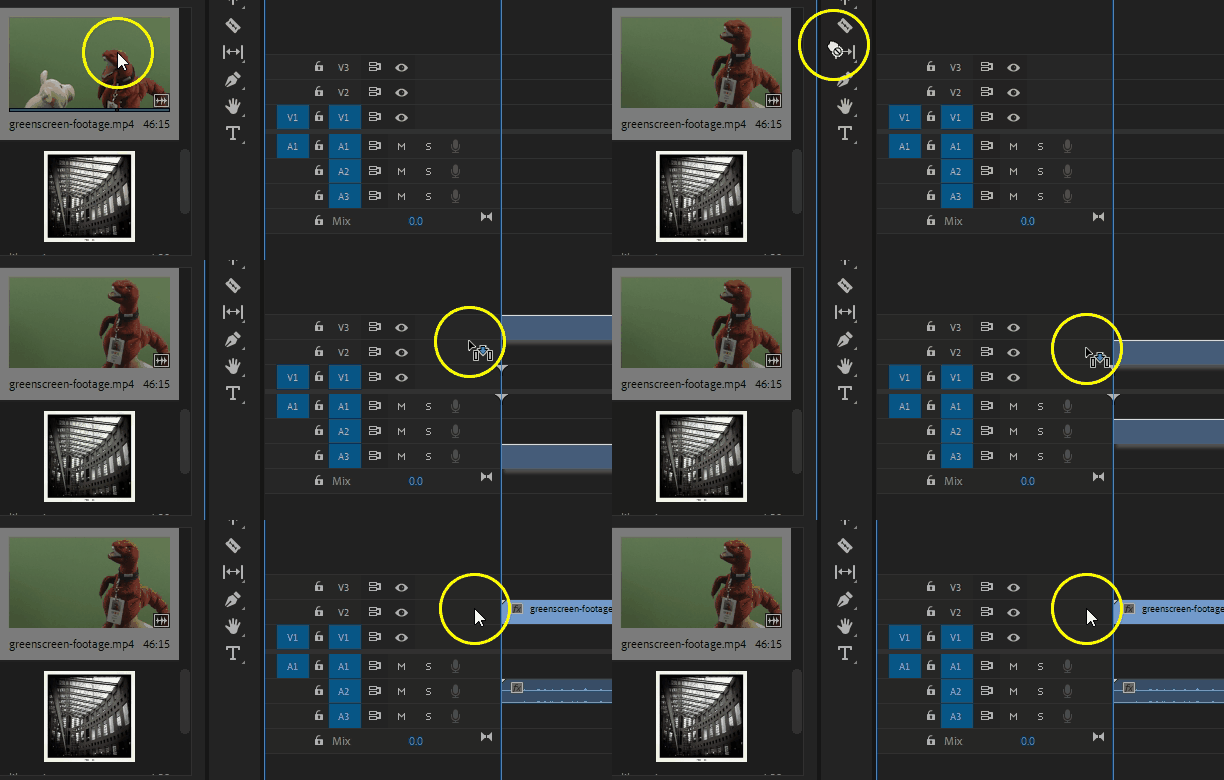
1. Click and drag the green screen video file(s) into the Timeline onto V2.
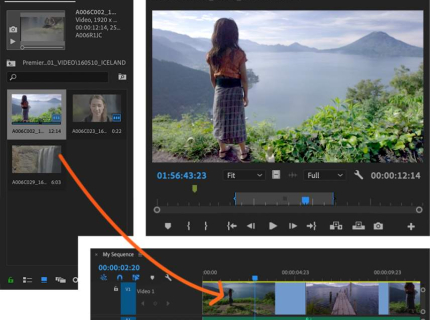
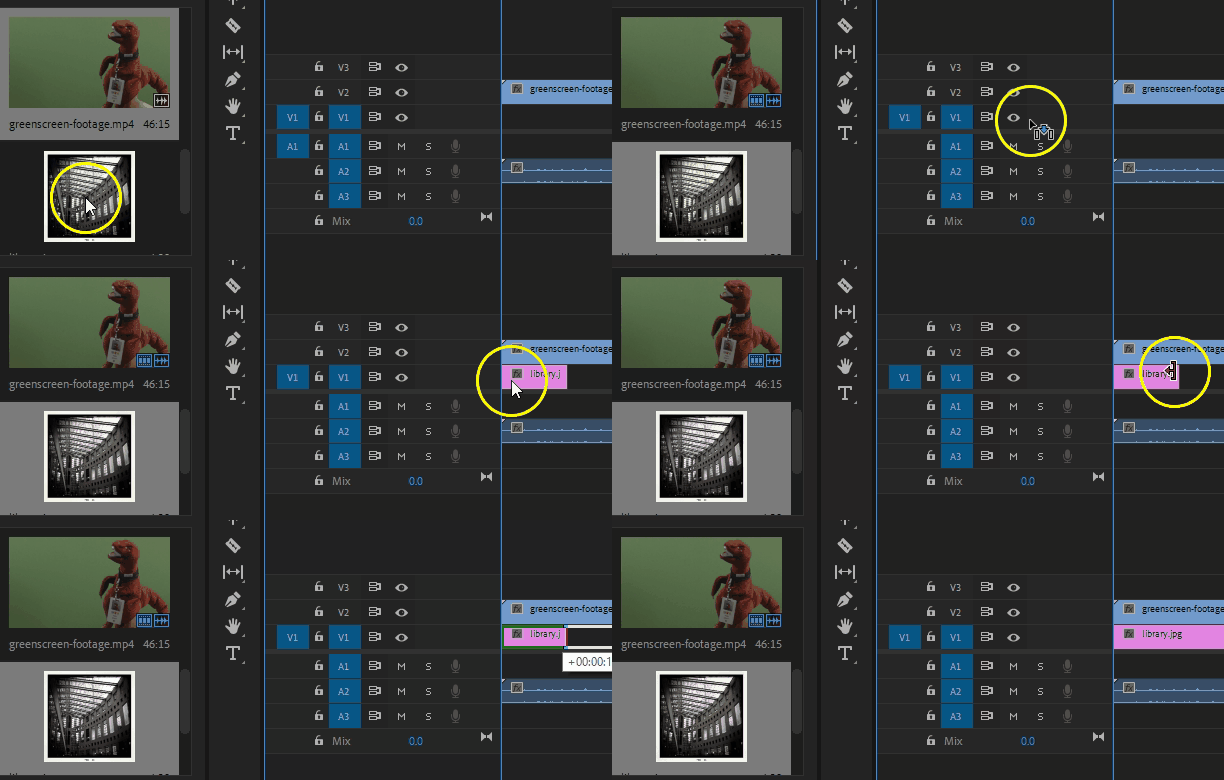
2. Next, drag the background image/video that will replace the background of your green screen video into the Timeline onto V1. You can increase the length of time the image appears in the footage by clicking and dragging. When you hover your mouse over the end of the picture, the mouse shape will change to a red bracket with an arrow. When you left-click and hold down while moving your mouse you can shorten and lengthen the image, video, or audio.
3. Optional: if you need to add a matte to remove areas showing around the green screen in the video, in the Effect Controls tab in the Source Monitor Panel, roll down the Opacity menu. Select Square, Circle or Freeform to click a custom mask around your green-screened subject.

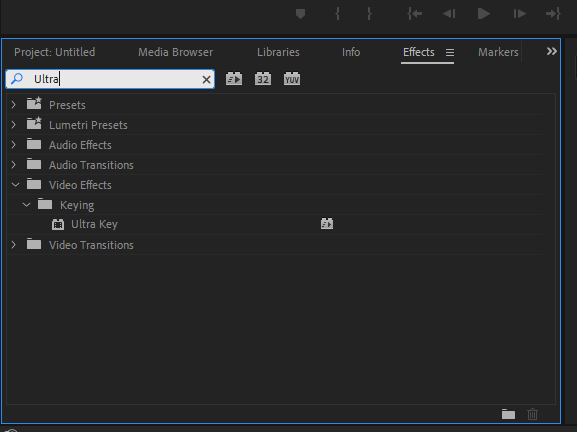
4. In the Effects tab of the Project Panel, do a keyword search for "ultra".
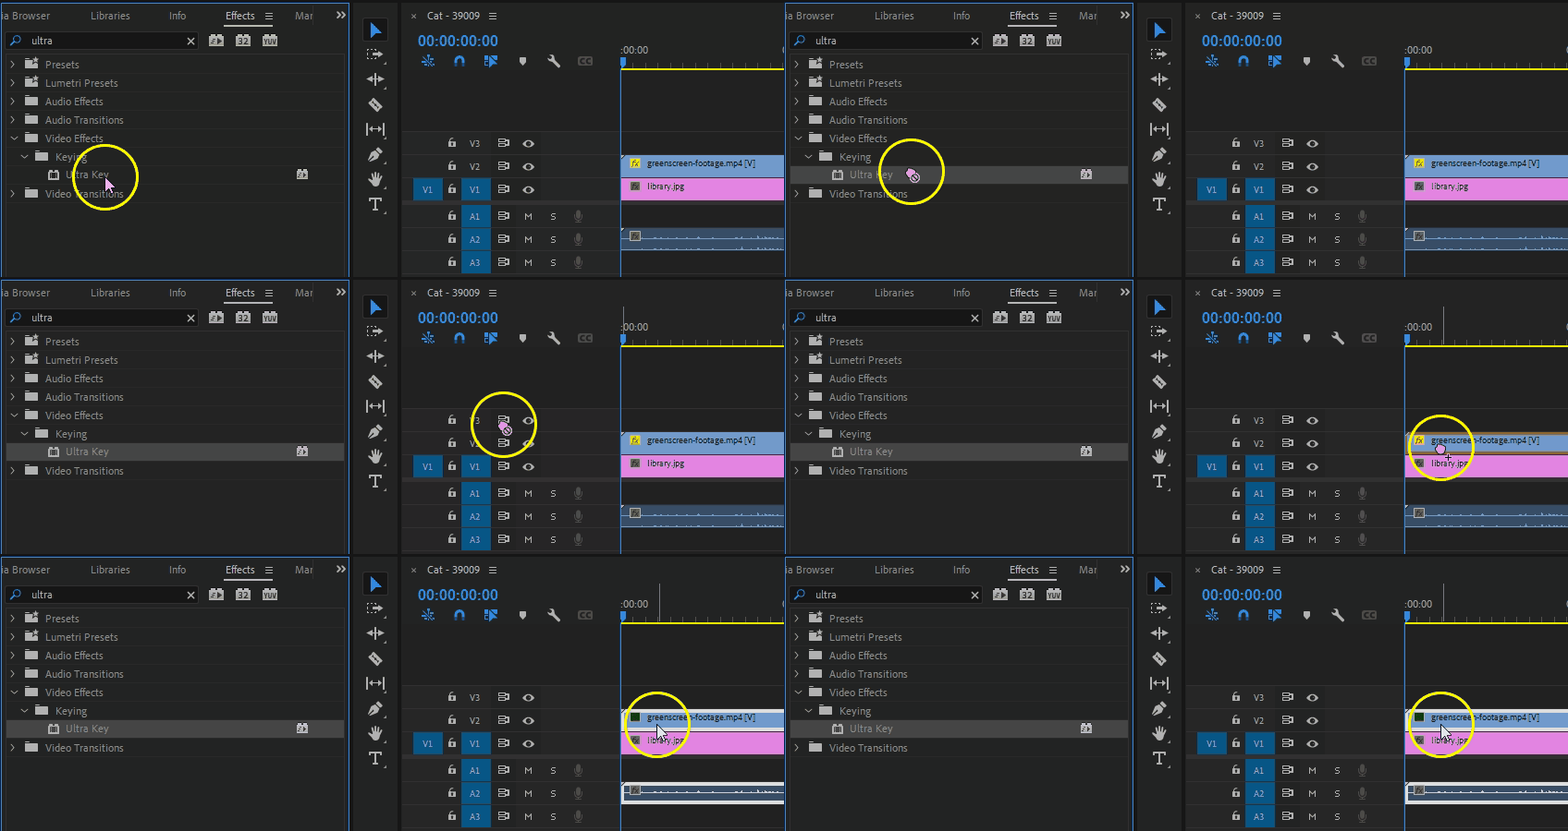
5. Click and drag the Ultra Key effect onto the video(s) recorded with green screen.
6. In the Effect Controls tab in the Source Monitor under the Ultra Key menu, click on the Eyedropper tool. With the Eyedropper tool selected, click the green background to select the colour.

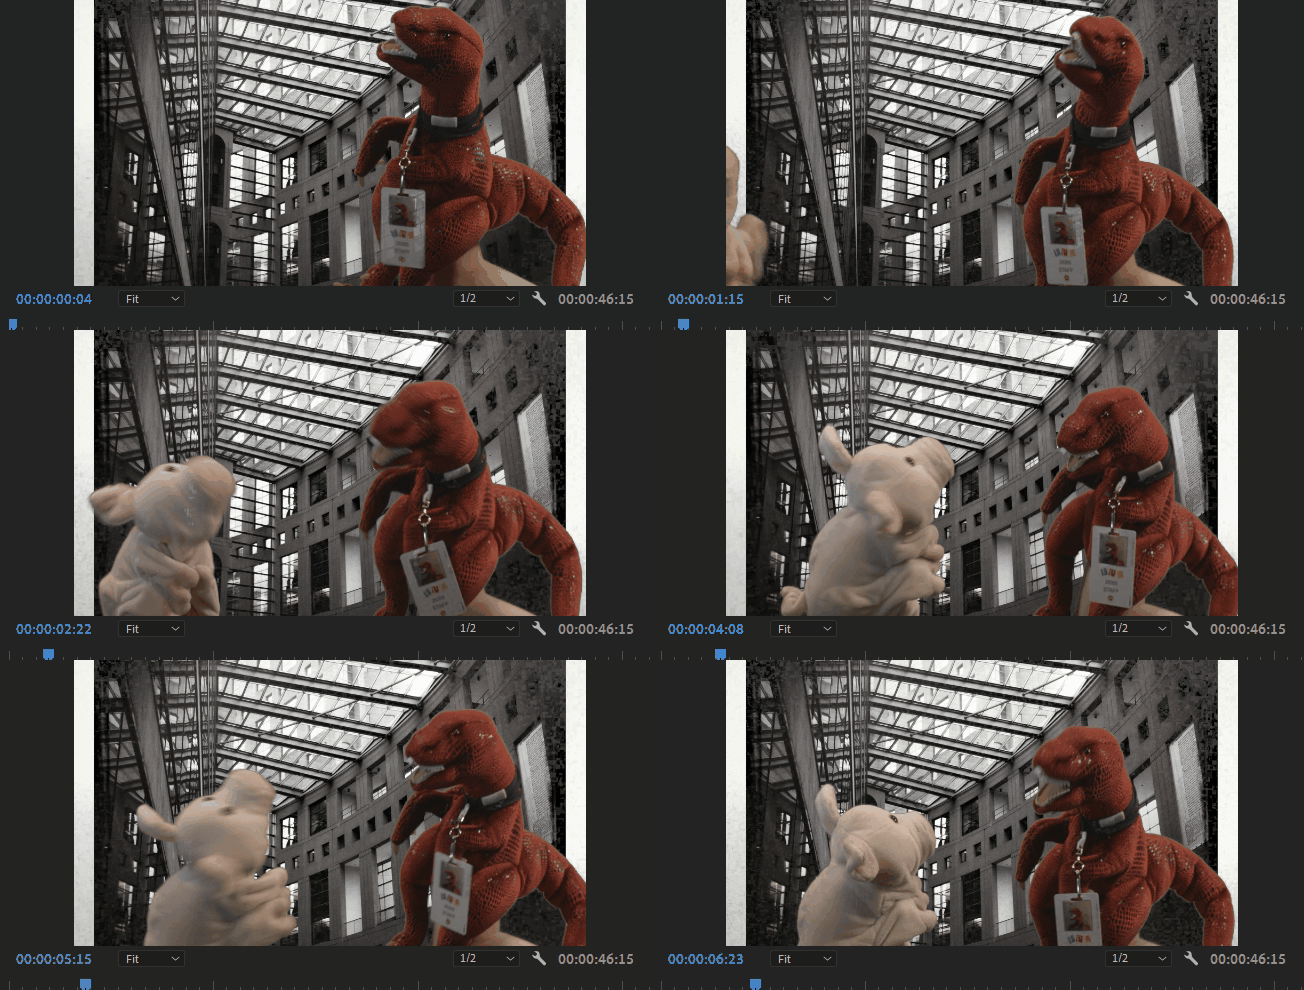
7. The background of your video should now be the image/video.
Adjusting the Background
Depending on your subject and background, once you've used the Ultra Key effect, you may need to tidy up the area around your subject. For a detailed video tutorial on these steps please refer to the LinkedIn Learning tutorial Compositing and Masks with Luisa Winters, Unit 2: Using Ultra Key to Key Green and Blue Screen Footage, Section 3 - Matte generation and keying footage.
1. Roll down the Ultra Key menu. Under Output, select Alpha Channel. Roll down the Matte Generation menu.

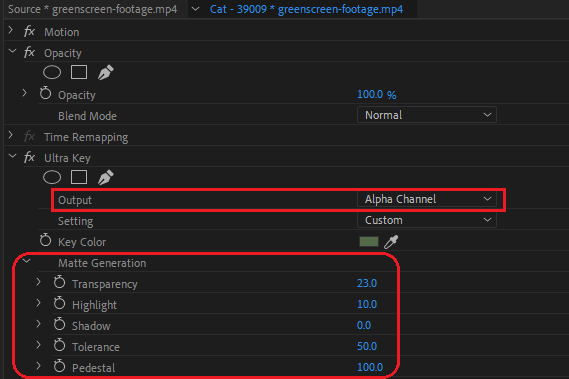
2. Adjust the Shadow slider if the background isn't completely black.
3. Adjust the Pedestal slider. This will clean up the background and make it completely black in the Alpha view
4. If the "white" ALPHA subject in the Program Monitor has some black scattered throughout, adjust the Transparency slider. This ensures that hair and small details will show nicely.
5. Set Output view back to Composite Channel to preview video. The Color Channel will show a combination of green screen background and added background.
Ideally your ALPHA subject should be completely white and the background completely black. Black spots showing through in your subject means your background will start showing slightly through your subject.
Choke, Soften, and Drop Shadow
Choke and Soften help to edit the edges of the subject of the video and look like it blends in with the background. Choking the key is the act of “shrinking” in the key. This means it will bring the background image slightly into or away from the subject (it can make the subject look slightly slimmer).
Softening the key is the act of feathering the key out at the edges. Depending on the lighting and the background this may not be needed.
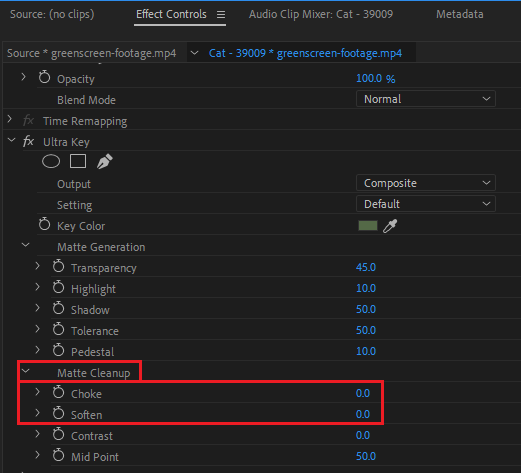
1. In the Effects Control in the Source Monitor Panel, roll down the Matte Cleanup menu.
2. Adjust the Choke slider. Try to not exceed 25 in Choke.
3. Adjust the Soften slider.
4. If Choke and Soften do not help the subject blend into the background, try the Drop Shadow effect. Adding a drop shadow is subtle, but effective. Search Drop Shadow in the Effects tab in the Media Browser, then click and drag it onto the video clip in the Timeline. Adjust the settings in the Effect Controls.

Luma and Spill
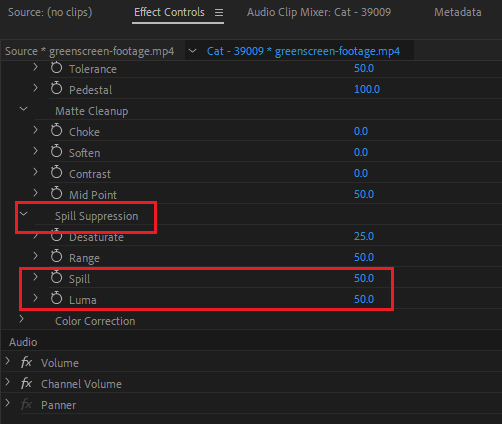
Spill and Luma, located under the Spill Suppression drop-down menu, will help fix any green spilling through gaps in hair or other difficult areas. Play with these to see the effects.
