Edit Audio Files
Unlinking
Before you begin editing, if your audio is linked to a video clip and you may want to separate them to make it easier to edit. In the Timeline, right-click on the audio and select Unlink. From there you can alter the speed, apply effects, delete it, move it elsewhere in the sequence, etc., all without affecting the (formerly) linked video file.
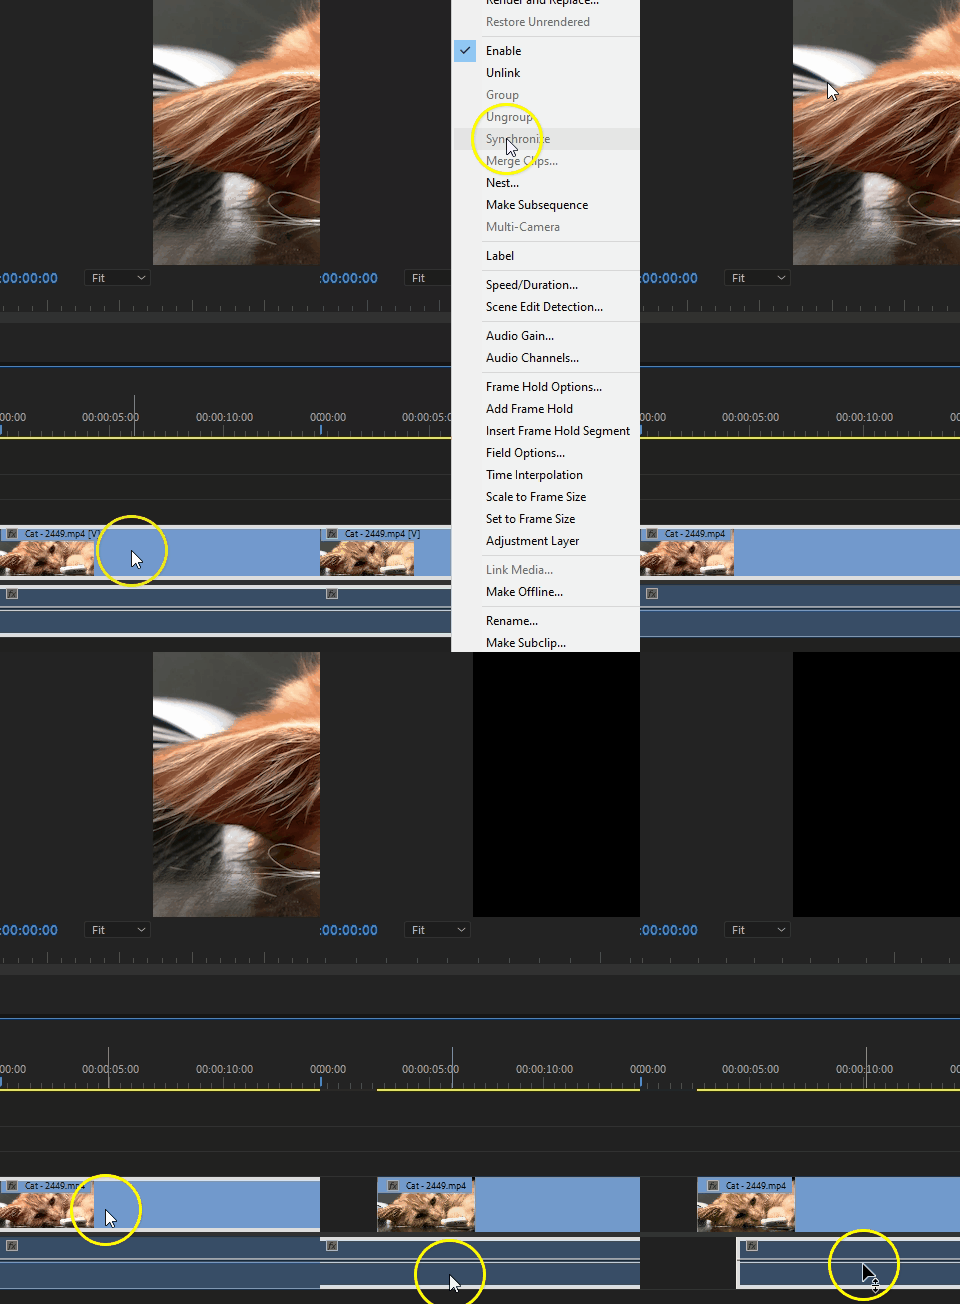
You can re-join video and audio files by holding CTRL, selecting the audio and video, right-clicking and selecting Link. The audio and video files are now linked.
Editing Audio
You can modify audio in a number of ways:
Audio Levels
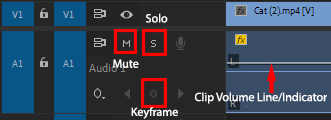
Mute/Solo: Click the M to the left of the audio track in the Timeline. To temporarily silence all other tracks, click on the S (Solo button) on the left of the mute button.
Volume: Click and drag the Clip Volume Indicator Line up or down to raise or lower the volume of the clip.
One other useful audio editing option is keyframes, which are hidden in the audio track. To access the keyframe button, using the Selection Tool, hover the cursor over the bottom line of the audio track you wish to expand. The cursor becomes two double-ended arrows. Click and drag the audio track down to expand.
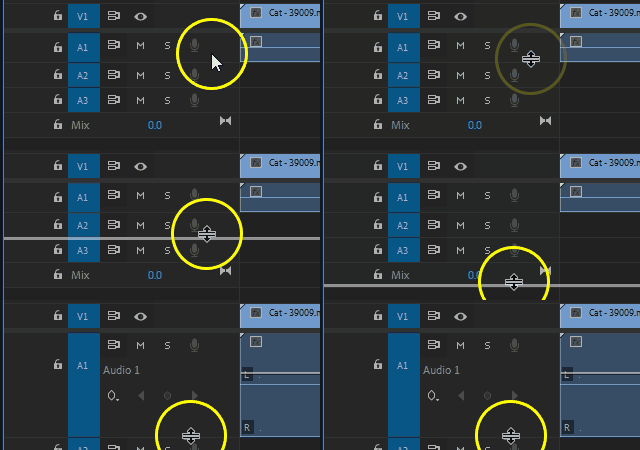
Keyframes: Click the Keyframe button on the audio track to add a key frame to the Clip Volume Indicator Line. Drag the key frame ◊ to where the line shows the desired level. This will allow you to increase or decrease specific portions of the audio in a clip (ex. fading music into your video).
Mixing
Mixing is the manipulation or enhancement of audio which can include adjusting the volume, panning left or right, and adding effects such as delay, reverb, etc. These can be done in either the Timeline or in the Audio Clip Mixer.
Timeline:
1. Right-click in the little fx box in the corner of the clip to select different properties (volume, panner, or track volume to affect every clip in the track).
Audio Clip Mixer in Source Monitor:
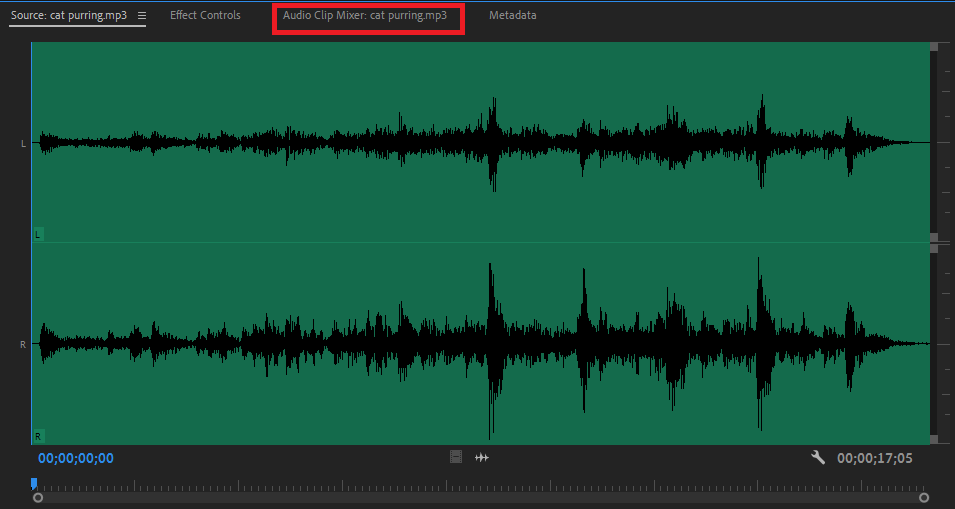
1. Double-click the audio clip you want to edit to view it in the Source Monitor (or click and drag the clip into the Source Monitor).
2. You’ll now see the selected audio clip in a visual “waveform” (see image below) that represents the peaks and valleys of the clip’s volume levels.
3. Click on the third tab to bring the Audio Clip Mixer.
4. Manipulate volume levels by using the Volume Fader lever to achieve the desired result. Beware of the audio “clipping,” when the volume is too loud and causes distortion, indicated by red.
5. Manipulate left or right balance within the stereo field by using the panning knob.
