Getting Started with InDesign

Choosing Your Workspace
Choosing Your Workspace
The default workspace mode is called Essentials, but experiment with different workspace settings to find the one that works best for your needs.
The different workspace settings can be changed in the Worskpace Switcher box located on the top right of the Application bar and just to the left of the Search box, or from the menu bar go to Window > Workspace and select the workspace you want to use.
InDesign comes with the following workspace settings, and some work better for particular projects than others. The Typography workspace is highly recommended for beginners, as it features the most options for working with text.
- Advanced
- Book
- Digital Publishing
- Interactive for PDF
- Essentials
- Printing and Proofing
- Typography
Navigating Your Workspace
Navigating Your Workspace

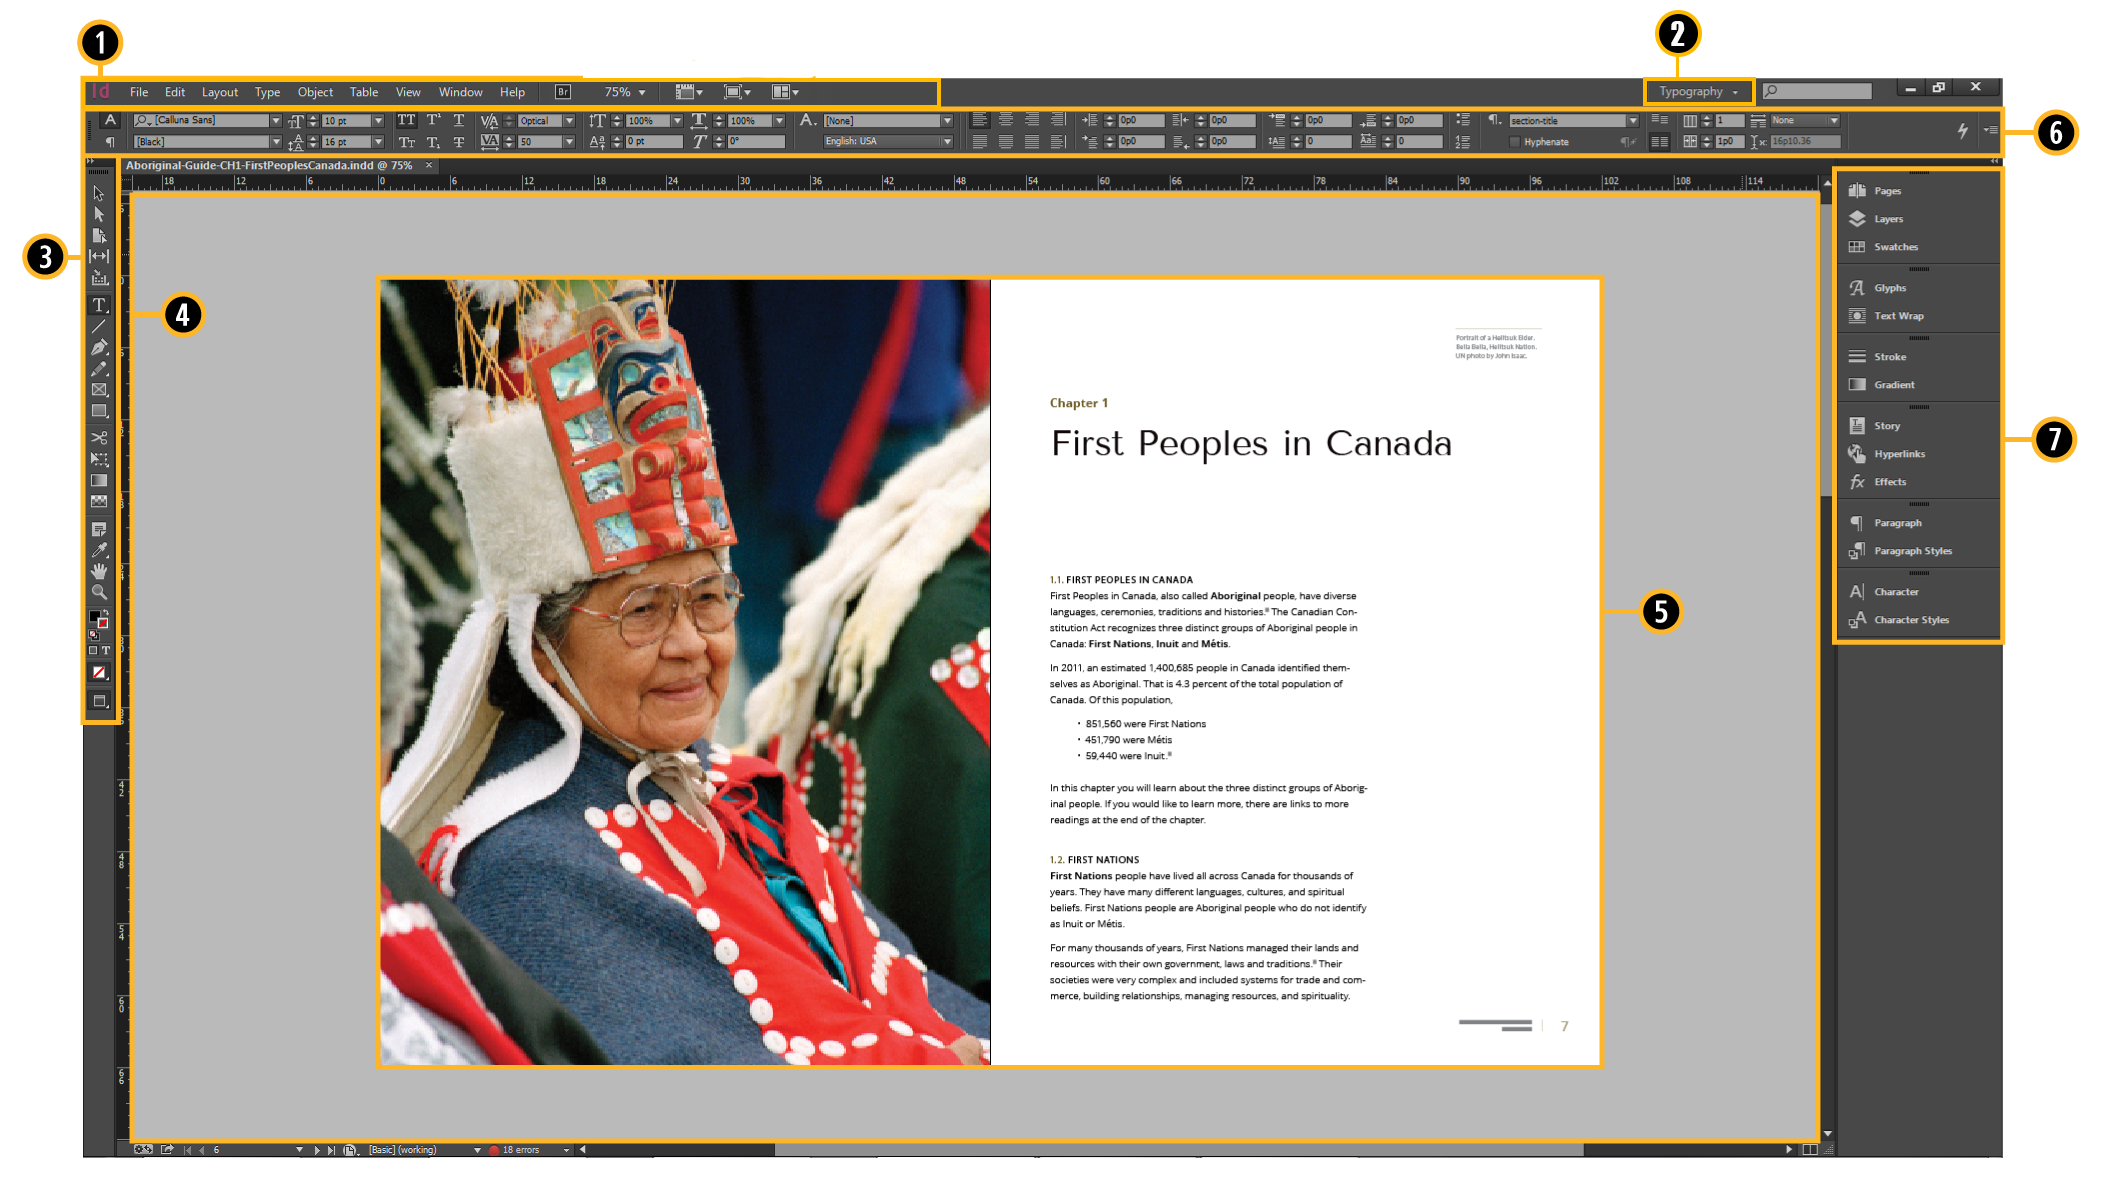
- Application Bar
Contains menus and other quick access options to view your document in different screen modes. - Workspace Switcher
Allows to change the arrangement of elements that you use frequently while working on documents. You can dock, stack, minimize, or make these elements free-floating in your workspace. You can select from several preset workspaces or create one of your own. - Tool Box
Contains commonly used tools for layout and design. Find more information about specific tools in the tab Your Tools. - Paste Board
Your primary work area. It is possible to drag and drop text, images and multimedia files directly onto the pasteboard from other applications. - Document Window
It displays the file you're working on. This is where all of your layout and design elements will be contained. Document windows can be tabbed, and in certain cases, grouped and docked. - Control Panel
Depending on the element you have selected, the Control Panel displays options and information about that element. You can also use the settings in the Control Panel to make changes to specific elements on your page. - Panels
The tabs in the Panels area contain basic and advanced layout features that allow you to modify specific elements on your page or apply styles throughout your entire document. Because InDesign allows for much more comprehensive layout and styling options, each of these have been separated into individual tabs. Click on each Tab to expand and edit.
Creating a New Project
Creating a New Project
- Before you begin, change the measurement units that you prefer to work with. Go to Edit Menu > Preferences > Units and Increments > Ruler Units
- On the menu bar, go to File > New > Create A New Document or use the shortcut (Ctrl+N).
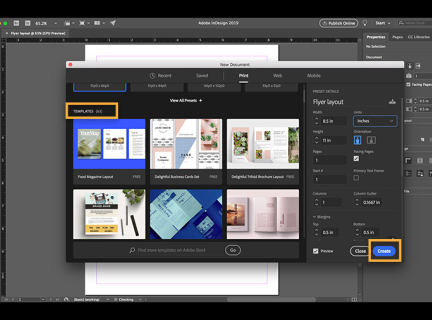
- In the New Document dialog window, you can prepare the settings for the document you will be creating. You can choose presets for different types of documents used for Print, Web or Mobile, or modify them to your own needs. You can also quickly open documents you accessed recently.
- * The settings for Margins and Columns can be changed when your document is created in the New Document dialog window, or they can be changed afterwards by going to Layout menu > Margins and Columns. Check the Preview checkbox at the bottom right of the New Document window to see what your document will look like.
- Click OK and you should see a blank page with the margin measurements that were set:
Your Toolbox
Common Tools
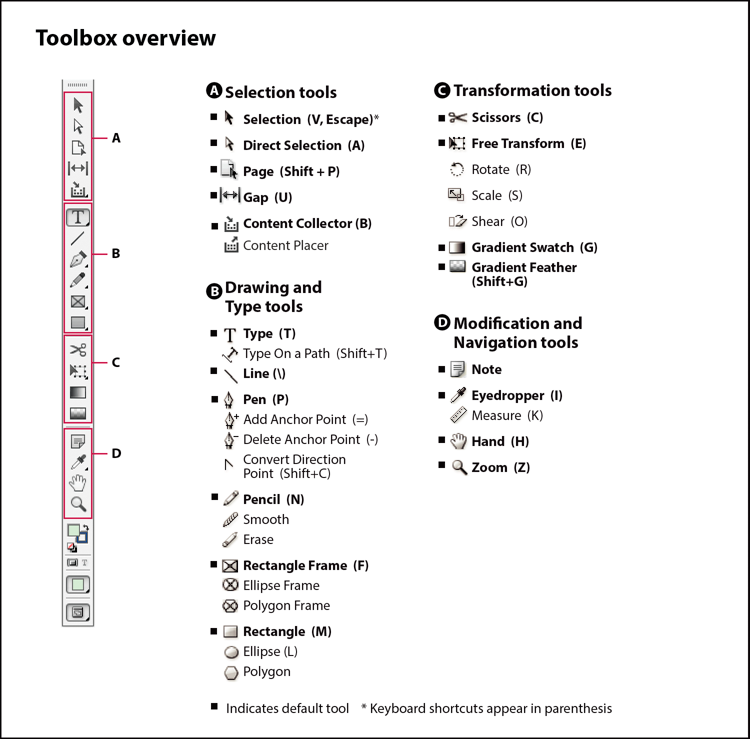
Tools in InDesign are displayed as a single vertical column. It can also be set up as a double vertical column or as one horizontal row. To move it around you can drag it from the top.
Some tools are for selecting, editing, and creating page elements, others are for selecting type, drawing shapes or lines, or applying gradients and colours.
Several tools contain hidden tools related to those that are visible. When a tool icon has small arrows in the bottom right, this indicates there are hidden tools which can be selected by clicking and holding the current tool, and then clicking on the tool that you want.
The name of the tool and its keyboard shortcut will appear if you hover with the pointer over the tool icons. This will give you a rough idea of what that tool is for.

Visit the Adobe InDesign User Guide website if you want to learn more about the tools of InDesign.

