Video Digitization
Video Cassettes to Digital Conversion
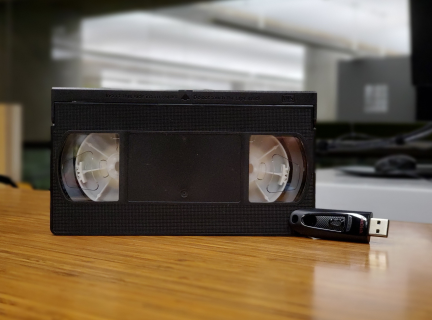
When digitizing video, please remember that transferring the content is done in real time. (1 hour of video cassette = 1 hour of transfer time). There is additional processing time needed at set-up and at the end to save your work.
When saving or moving files on a USB device, please note that FAT32 won't accept files larger than 4GB (about 1 hour of captured video), so the USB will have to be formatted to exFAT to accept larger files. Reformatting a USB drive will wipe off all the data, so either come with a new drive, or be prepared to move your files off the drive and back onto it when reformatting it.
To format your USB drive to exFAT on a computer in the Inspiration Lab:
- Connect your USB to the computer.
- Click on the START menu.
- Click on DOCUMENTS.
- Right click on your REMOVABLE DISK.
- Click on FORMAT.
- Pick exFAT (instead of FAT32).
- Click START and OKAY.
VHS Tape to DVD and USB Drive
Video Overview
Set Up VCR
- Plug in headphones to computer (In the Inspiration Lab this should already be done).
- Turn on VCR.
- Insert tape into VCR.
- Tape may start playing automatically. If it does, hit stop button.
Start Video Conversion Software
On computer open CyberLink.

Choose Video.

Choose Advanced Video Editing.
Choose Full Feature Editor.
Choose Capture.
- [for saving to a DVD disc] - Change Folder: Make sure the Data2 (D:) / Documents drive (default) or your USB drive pathway is selected.
- [for saving to a USB drive] - Plug in your USB Drive, and ensure Change Folder pathway directs to Removable Disk.
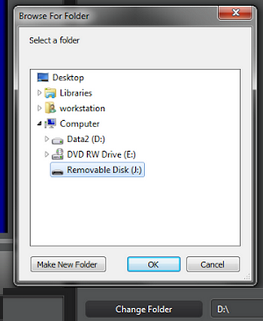
Start Recording
Do you want to convert entire tape?
If yes:
- click the Play button on the VCR

- and then the red record button on the software.

If no:
- Hit play on the VCR and watch video until you reach desired point in video. (You can fine tune the location on the tape by using the fast forward / rewind / pause buttons on the remote as the video is playing. When you have reached the desired point click the Play button on the VCR and then the red record button on the software.
- When you are done recording press the Stop/Eject button on the VCR

- and the white square in a circle on the software. Enter a file name when prompted.

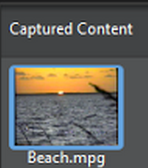
If you want to record more video off of your tape, repeat from No step above. You may preview your converted files by double clicking the file in the right hand pane. Playback may be smoother if you open the file with VLC media player.
Create DVD [for saving to a DVD disc]
- Insert blank DVD into computer
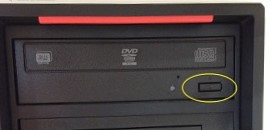
- Shut down Cyberlink. Media Suite menu will appear.
- Choose Video.

- Choose Create a Movie Disc.
- Choose DVD and make any other changes as needed and choose Next.
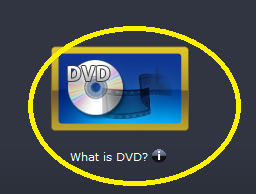
- Choose Import > Video Files and find the video file or files you just created.
- You can also choose a menu and (by double clicking on the text) customize the menu text. After you have finished with the menu click Next.
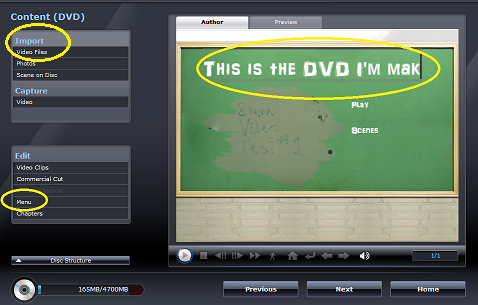
- Make sure the DVD drive is selected and label your disc if you like. When done click Burn. Sit back and relax, depending on the length of the video, this could take some time. An onscreen display will give you a time estimate.

- Disc will pop out when burning is complete.
Finish
Eject tape from VCR with the Stop/Eject button.

Shut down software.
- [for saving to a DVD disc] Remove DVD from computer.

- [for saving to a USB drive] Remove USB flash drive by:
- Clicking on safely remove hardware (bottom right of screen next to clock).
- Choose device to remove.
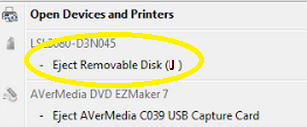
- When prompted, remove device from computer.
Video Camera to DVD and USB Drive
Video Overview
Set Up Camera
Note: The Inspiration Lab has MiniDV and 8mm camcorder kits available if you don't have a working camcorder to bring with you. Ask a staff member for the kit you need.
Otherwise, bring your own video camera to the lab, including your own power adapter and cords.
- Attach your camera to the AVerMedia dongle. It accepts Composite audio/video (RCA) and S-Video cables.
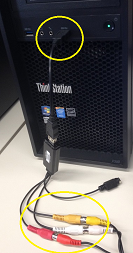
- Plug in headphones to computer (In the Inspiration Lab these should already be plugged in.)
- Turn on Camera.
- Insert tape into Camera.
Start Video Conversion Software
On computer open CyberLink.
Choose Video.

Choose Advanced Video Editing.
Choose Timeline Mode.
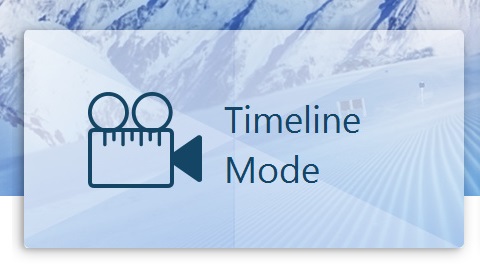
Choose Capture.
- [for saving to a DVD disc] - Change Folder: Make sure the Data2 (D:) / Documents drive (default) or your USB drive pathway is selected.
- [for saving to a USB drive] - Plug in your USB Drive, and ensure Change Folder pathway directs to Removable Disk.

Start Recording
Do you want to convert entire tape?
If yes, click the Play button on the camera and then the red record button on the software.

If no, hit play on the camera and watch video until you reach desired point in video (you can fine tune the location on the tape by using the fast forward / rewind / pause buttons on your camera). When you have reached the desired point click the Play button on the camera and then the red record button on the software.
When you are done recording press the Stop button on the camera and the white square in a circle on the software. Enter a file name when prompted.

If you want to record more video off of your tape, repeat from No step above. You may preview your converted files by double clicking the file in the right hand pane. Playback may be smoother if you open the files in VLC media player.

Create DVD [for saving to a DVD disc]
- Insert blank DVD into computer.

- Shut down Cyberlink. Media Suite menu will appear.
- Choose Video.

- Choose Create a Movie Disc.
- Choose DVD and make any other changes as needed and choose Next.

- Choose Import > Video Files and find the video file or files you just created.
- You can also choose a menu and (by double clicking on the text) customize the menu text. After you have finished with the menu click Next.

- Make sure the DVD drive is selected and label your disc if you like. When done click Burn. Sit back and relax, depending on the length of the video, this could take some time. An onscreen display will give you a time estimate.

- Disc will pop out when burning is complete.
Finish
Eject tape from camera with the Stop/Eject button.

Shut down software.
- [for saving to a DVD disc] Remove DVD from computer.

- [for saving to a USB drive] Remove USB flash drive by:
- Clicking on safely remove hardware (bottom right of screen next to clock).
- Choosing device to remove.

- When prompted remove device from computer.

