Audio Digitization
Audio Cassette to Digital Conversion
Video Overview
Note: When digitizing audio, please remember that the conversion is done in real time. (1 hour of audio cassette = 1 hour of transfer time). There is additional processing time needed at set-up and at the end to save your work.
Setting up the Hardware
1. Make sure the POWER button on the audio cassette deck is pushed into the ON position.

2. Plug your headphones into the computer. Your cassette will play through the computer.
3. Press the EJECT button on the cassette deck and insert the cassette into the cassette compartment. (Either the left or right cassette compartment is fine.)
Opening the Software (REAPER or Audacity)
You can use either REAPER or Audacity to digitize audio.
To use Audacity:
1. Double-click the Audacity icon to launch the software.

Audacity is a free, easy-to-use, multi-track audio editor and recorder for Windows, macOS, and Linux.
To use REAPER:
1. Double-click the REAPER icon to launch the software.
REAPER is a DAW (Digital Audio Workstation), available for Windows, macOS, and Linux.
Recording with Audacity
-
Click on the Audacity Record button [●] and manually press Play [▶] on the cassette deck so audio can be captured. The audio will begin to record.
Note: Each time you stop the recording it will save as an individual track. When you click the Record button again, it will create and save a separate track. A long single recording can later be split into single tracks. If you pause the recording, it will resume where you left off on the same track (but no edits can be made while it is paused).
Image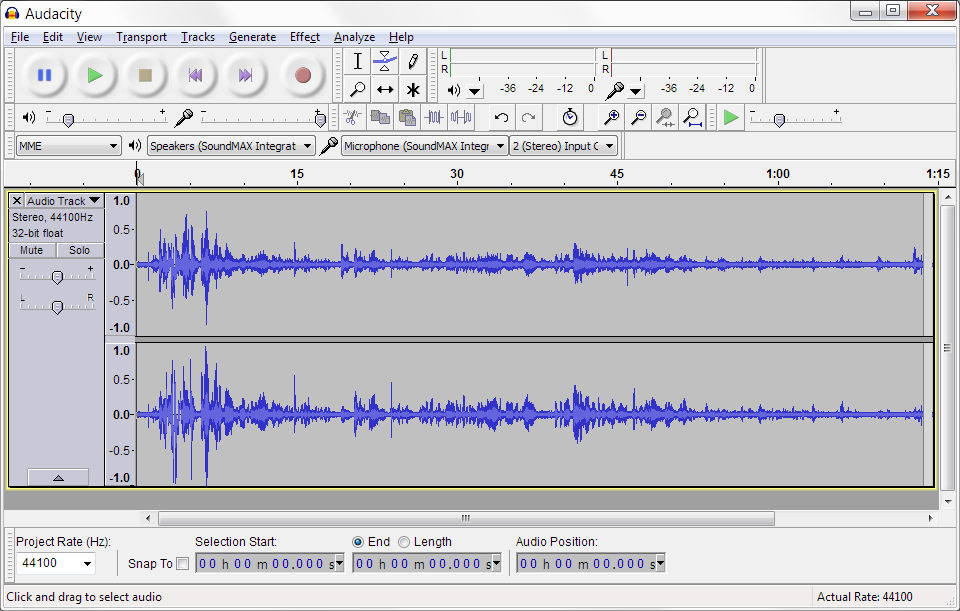
- To stop recording, manually press Stop [◼] or Pause on the audio cassette deck. The recording on Audacity will stop.
- To review your audio file, press the Audacity Play button [▶].
Saving and Exporting in Audacity
-
When you are done and want to save your audio as a file you can open on other computers, go to File > Export Audio.
Image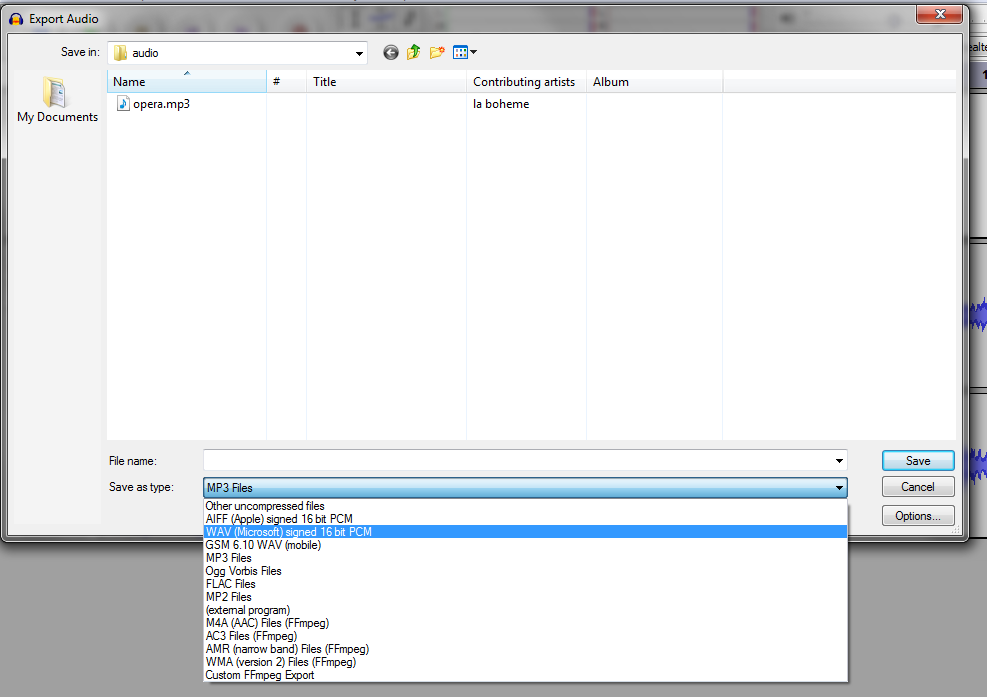
- Give your file a name and choose your format: *WAV or *MP3. Both audio formats will play on almost every computer. *WAV files are significantly larger and lossless, so they are higher quality (a good choice if you want to archive something or do more edits to it later in other software). *MP3 files are smaller files and lossy, which means each time you do edits, there is a loss in audio quality (but handy if you want to email a file to someone). If you have enough room on your USB, you can save your file in both formats.
-
A metadata (information about the recording) dialog box will pop up. You can enter extra information about your audio track on the metadata menu (but you do not have to). Click OK to save your recording and the metadata.
Image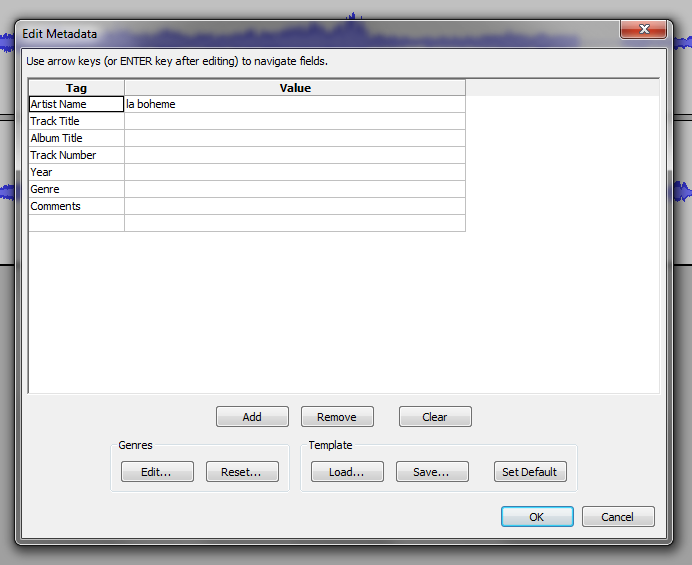
- When you are done, you can copy the file you've created to a USB (recommended) or burn it to a disc as shown in the next step. (Once a file is burned to a disc, it cannot be changed.)
If you need to edit your new audio file, then consider saving it as a project file. It will save as an *AUP file when you can edit again later in Audacity. When you save working files, make sure they are all in the same folder on your USB flashdrive. (If you move some bits around it will interfere with your project, and it may not even work again.) You can still edit an MP3 or WAV audio file, but if there were multiple tracks they will have been melded into one, so any editing is more limited.
Recording with REAPER
- To capture audio, you need to make a track. Ctrl+t creates a track. You can also double-click the dark grey area on the left of the workspace to create a track.
- Arm the track. Click the circle in the top left of the track to arm it (the circle should turn red).
- Click the record button on the transport bar.
- When you are finished recording, press the stop button. The software will ask if you want to keep the file. Click "Yes to all".
Saving and Rendering in REAPER
REAPER automatically creates *WAV files each time it records. After recording, you can navigate to where the *WAV file has saved (Documents > Documents > REAPER Media) and transfer the file or files from there to your storage device.
However, you can also export the audio (especially if you want an *MP3 file). Both audio formats will play on almost every computer. *WAV files are significantly larger and lossless, so they are higher quality (a good choice if you want to archive something). *MP3 files are smaller files and lossy, which means each time you do edits, there is a loss in audio quality (but handier if you want to email a file to someone). If you have enough room on your USB, you can save your file in both formats.
If you want to make more edits to the REAPER project later, you can save the project. This will be an *RPP file. Note that this file does not contain any audio itself, only information on edits. If you only save an *RPP file, and no other audio files, you will not be able to listen to your project later! This is why some people choose to render everything they have captured into a single audio file.
To turn the audio into a file you can open on other computers, go to File > Render...
There are many options, but these should be the only settings you need to consider:
Directory: Where you want to save the rendered file to (usually your storage device); click Browse and navigate to where you want to save it to.
File name: The name of the file
Output format: The file format. Usually you will only choose *WAV (higher quality, but larger file size) or *MP3 (smaller file size, but lower quality).
Burning to an Audio CD
Note: This step is optional and only necessary if you want to create an audio CD, such as one that could be played in a car or home stereo system. Remember that once files are burned to a disc, they cannot be edited on the disc.
- Click on the CyberLink Media Suite 10 icon on the desktop to launch the program.
-
From the available options, choose Music.
Image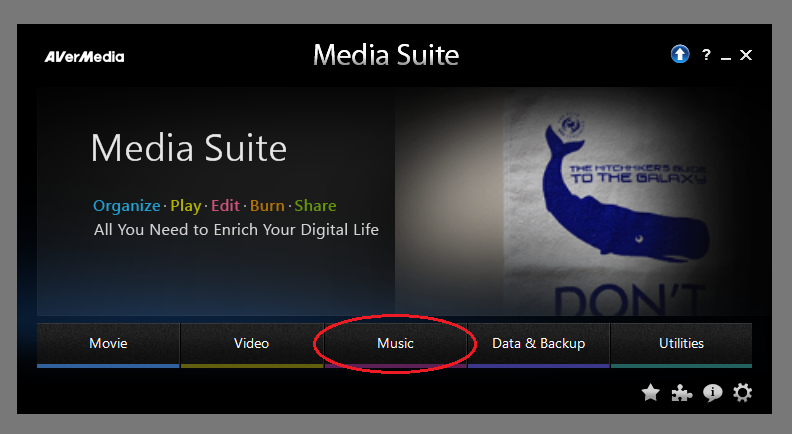
-
Click on Burn a Music Disc from the list.
Image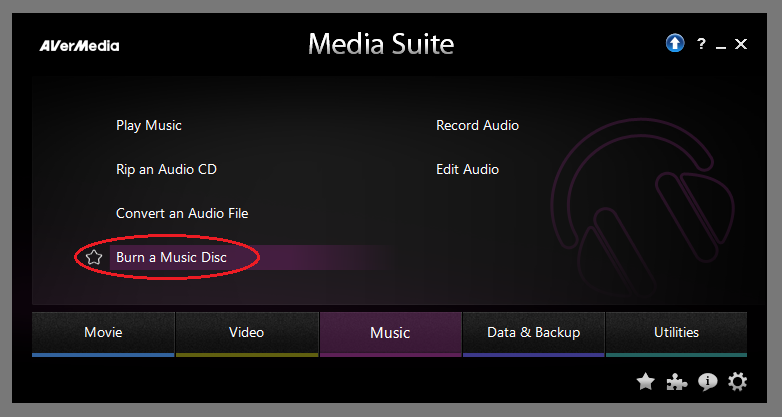
- Select the Browse tab in the upper left of the dialog box and navigate to where you saved your audio file(s).
- Drag the file(s) to the bottom half of the dialog box to create a playlist
-
When you are ready, click on Burn now.
Image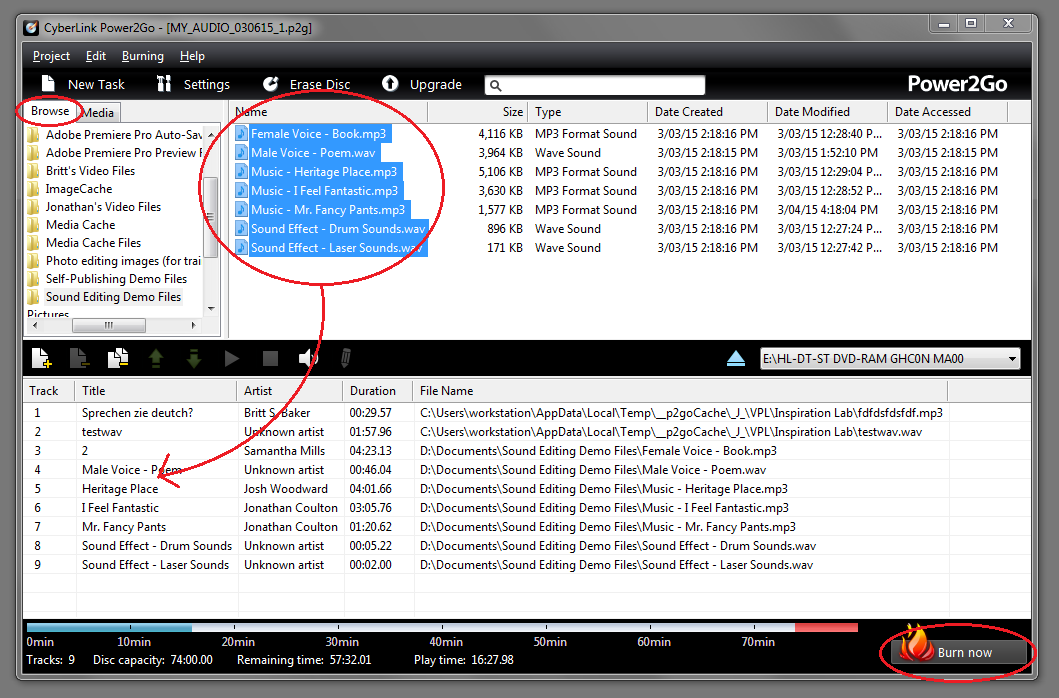
- Insert a blank CD-R into the computer's CD-DVD drive.
- Click on Burn. You can leave the settings at their defaults in most situations.
-
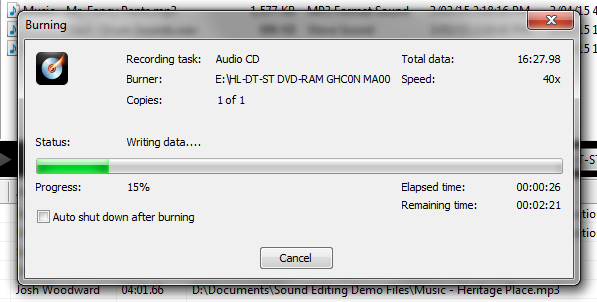
Wait for the disc to burn and you are done!
Image