Saving Your Project

Saving
To save an image from Photoshop, select File menu > Save As. In the popup window, select the Removable Drive/USB Drive, give the file a descriptive name, and select which File Format the image will be saved as. If your project contains multiple layers you will it will need to be exported of 'flattened' before it can be saved as a JPG or other image file.
PSD (Photoshop Document) Files
A PSD file (Photoshop Document) is a layered image file used in Photoshop. PSD is the default format that Photoshop uses for saving data. A PSD file allows the user to work with the images' individual layers even after the file has been saved. However, these files can only be opened in Photoshop (or similar programs like GIMP) and so will not be viewable on devices without one of these programs installed.
Export
Exporting creates a jpg, png or other image file from the visible layers of a PSD document. The 'Export' feature is found under the 'File' drop-down menu.
Flatten Image
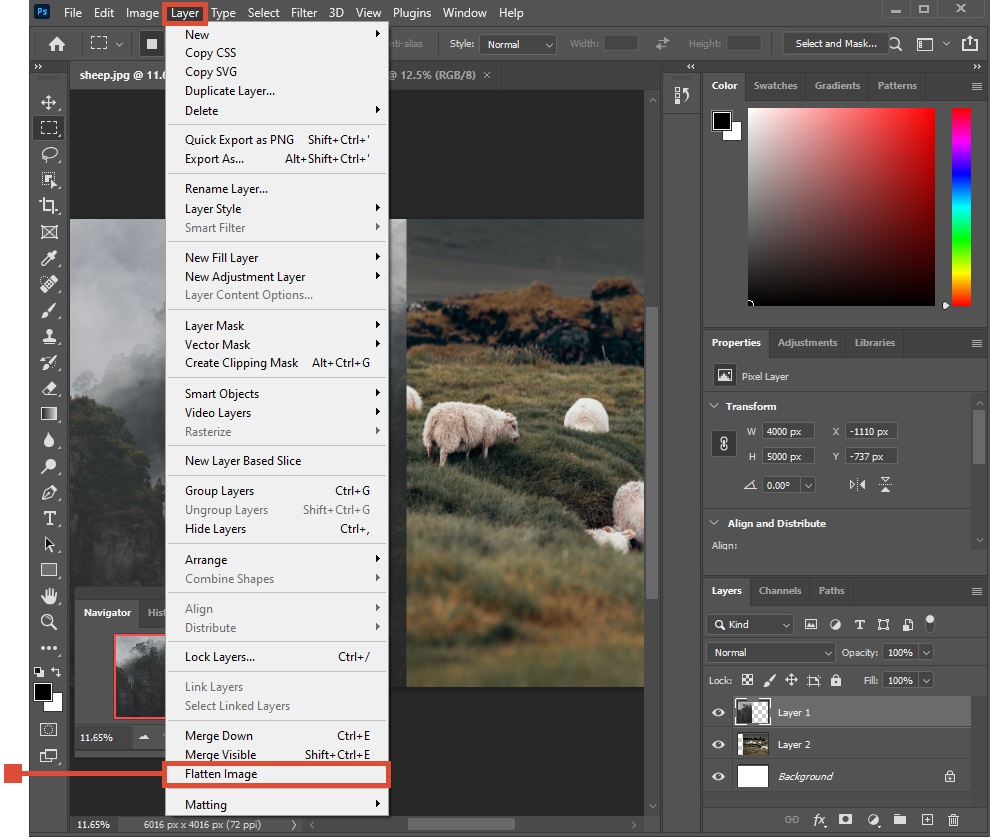
'Flatten Image' can be found near the bottom of the 'Layer' drop down menu. This will reduce the file to one layer allowing it to be saved as an image file. Once you flatten an image you will not be able to go back an edit layers individually so you may want to save a backup version of your work as a PSD file before flattening.

File Options
Some common formats for Saving Photoshop images are the following:
*.TIFF - Standard file format in the printing and publishing industry.
*.JPG - Smallest image file format, best for sending over the internet but with a significant loss in editing quality.
*.PNG - Replaced .GIF as most used lossless image compression format on the Internet.
*.RAW - Highest quality, large file size. Provides highest bit depth, the most color information and the highest dynamic range and extra control and quality for editing.
*.PSD or *.PDD - Photoshop project files that can only be opened with Photoshop but are uncompressed and retain quality for further editing.
Click the Save button.
Note: *.TIFF files are larger than *.JPG's. A folder containing many *.TIFF or *.RAW files may need to be compressed or ZIPPED to more easily send through email or fit on a USB.
To zip a folder:
- Locate the folder that you want to zip.
- Press and hold (or right-click) the file or folder, select (or point to) Send to, and then select Compressed (zipped) folder. A new zipped folder with the same name is created in the same location.
