Format a Print Book
This page features the steps you can follow to create and use a basic template for a print book using InDesign.
Create a New File
Open InDesign.
Because printers in North America use inches, the first thing you should do before starting your new document is to change picas to inches.
To do this:
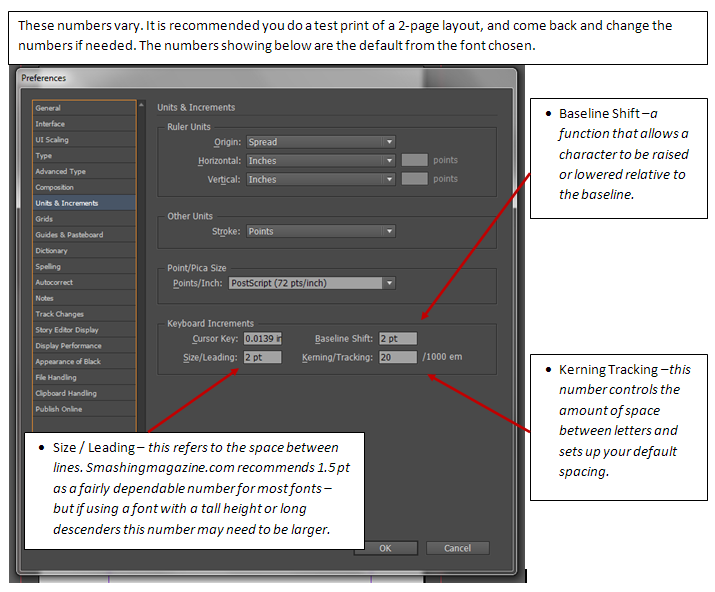
- Go to File > Preferences > Units & Increments.
- Change: Picas to Inches in both Horizontal and Vertical.
- Click OK
Now you are ready to start your new document:
- Go to File > New > Document
In the dialog box that opens make the following changes:
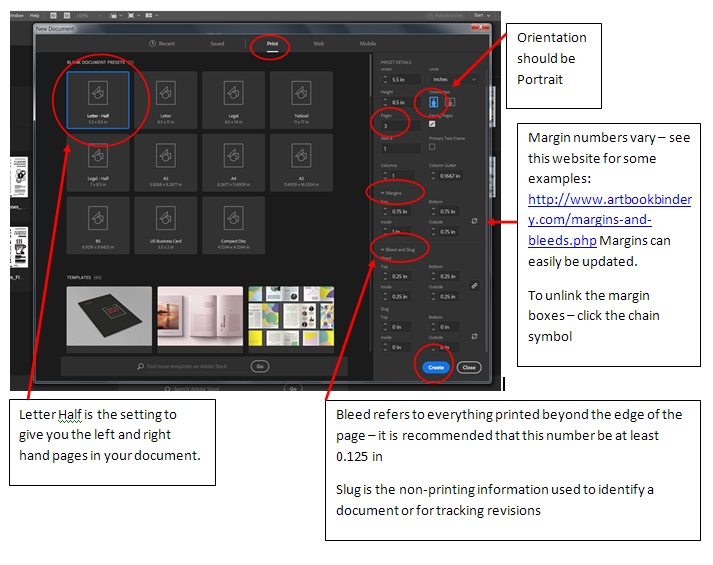
Make sure Preview is checked. Click OK.
- From the drop-down menu in the application bar above the control panel on the top right > Select:
- Typography
- To make sure that all the panels fully loaded:
- Click on the drop-down menu
- Select: Reset Typography.

Save your document:
- File > Save As > Name of Book > Save.
Set Preferences
Now you need to do quite a few changes in the Interface box (using the the tabs on the left side of the box) - do not click OK until done.
- Edit > Preferences > Interface
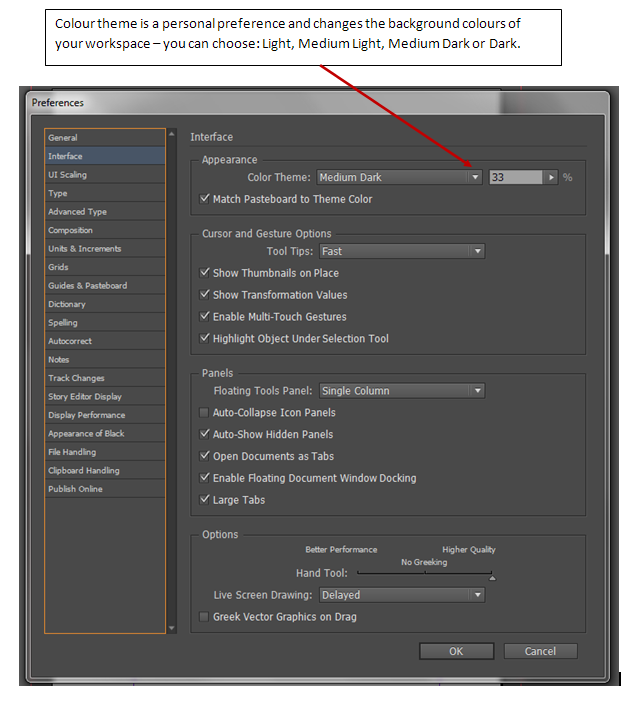
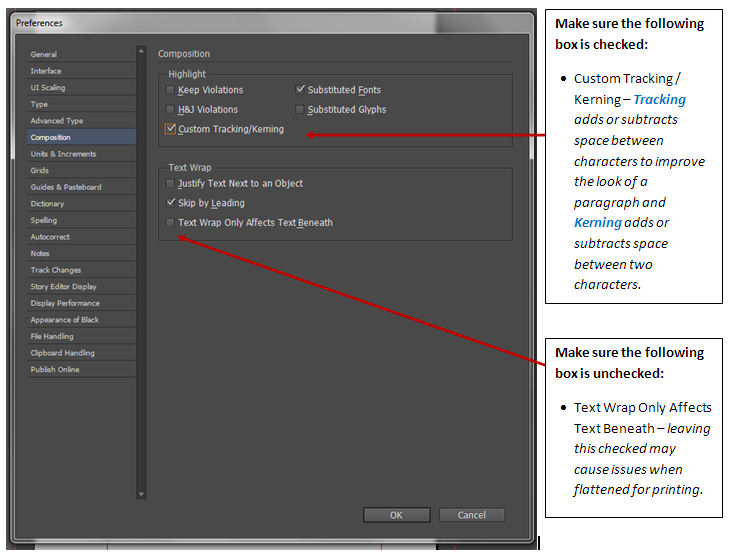
Using the links on the left side, click on the following and make your changes:
- Type

- Advanced Type:

- Composition:
- Units and Increments:
- Click OK
- File > Save
Set and Create Your Basic Styles
It is important to use styles in your document. You will need to create Paragraph and Character styles. Below are some examples of the various styles you might want to create.
Paragraph Styles:
Basic Paragraph Style - this will be the style you create as your main style for your entire document.
- Click on Paragraph Style > Double-click Basic and when the dialogue box will open up make the changes below using the list on the right side of the box to select the area you want to make changes to.
From the list on the side:
General:
- Style Name: When creating your first paragraph style you do not have the option to change the style name
- Based On: When creating your first paragraph style you do not have the option to base it on another style as no others have been created

Basic Character Formats:
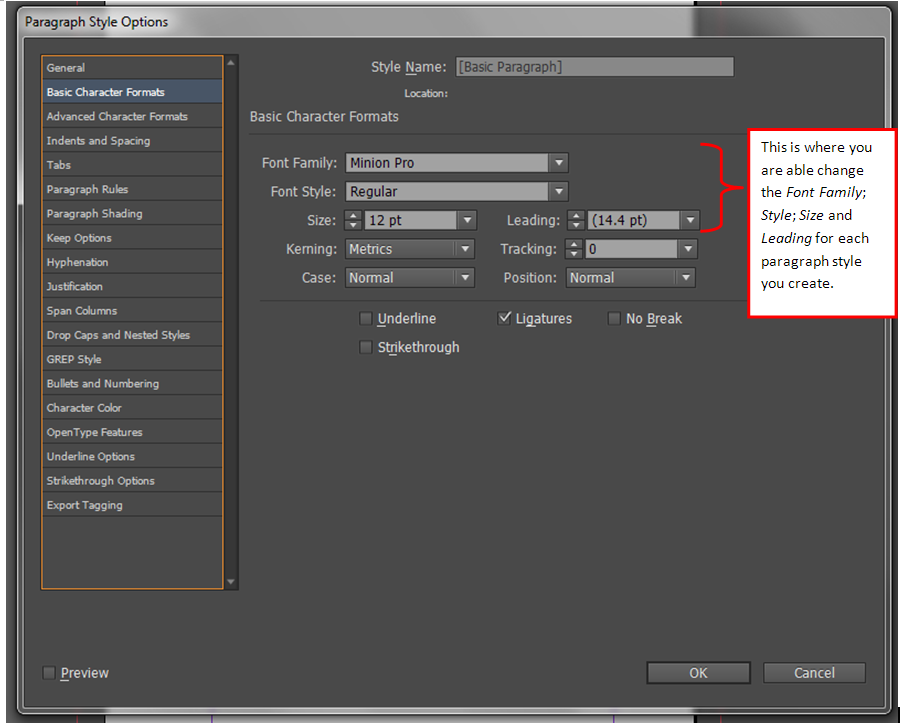
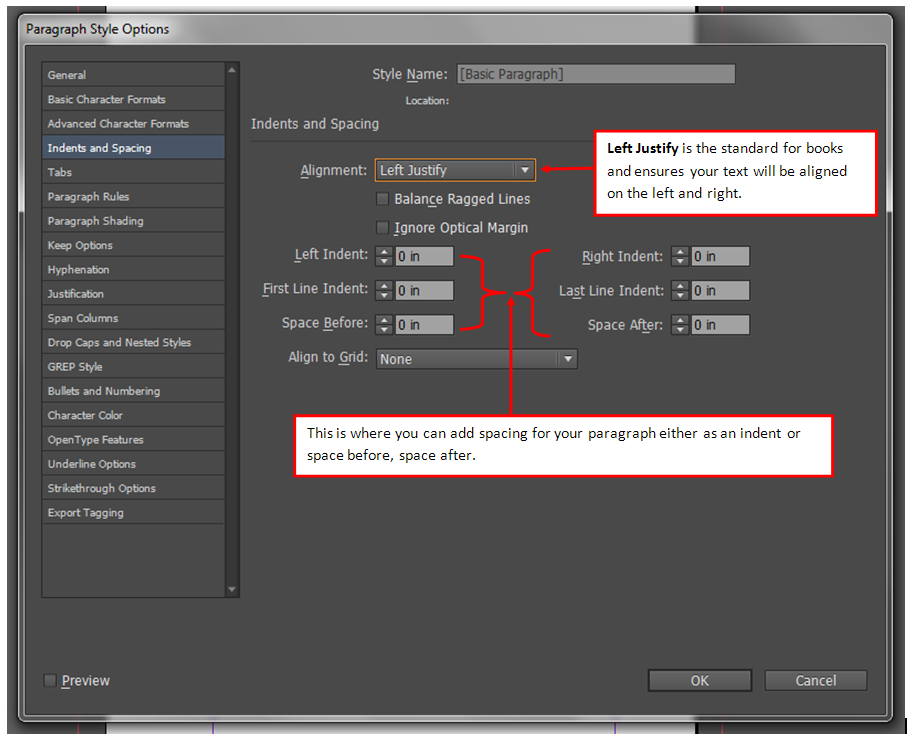
Indents and Spacing:
NEVER USE carriage returns in your document to create space above or below paragraphs. This is where you would create that space using space before or space after.
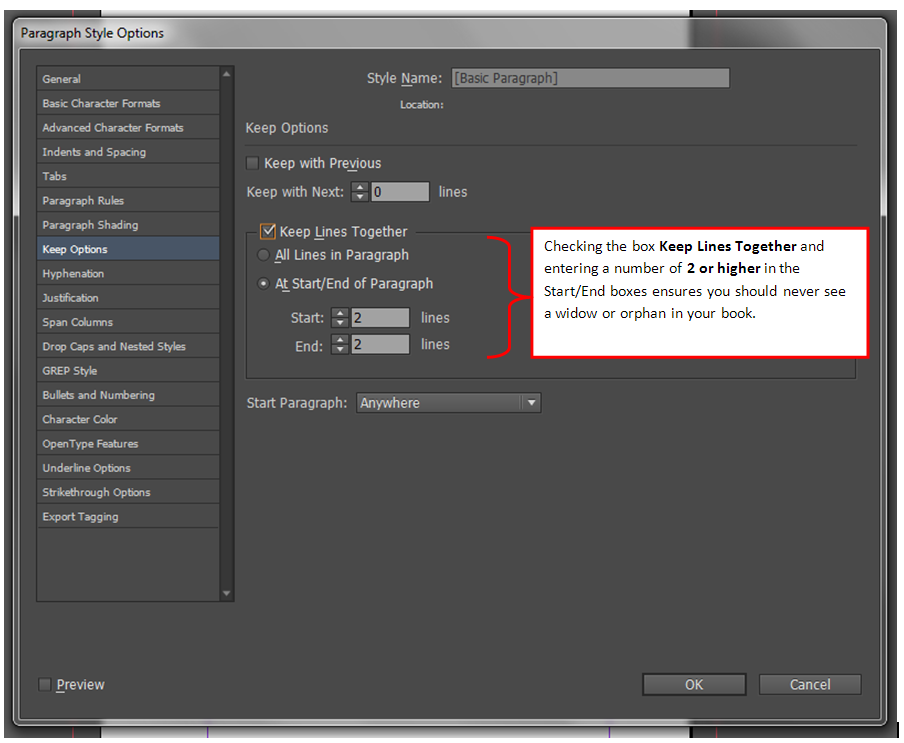
Keep Options:
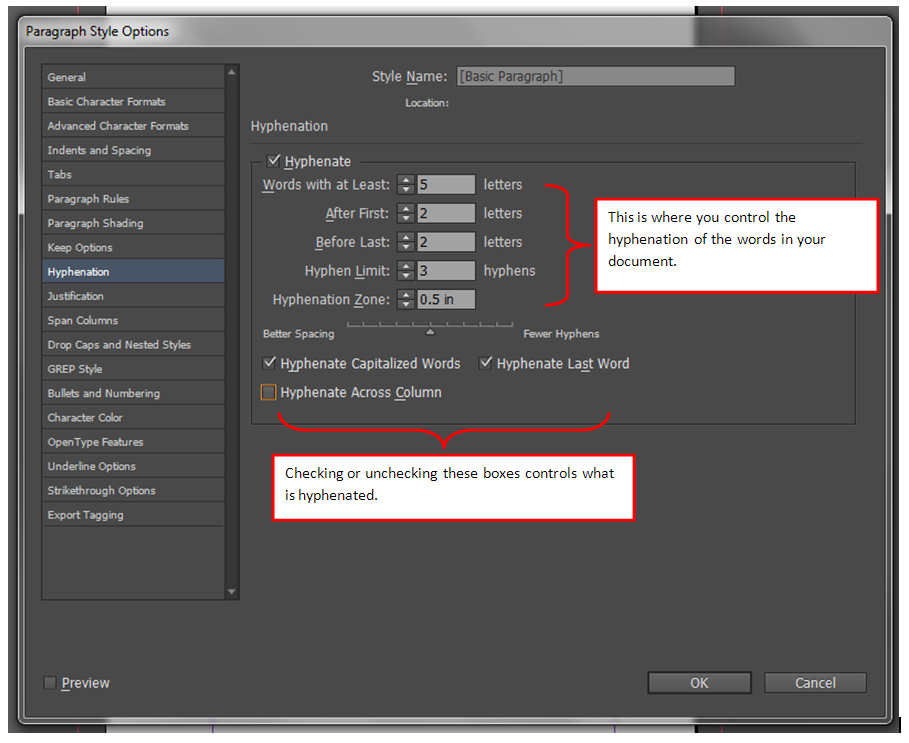
Hyphenation:
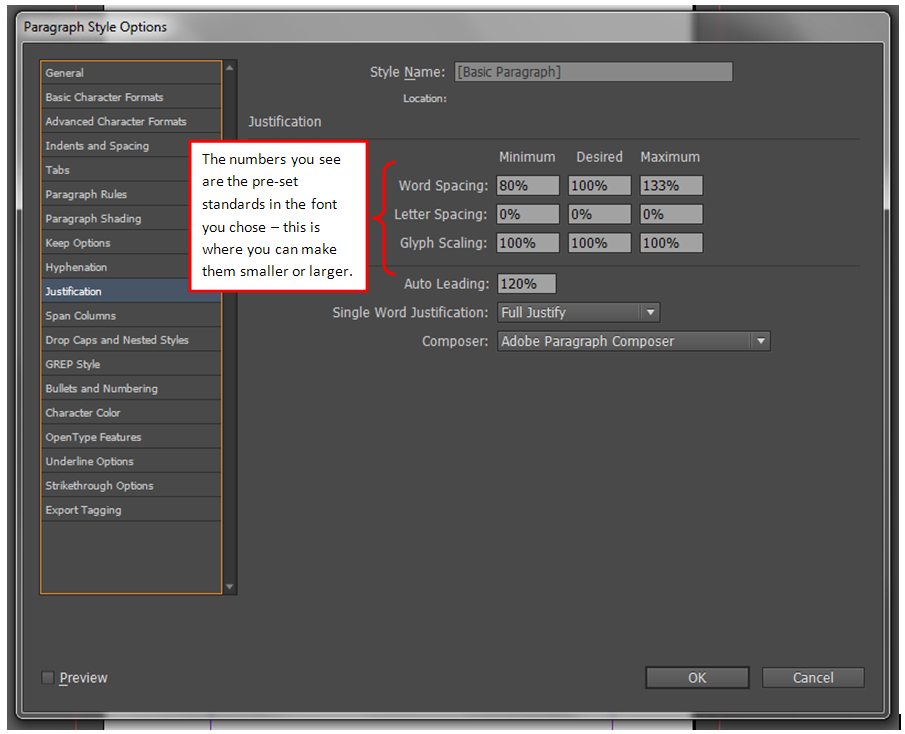
Justification:
Character Colour:

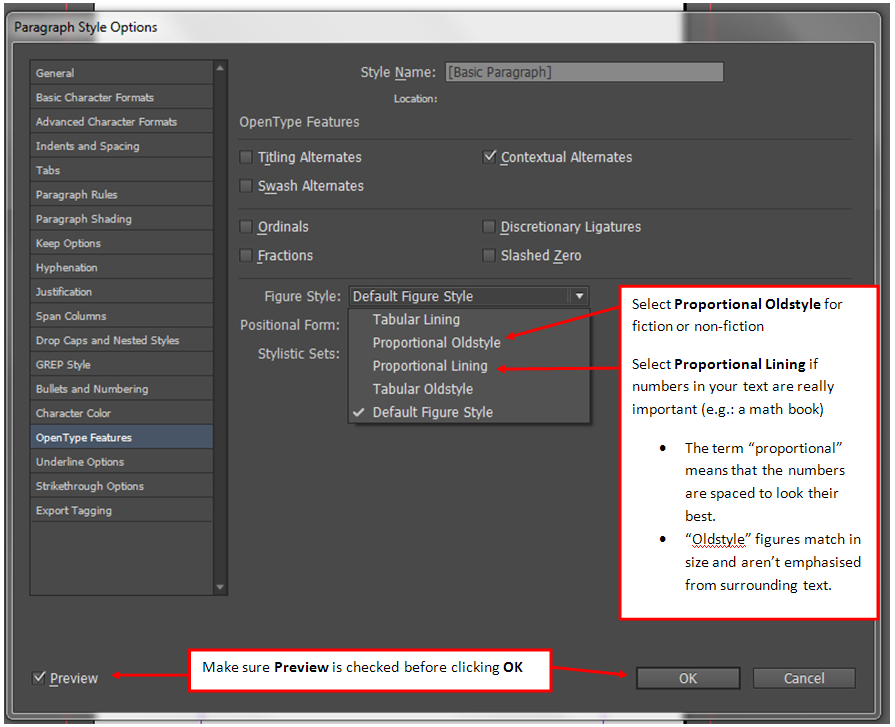
Open Type Features:
You will need to repeat the above steps to create a paragraph style for each type of paragraph you plan to have in your document. These can be created at the start or later as you find you need them.
It is recommended you apply a paragraph or character styles when formatting your document to make it easier later on if need to make a change to it.
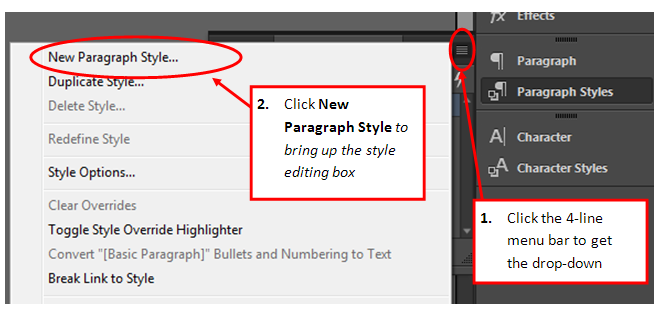
- To open a New Paragraph Style edit box > Click open Character Styles on the right side and follow the two steps below:
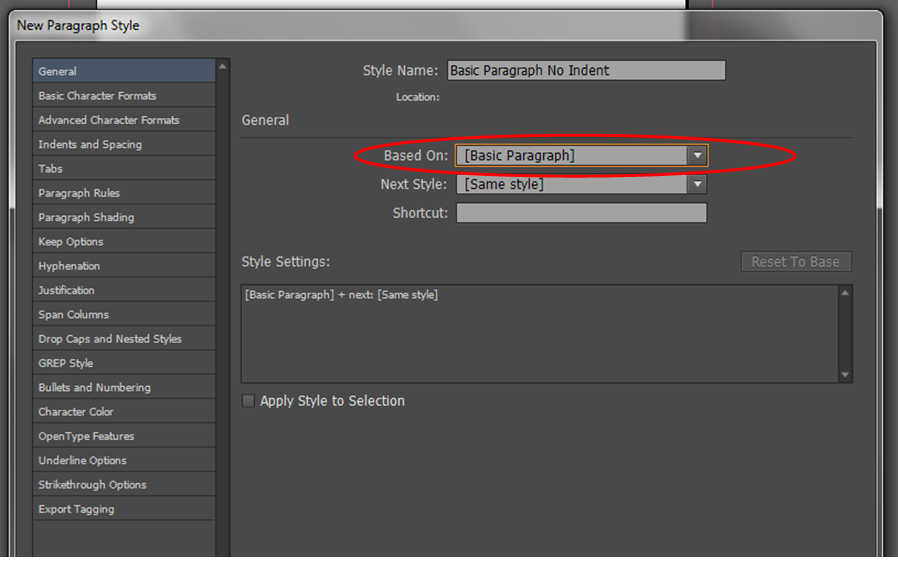
If your style is similar to another one when the box below opens up in the General tab select the similar style to base it on - then you only need to change few options that are different:
Some common paragraph styles might include:
Basic Paragraph - your main format for the document - as we did above this might be your indented paragraph
- Paragraph No Indent - this might be an alternate style for paragraphs where the paragraph is defined with space after
- Heading 1 (h1) - this might be a style to use on your Title Page
- Heading 2 (h2) - this might be a style used for Chapter Headings (Note: if doing a Table of Contents - you will need headers to pull content)
- Running Heads (rh) - this style is used for repeated text across the tops of the pages (e.g.: Book Title and/or Author Name)
- Folios (fol) - this style is used for page numbers
Using the examples above, when creating new styles you could:
- Base numbers 2, 3 and 5 on Basic Paragraph (#1).
- Number 4 (h2) would be based on number 3 (h1) - Reason: Because they are both heading, most of the formatting we did when creating h1 would be the same so we would only have to make a few adjustments
- Number 6 (fol) would be based on number 5 (rh) - Reason: Because they are repeating text on the top or bottom of the page, most of the formatting done when creating rh would be the same so we would only have to make a few adjustments.
Go ahead and create all the paragraph styles you need, as they are created you will see them listed in the Paragraph Styles box on the right - see example below:

Character Styles:
When you open the Character Styles panel, you will see None listed. This is your basic style based on the preferences you set earlier.
If you want to format individual text, you need to create a new Character Style and apply it to the text. Do Not make individual styles using the toolbar (for example to bold or italicize a word)or you will need to change each one individually if you decide on a style change at a later date.
To create a new Character Style:
- Open Character Style panel
- Click menu and select New Character Style
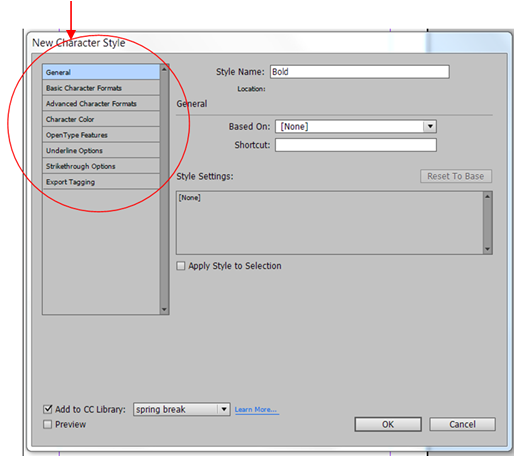
From the box that opens:
- Create a Style Name (eg: Bold)
- Leave Based On as: None
Using the tabs on the left, create your new style
File > Save.
You now have a template to use for any new print books you are creating. Always remember to check with your printer and/or distributors/websites for their specific requirements. These can easily be changed in the template. Remember to Save As so as not to override your template.

