Working with Audio in FL Studio
Recording Audio Setup
Setup Equipment
First, make sure mics and instruments are connected properly.
When using an audio interface, check to make sure:
- it is plugged in, powered on, and connected to your computer via USB
- microphone(s) are connected to proper interface XLR input(s)
- phantom power is turned on for mics that require it
- instruments are connected to interface via 1/4" instrument cable
- instrument is powered on
- batteries for guitar pickups are charged
- switch interface to instrument mode for that input
For more information about sound recording equipment, please see the Inspiration Lab - Sound Recording VPL Guide.
Software Setup
1. Set an Audio Device and select settings.
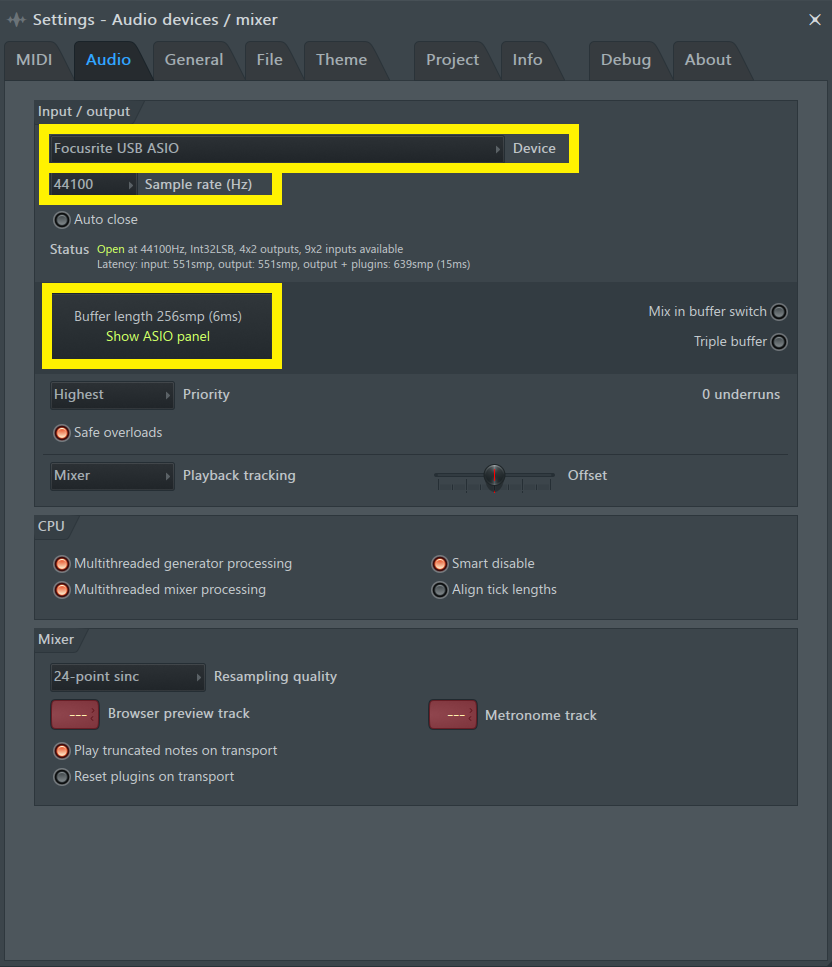
- Open 'Options > Audio settings'
- In the 'Input / output' section under device, make sure your interface is selected. In the Inspiration Lab Recording Studios it should be 'Focusrite USB ASIO' (be sure to select ASIO version instead of DirectSound.
- Use the default the sample rate of 44100 Hz
- Use the default buffer length of 256smp (6ms)
2. Open the Mixer (F9)
3. Select an open insert
- You will record one input per insert
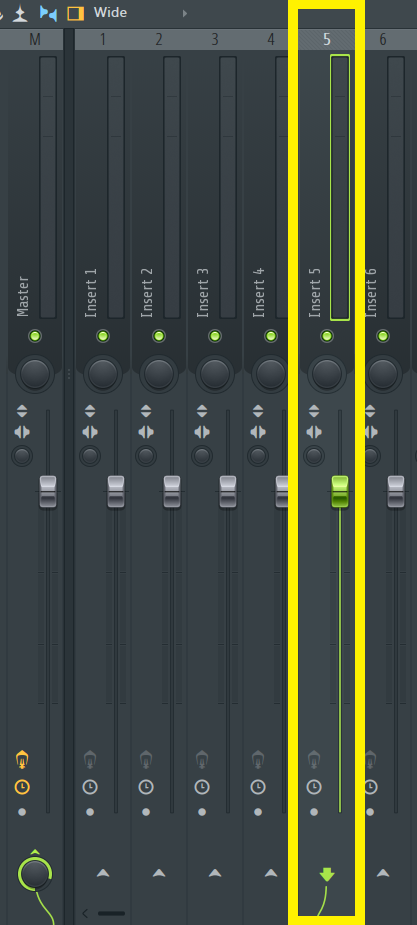
4. Select an Input
- Make sure the input selected corresponds to the input on your interface where your mic or instrument is plugged into
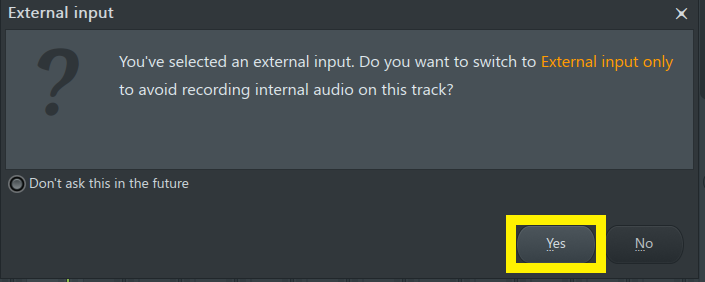
- External Input: Select Yes to the popup message


5. (Optional) Name and Color the Insert
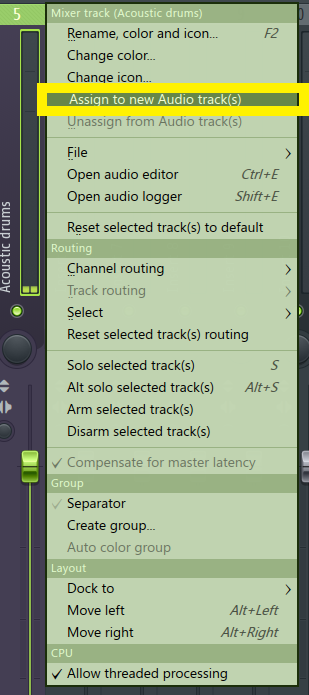
6. Assign Insert to an Audio Track
- Right click on the insert and choose 'Assign to new Audio track(s)'
- In the Playlist, an audio track will be added.
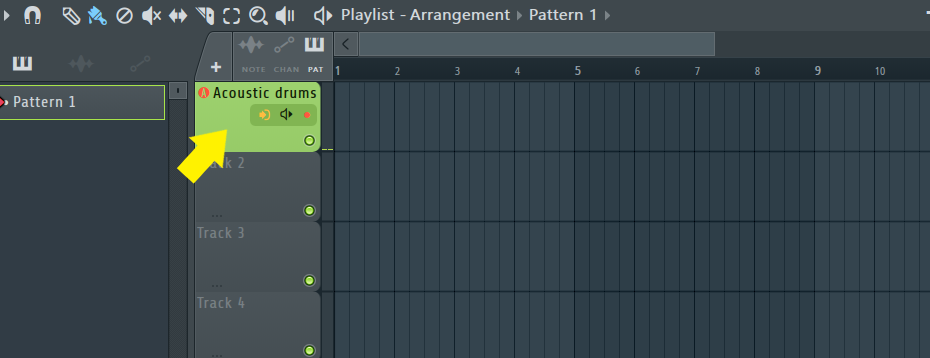
6. Arm track for recording
- This normally happens automatically when you first select an input, but if not, or it gets toggled off, you can arm track by clicking the red Arm/Disarm Track button.

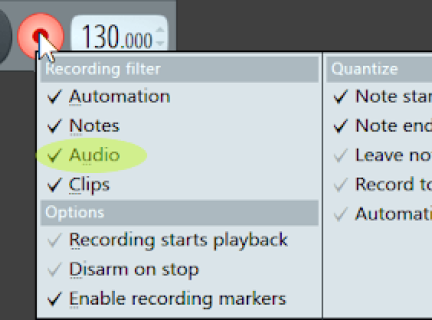
7. Recording Filter
- right click red record button
- make sure audio is checked
- Optional: enable "Countdown to recording" and also "metronome" to give yourself a countdown and a rhythmic beat to record to at the set BPM.
8. Start Recording!
- With record button enable, click the record button, and start playing
- Remember to stop the recording when done
- Your recording will show up in the playlist (it can be moved around and edited from there)

Importing an Audio File
Use the Drag and Drop method to import an audio file; drag a file from your drive or computer and drop it onto the Playlist in FL Studio.

Tip: In FL Studio you can import a variety of types of audio files.
.MP3s and .WAVs are the most common audio files. (FL Studio can also accept .AIFF, .DS, .DWP, .FLAC, .OGG, .SF2, .Speech, .SYN, and .XI, file types)
Tip: You can work with audio clips and Loops in the Playlist instead of the Channel Rack
Audio Editing Tools
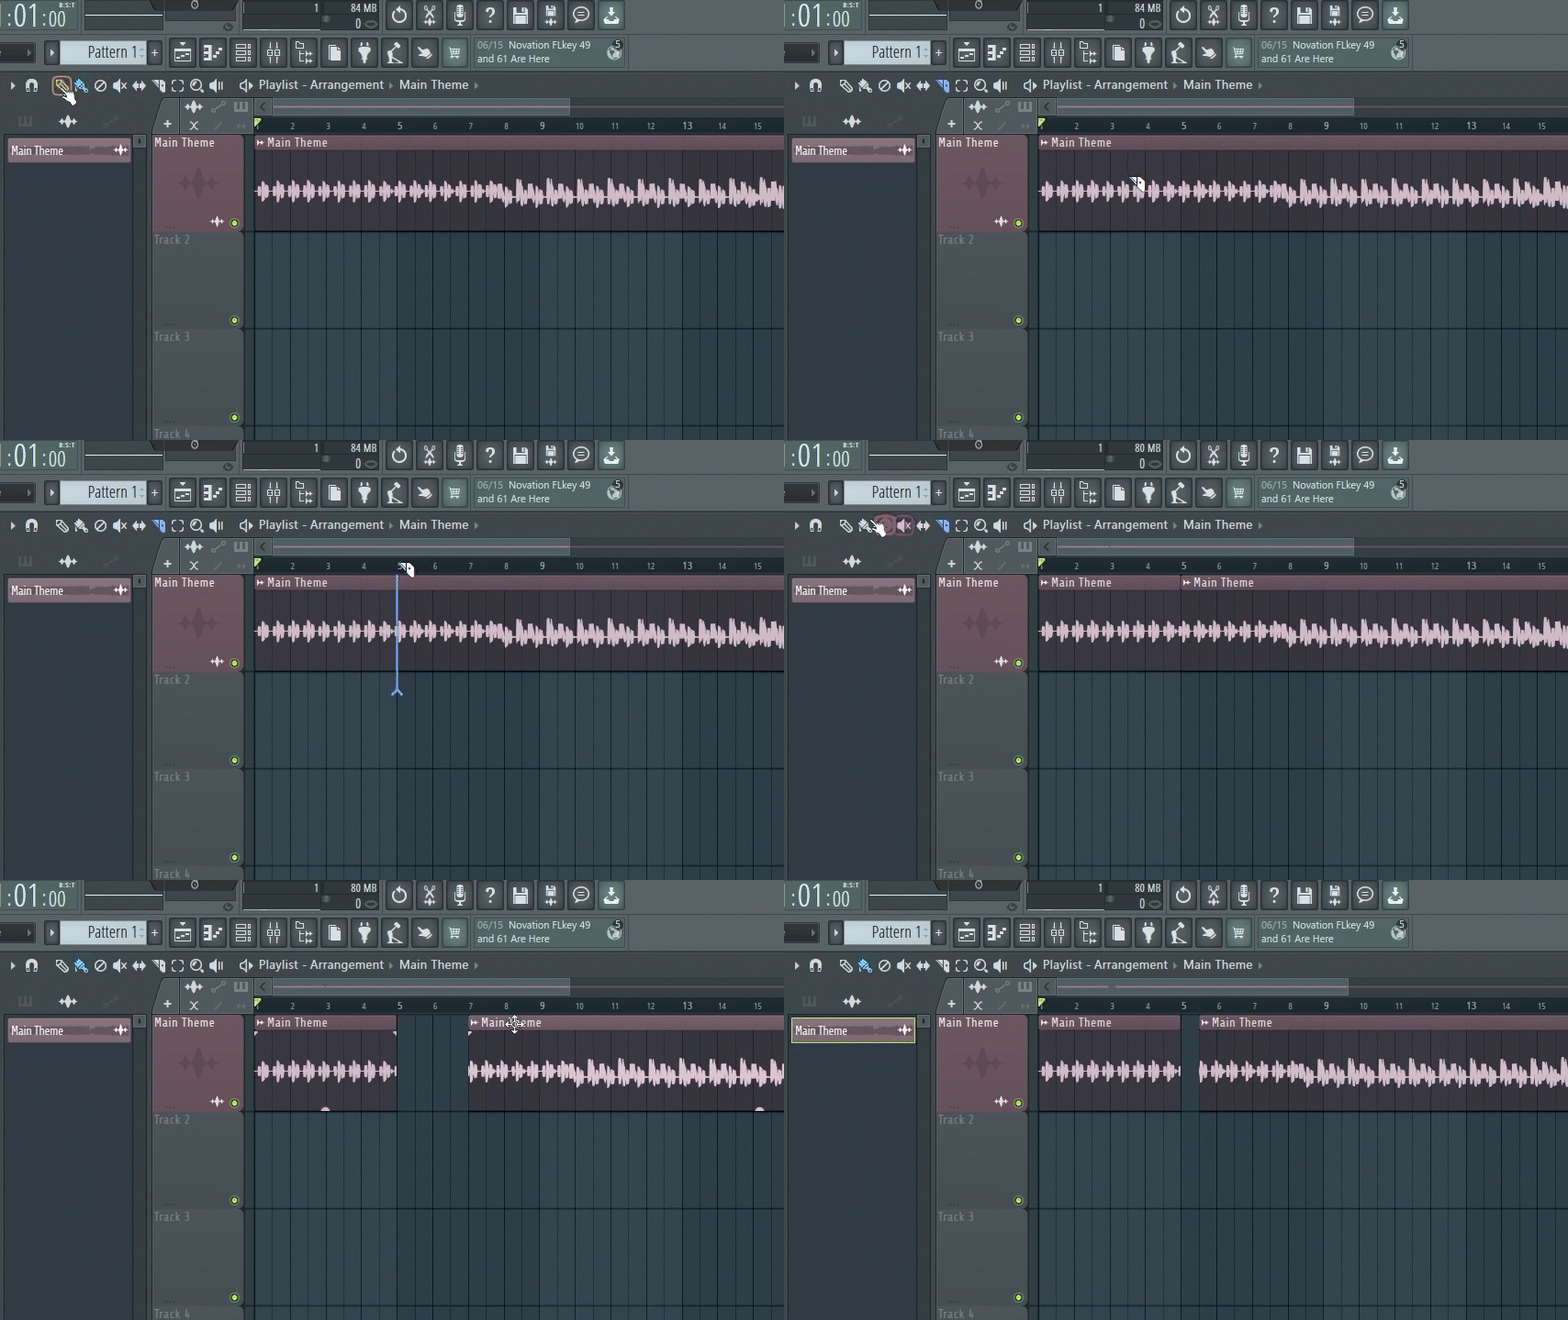
Razor Tool
Splits your audio clip into two where you slice it with the razor.
Fade In / Fade Out
Increase or decrease volume over time. With draw or paint tool selected, left click on top left corner of clip for fade in and top right corner for fade out.
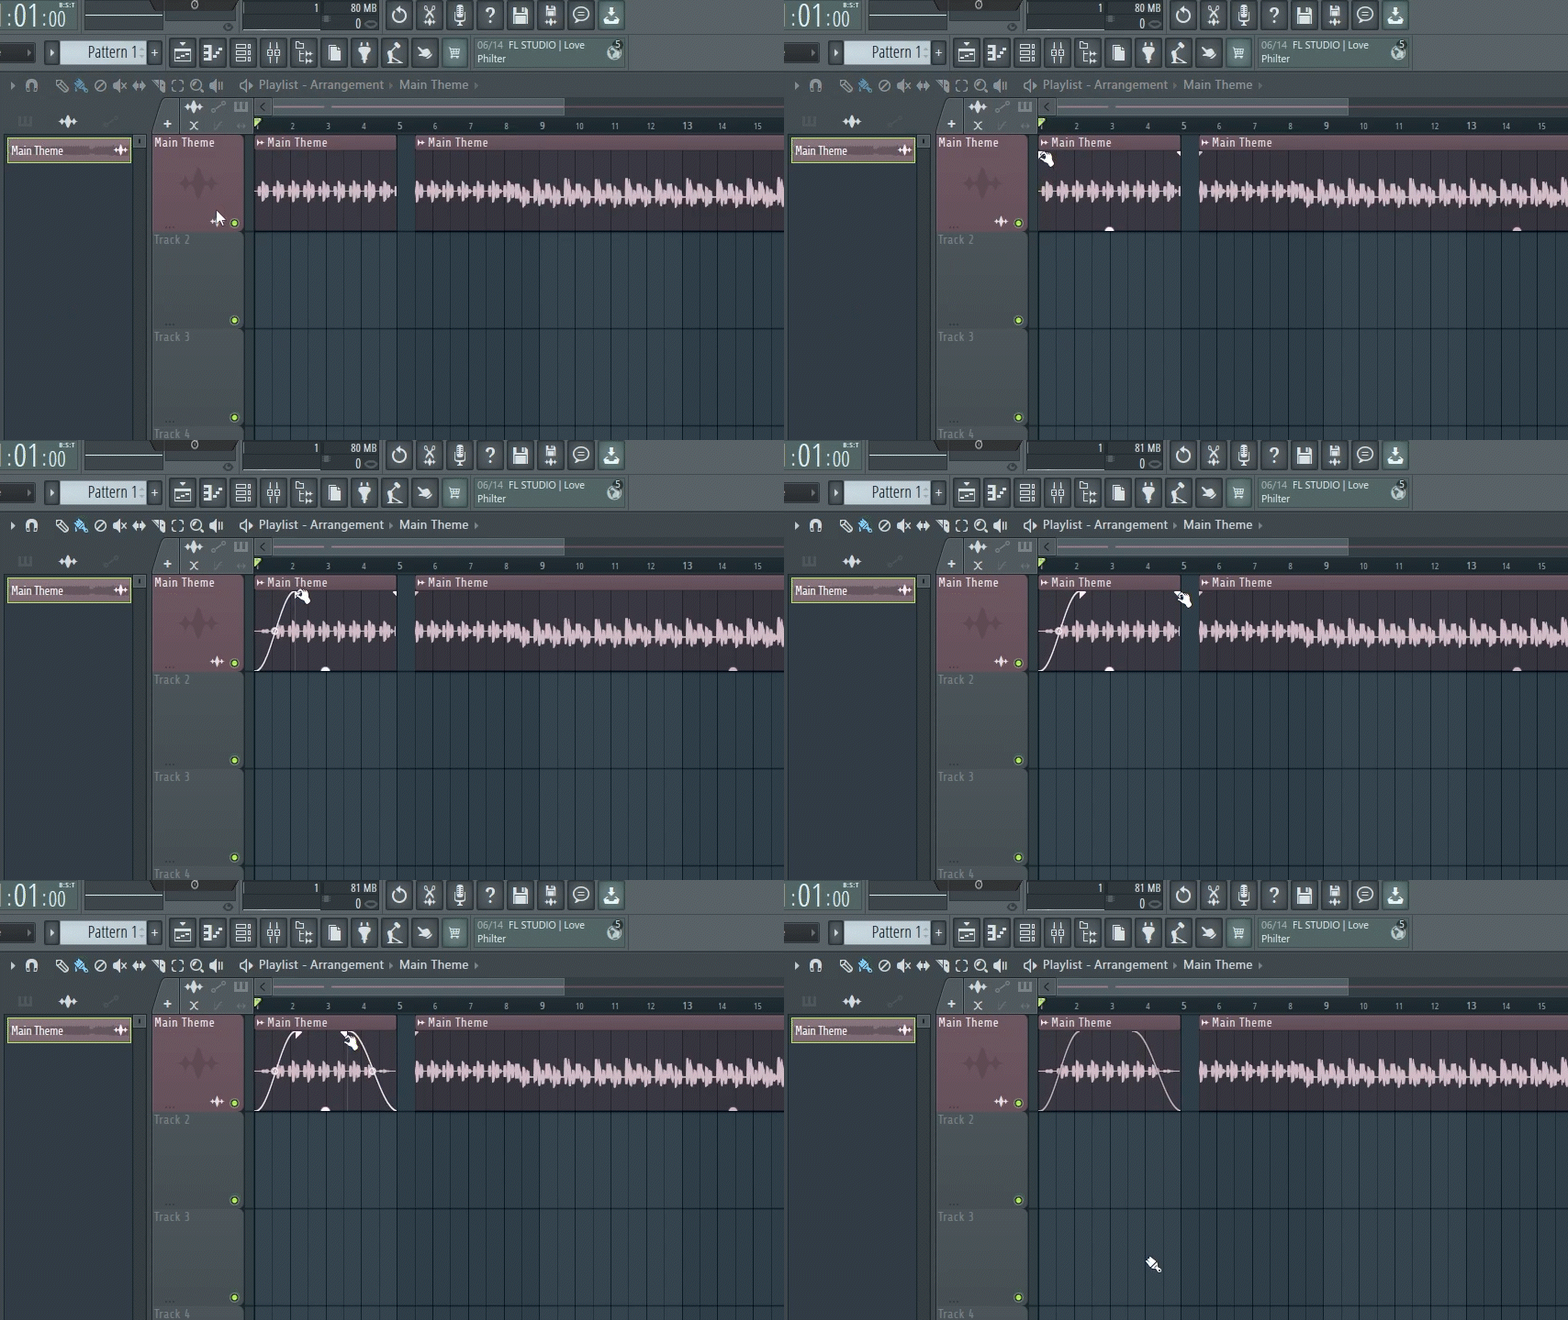
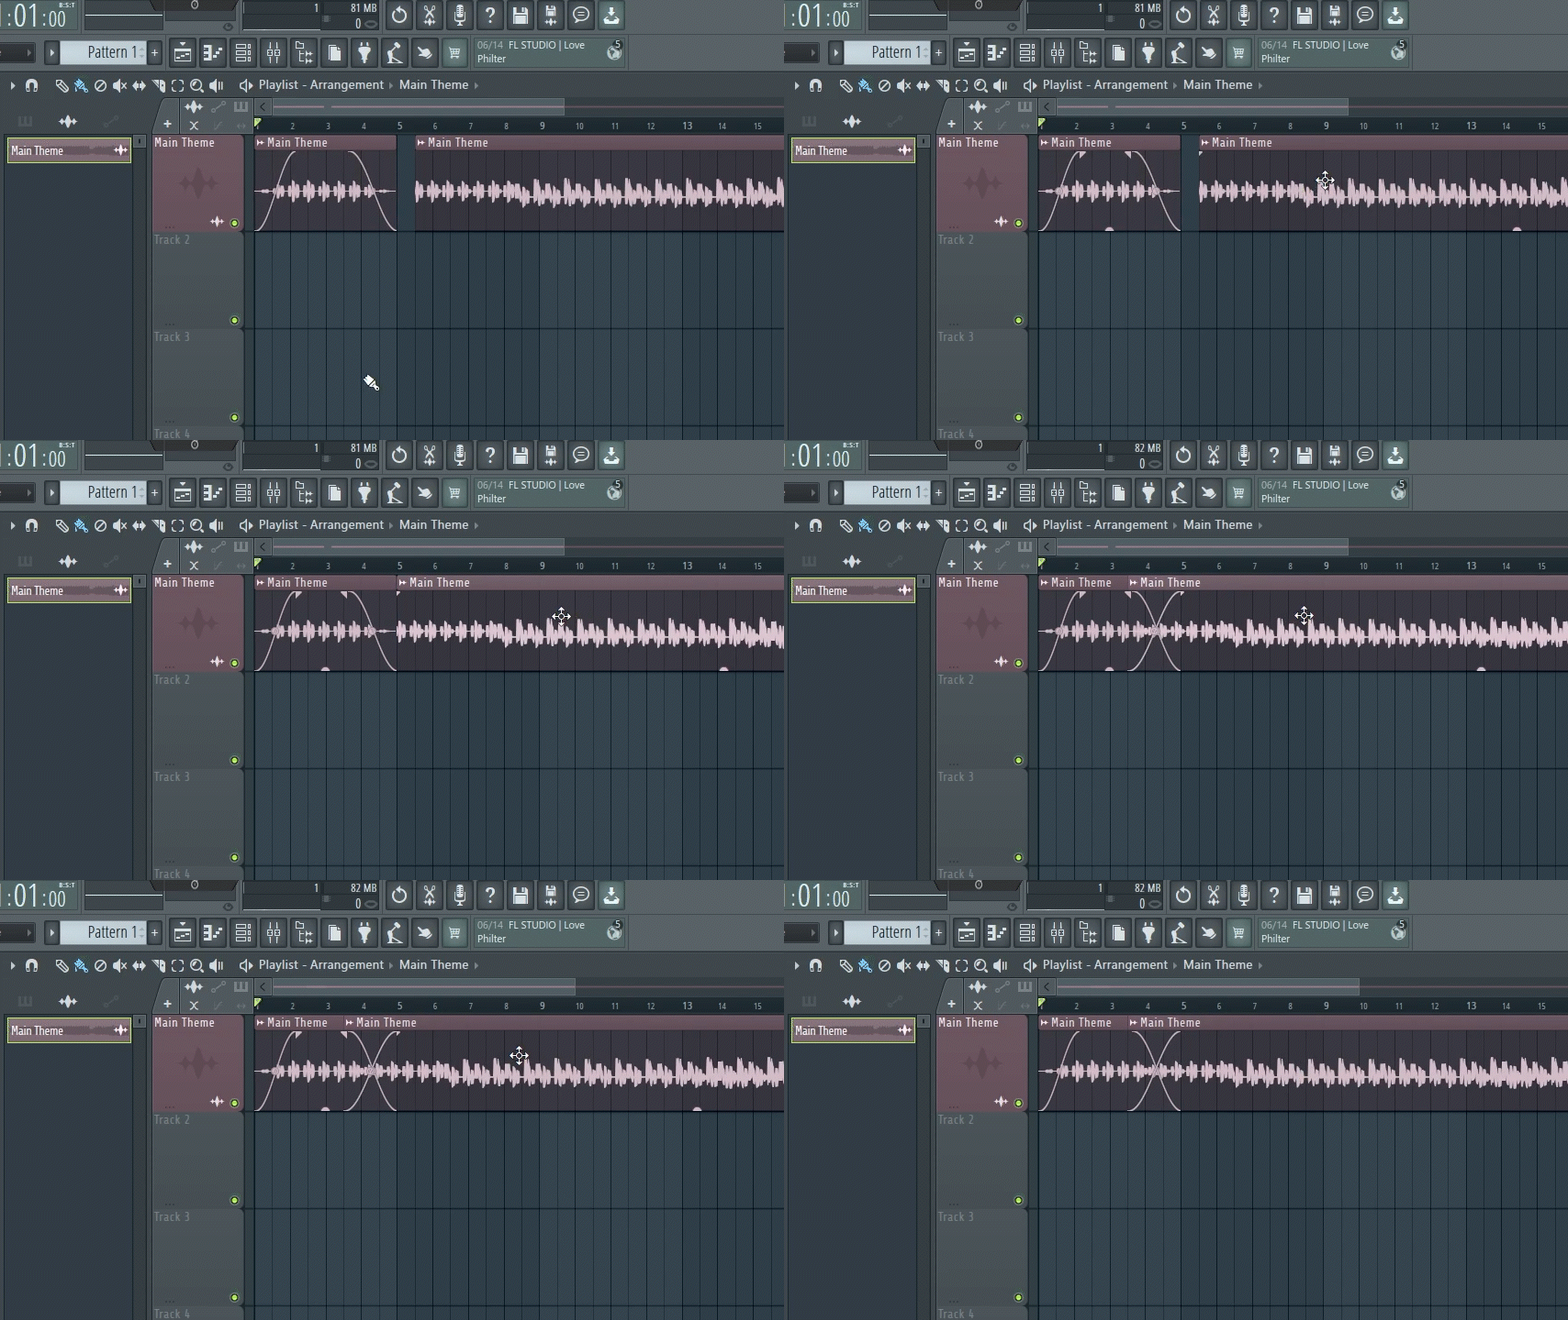
Crossfade
Blends two clips together, creating a smooth transition. When you drag a clip and it overlaps another clip, FL Studio automatically creates a crossfade
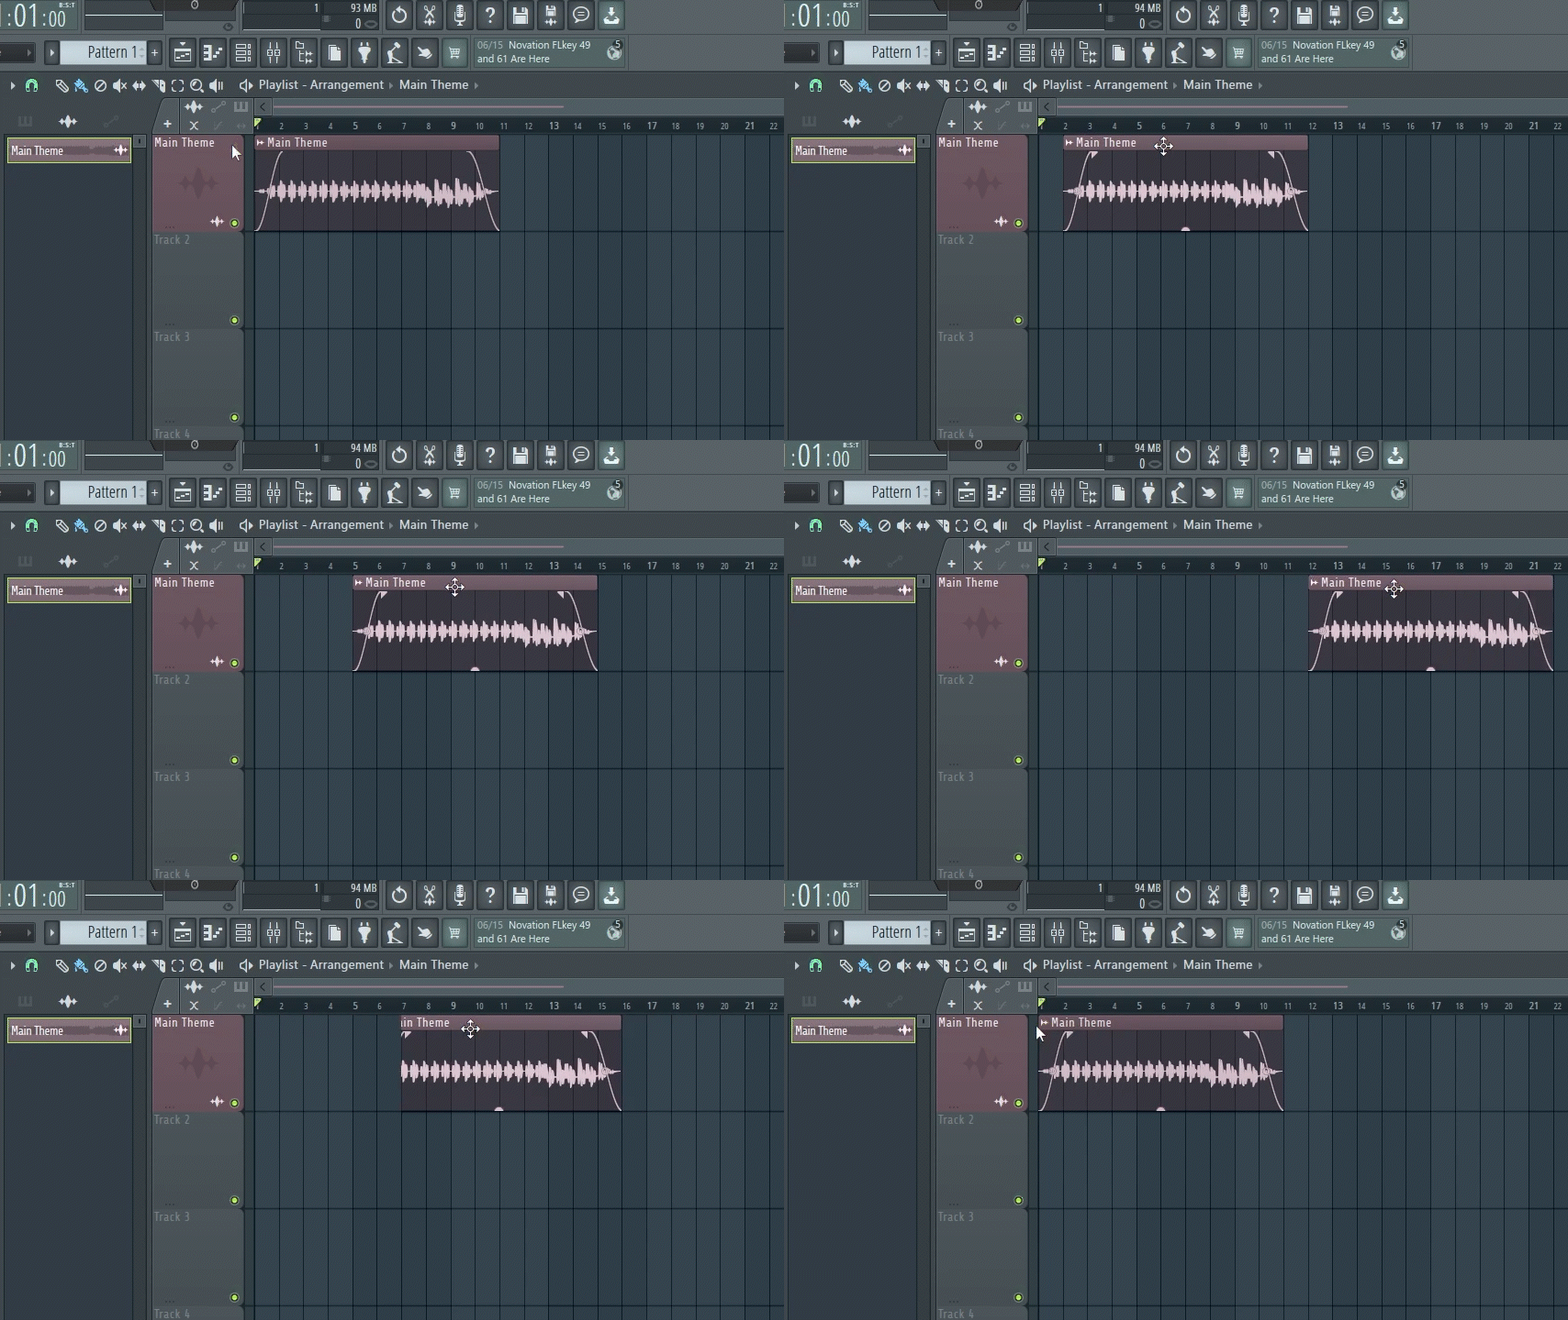
Slide
You can drag clips and slide them around the playlist to arrange in your desired position. Click on header of clip with draw or paint tool selected and drag horizontally.
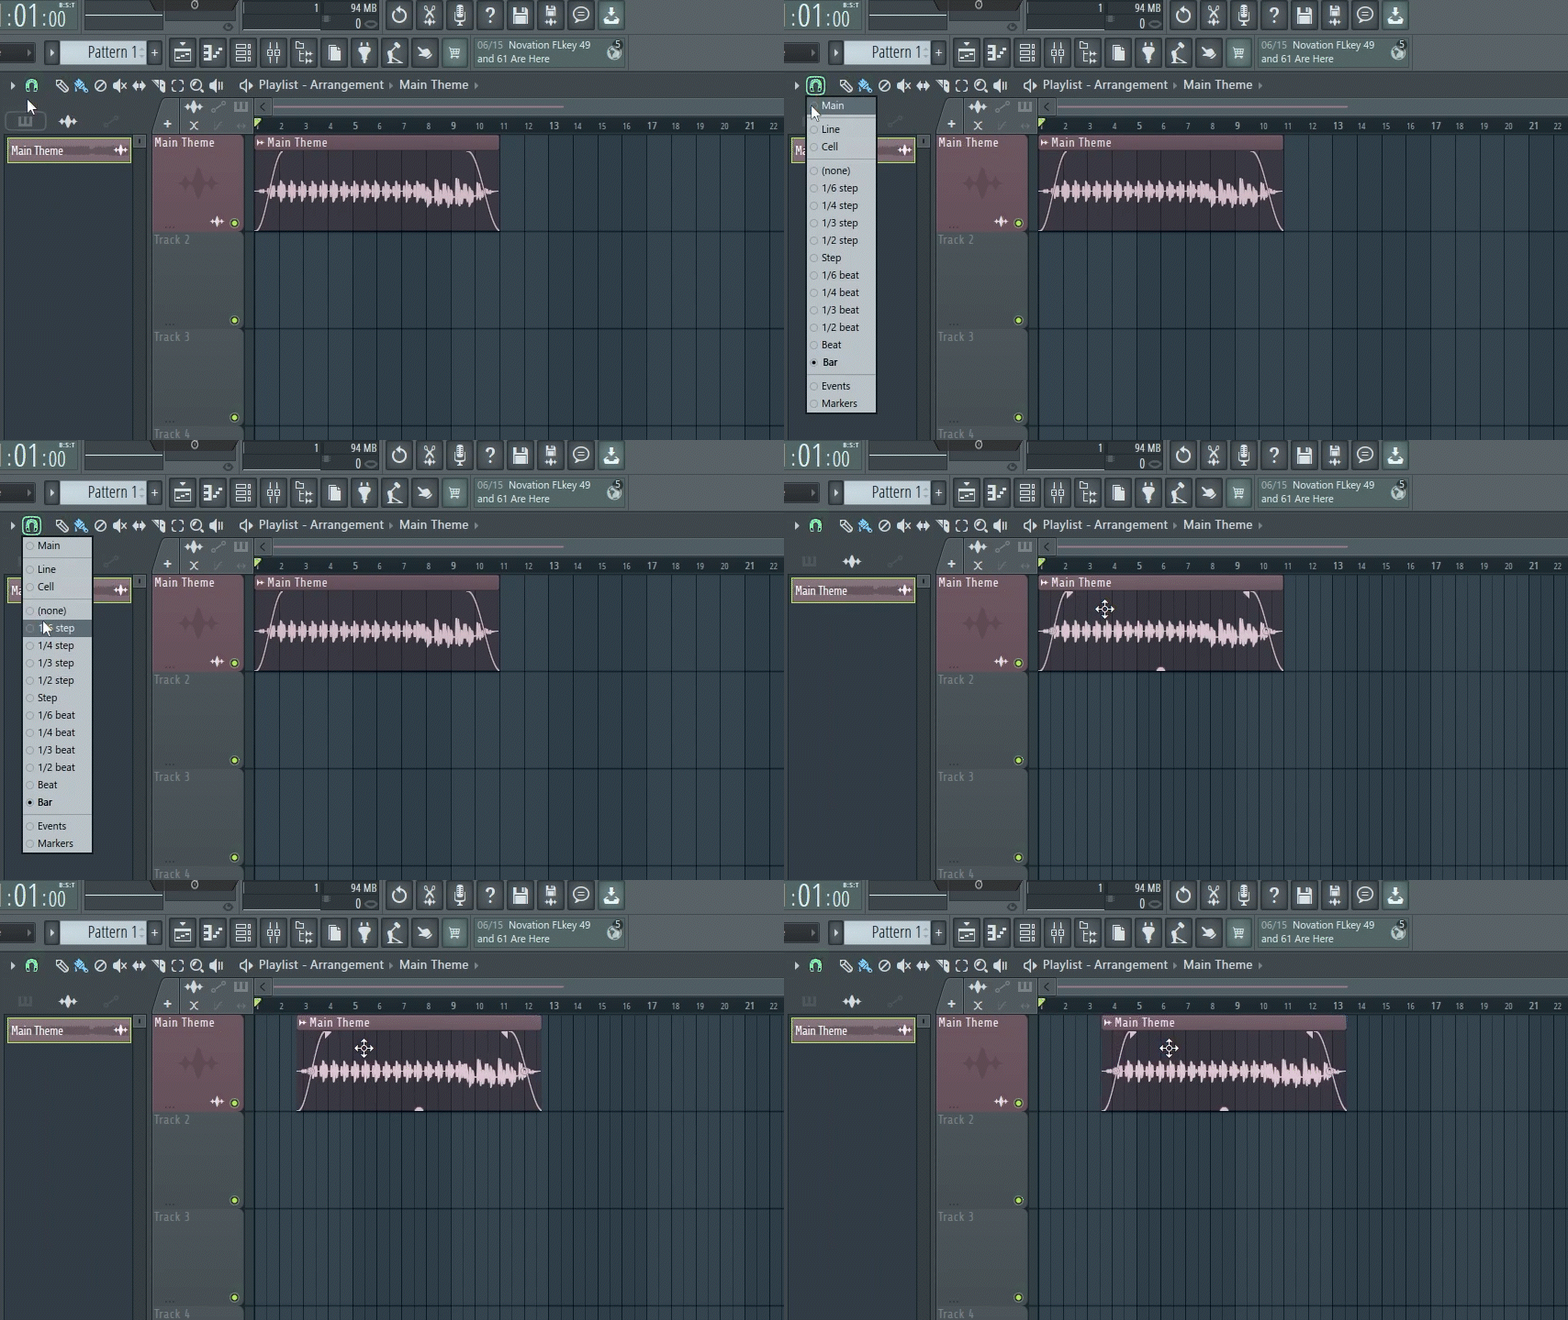
Snap
Normally sliding occurs in set increments, snapping onto the grid of the playlist. But, to get more precise, fine-tuned edits, set the snap to "none". This can be helpful for syncing things up! But it may throw your beat off the grid, so remember to switch it back to "bar" or whichever mode you were using.
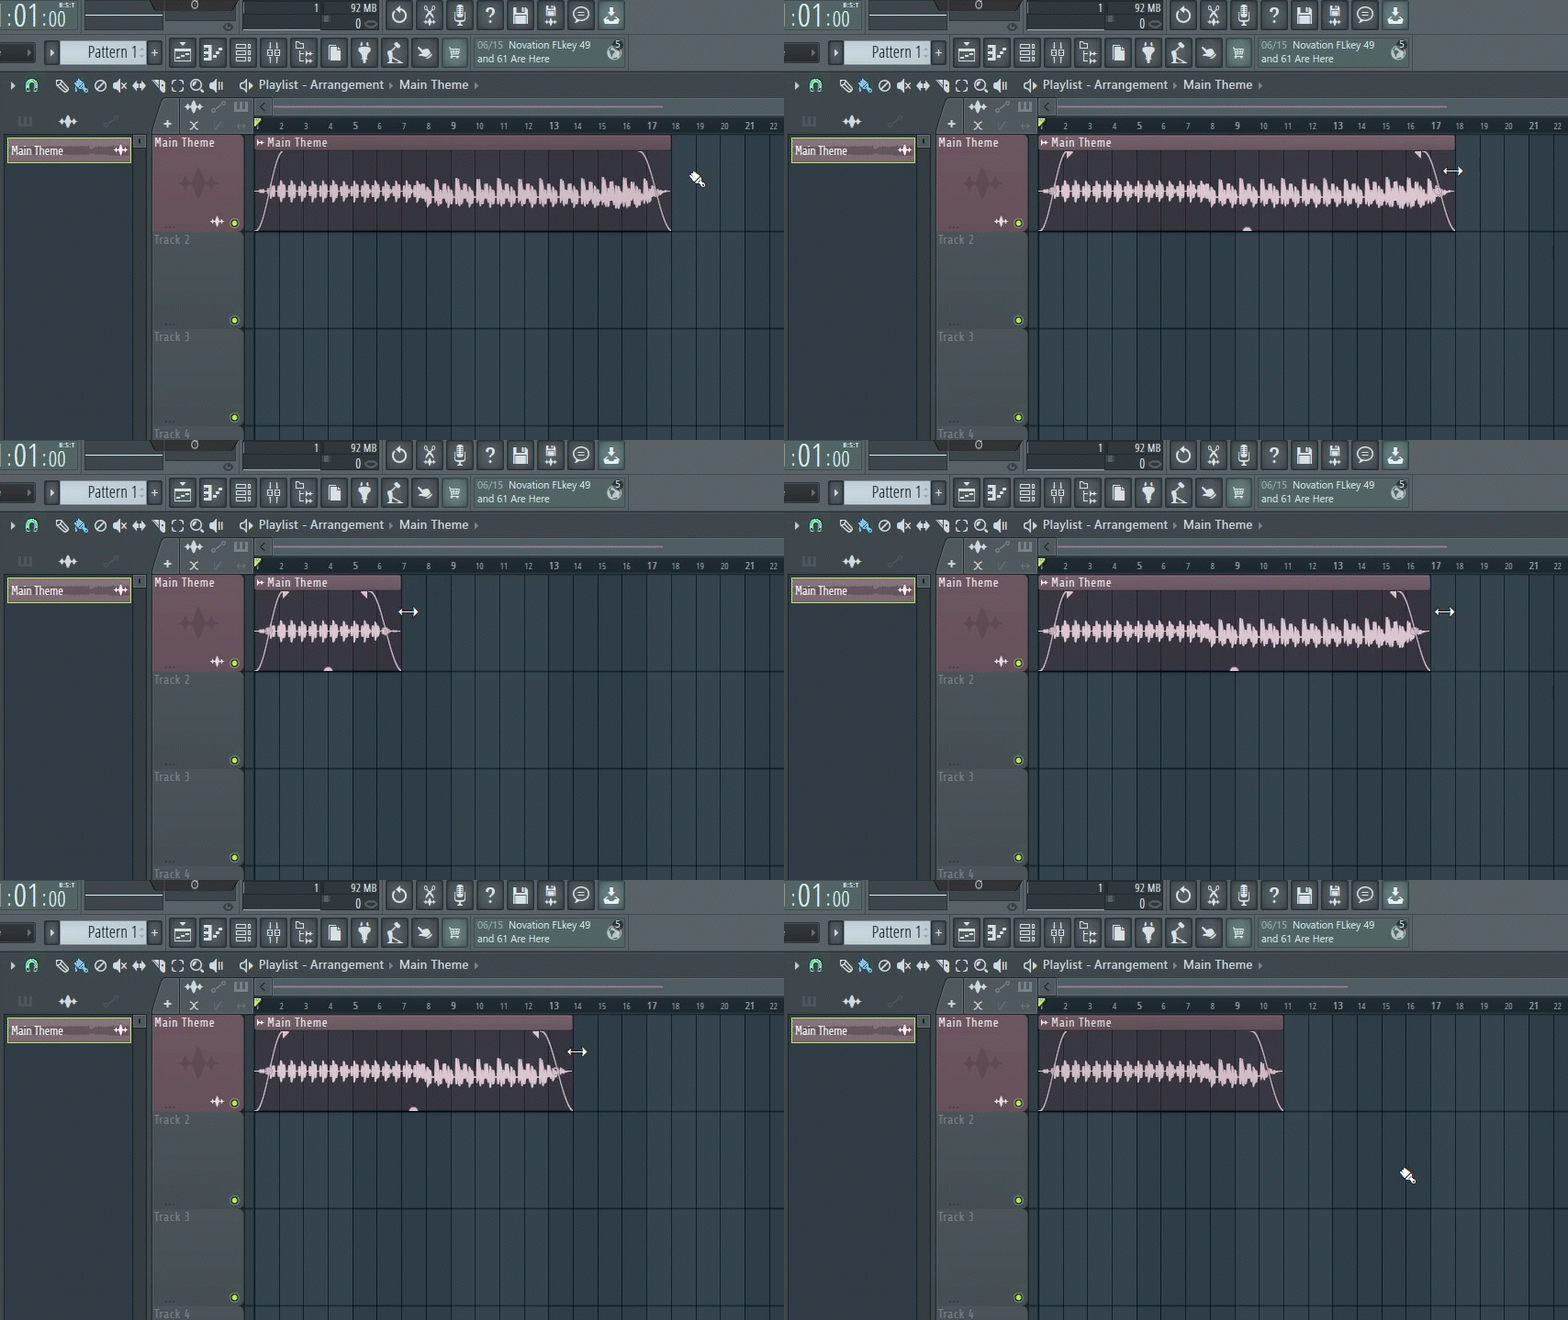
Trim
Adjust the length of your audio clip by shortening it either from the end or beginning. With brush or pencil tool selected, left click on edge of clip and drag in or out.
Volume and Pan
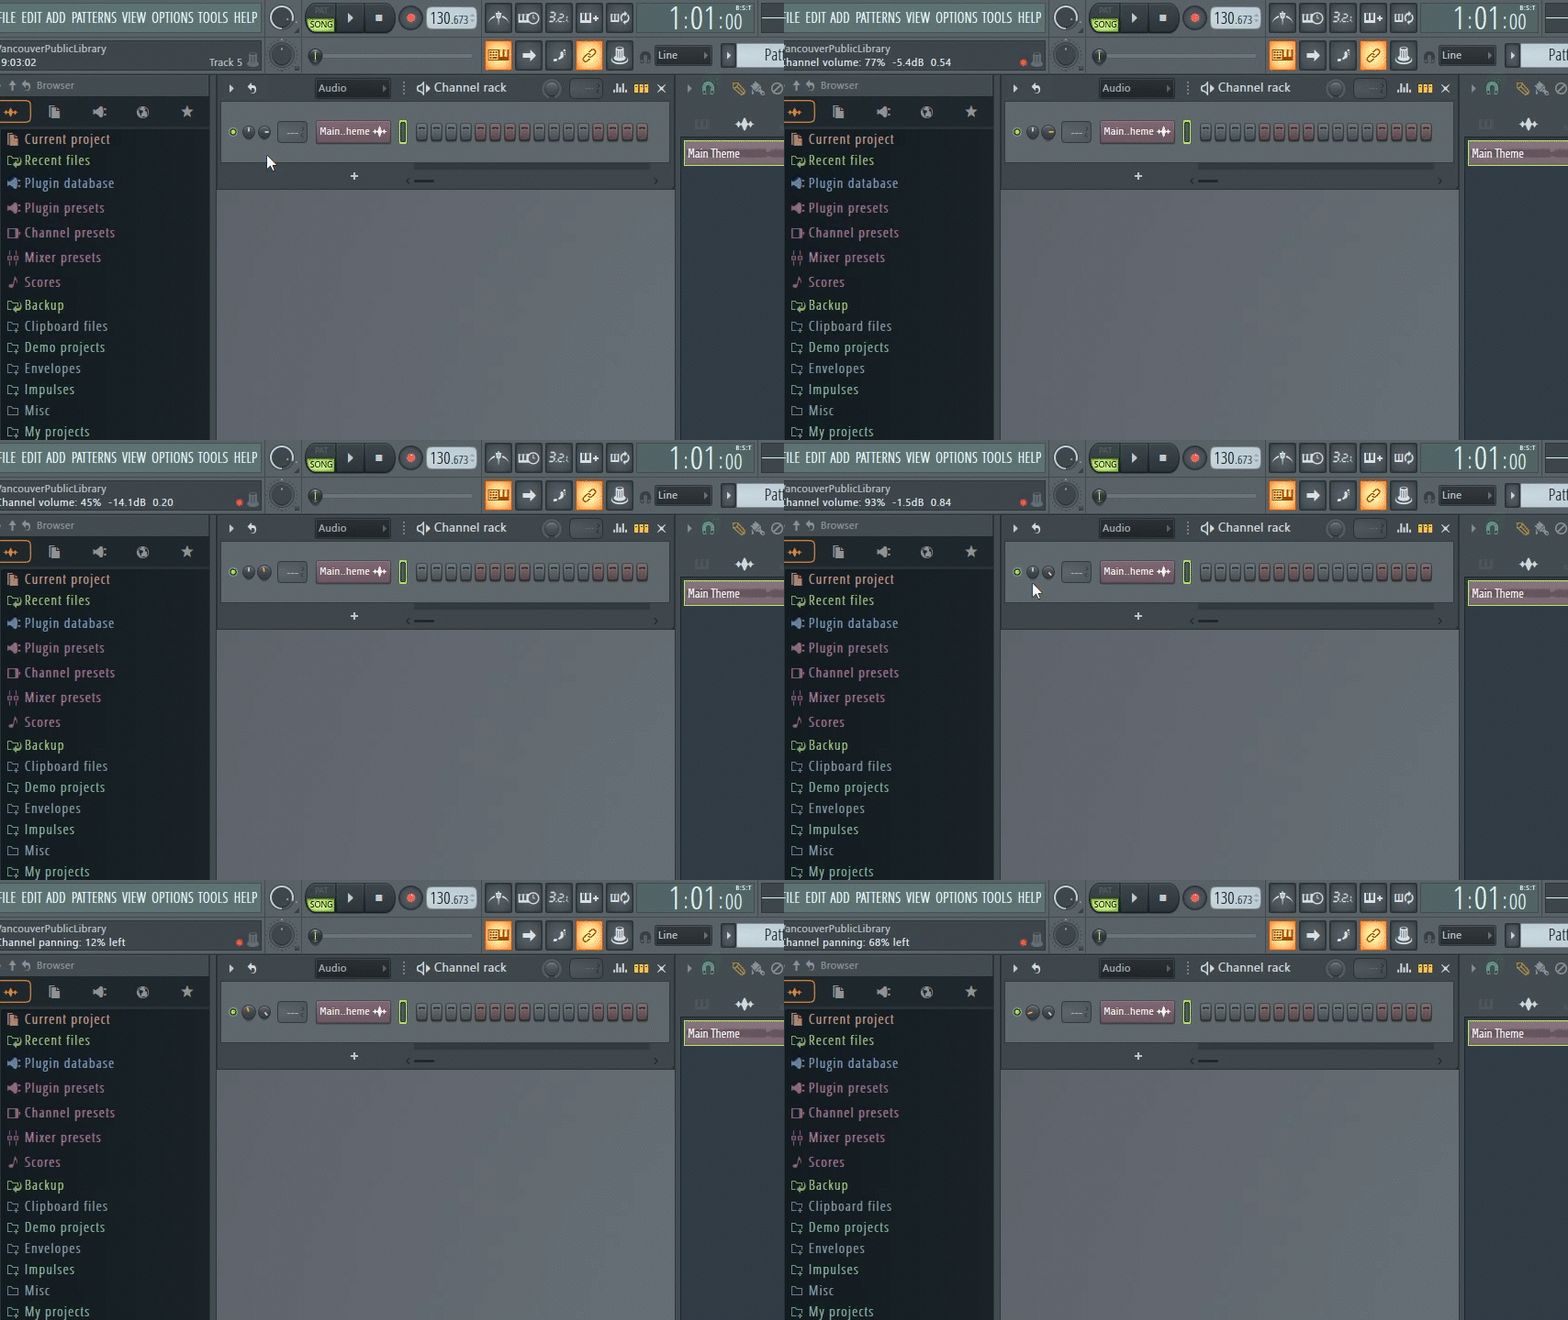
Use the volume dial next to the clip in the Channel Rack to lower or raise the volume of a clip. To adjust which side in the stereo field the audio on the clip is played from, use the pan dial located right next to the volume dial. You can also make adjustments to these in the mixer (F9).
Envelope
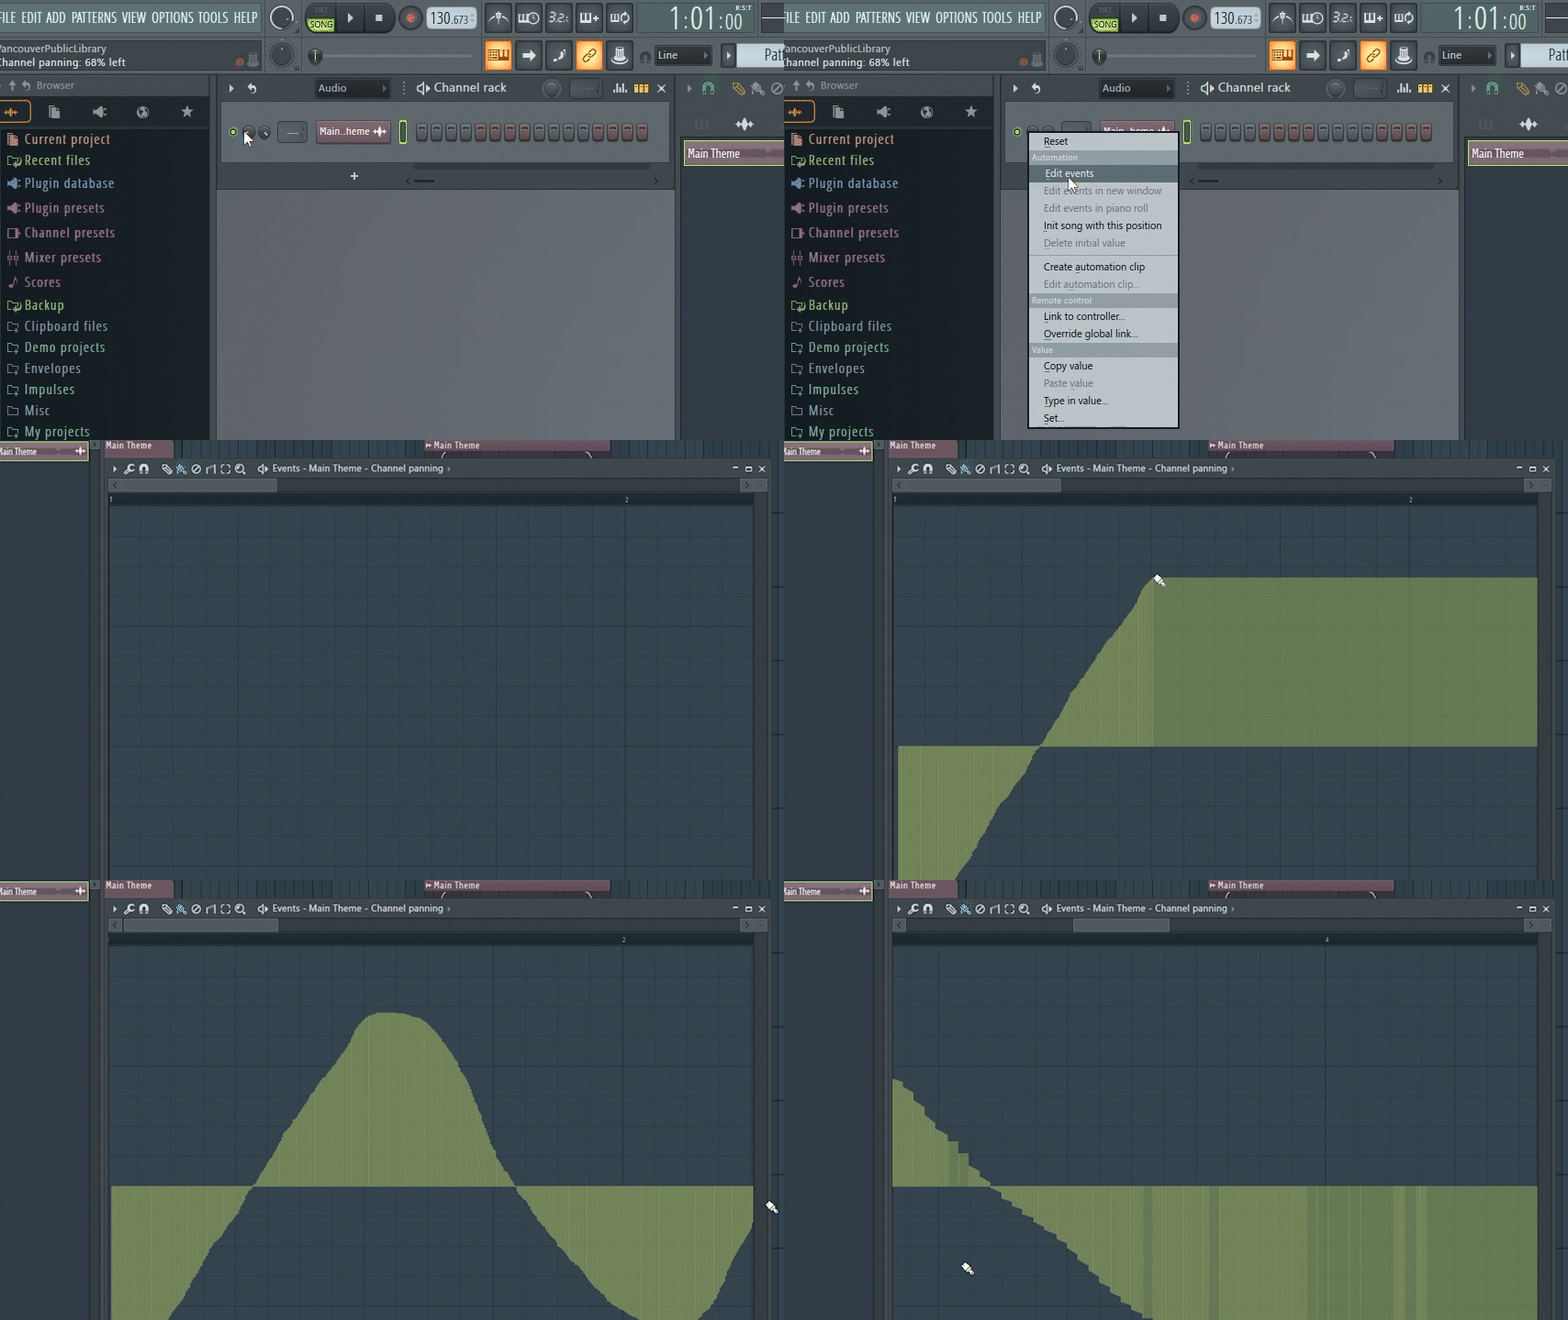
To make adjustments over time to the volume, pan, or any other effect parameter, create an envelope. This can be done by right clicking on a parameter and selecting "edit events". Left click and drag to create an envelope which will make real time adjustments to the parameter as the clip plays.
Selection Tool
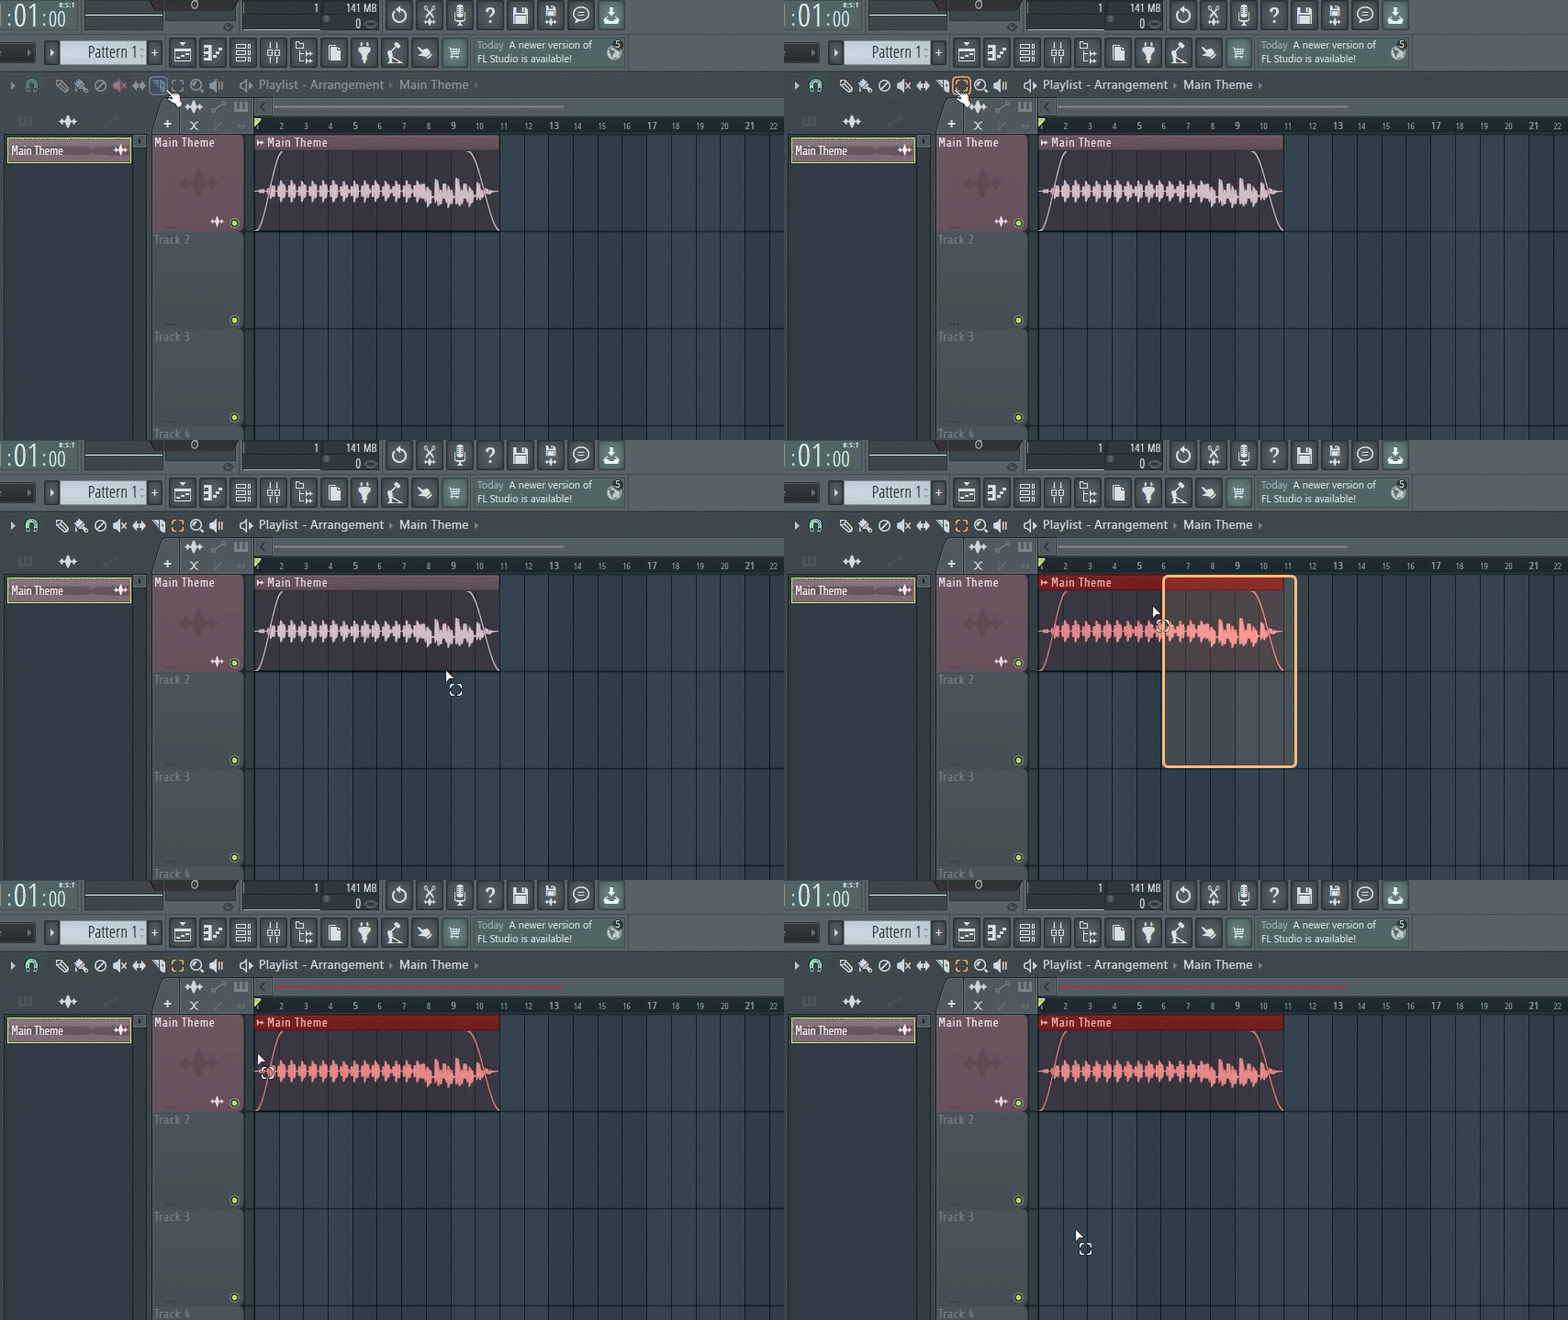
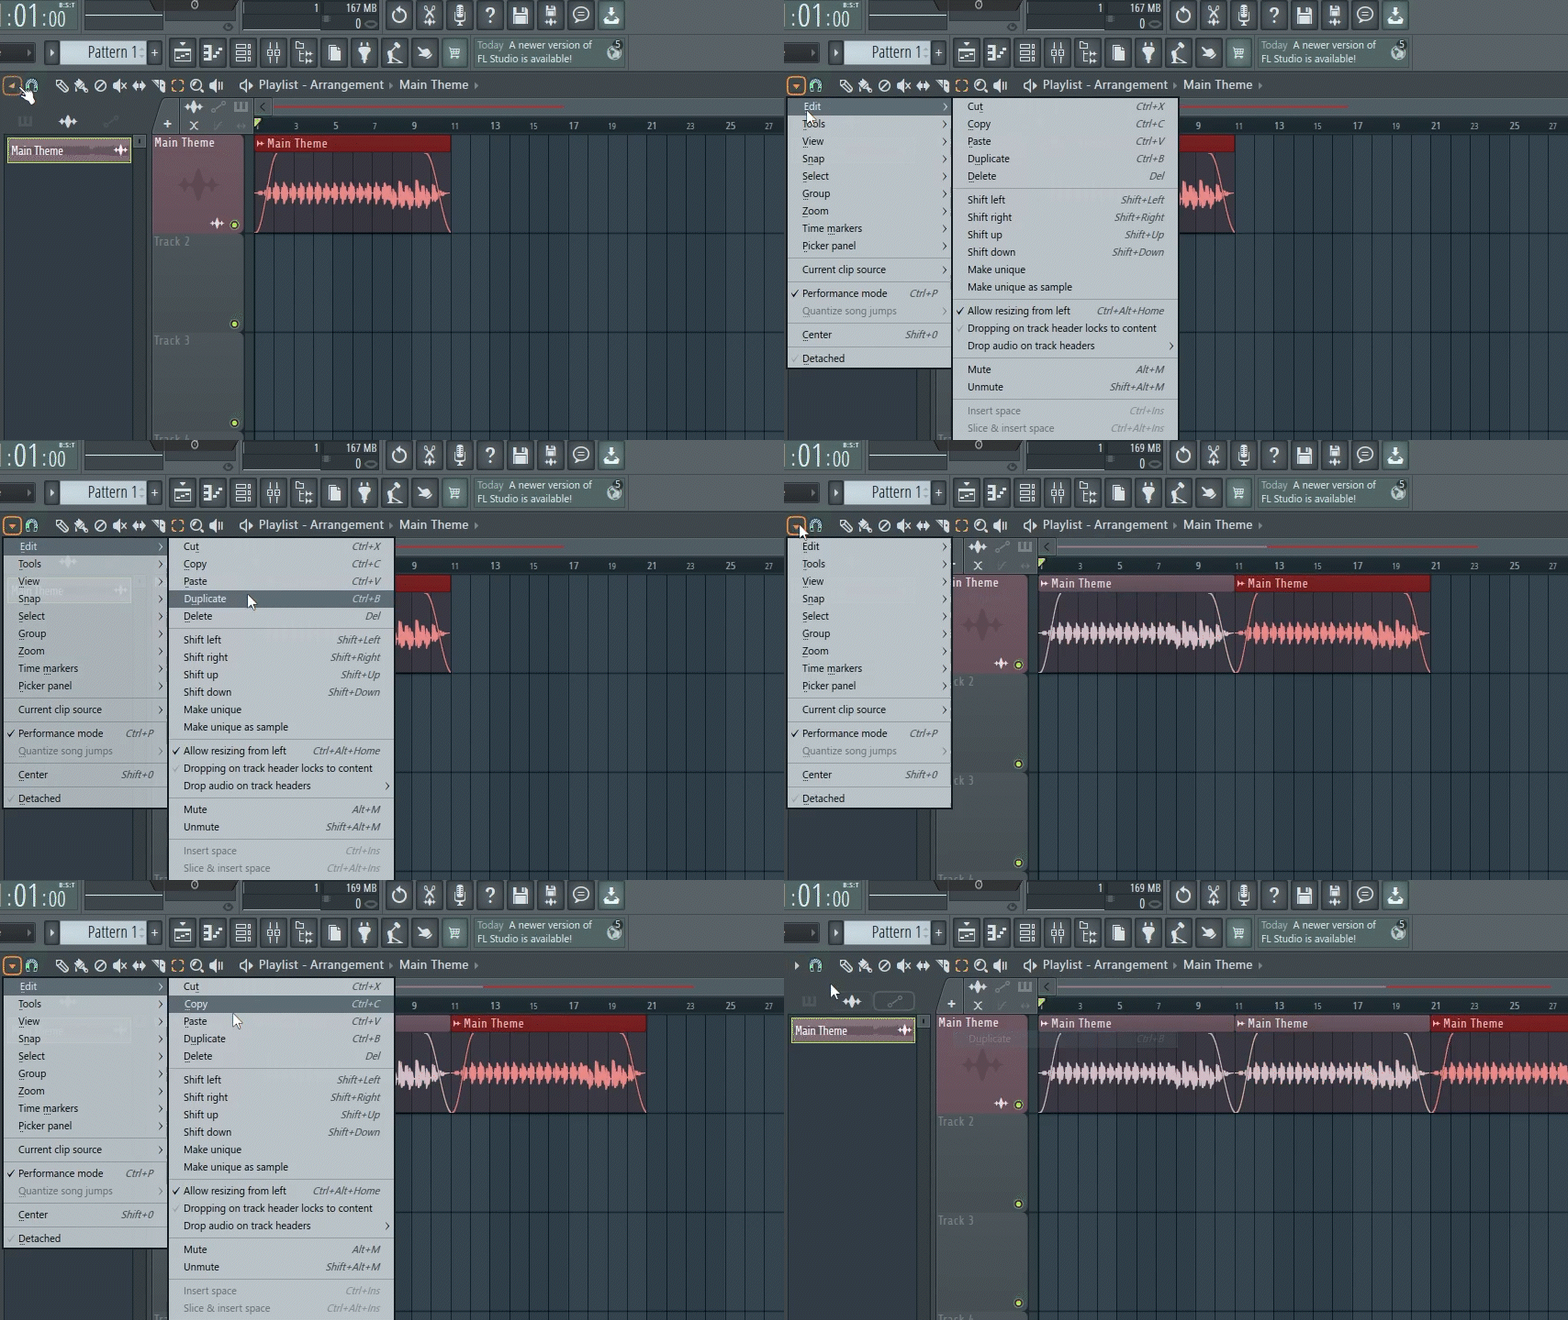
Select your clip. This helps if you want to copy and paste or duplicate your clip.
Duplicate
This will create a copy of your clip and paste it right after the previous clip in the playlist. Helpful for looping. (Ctrl+D)
Normalize Audio
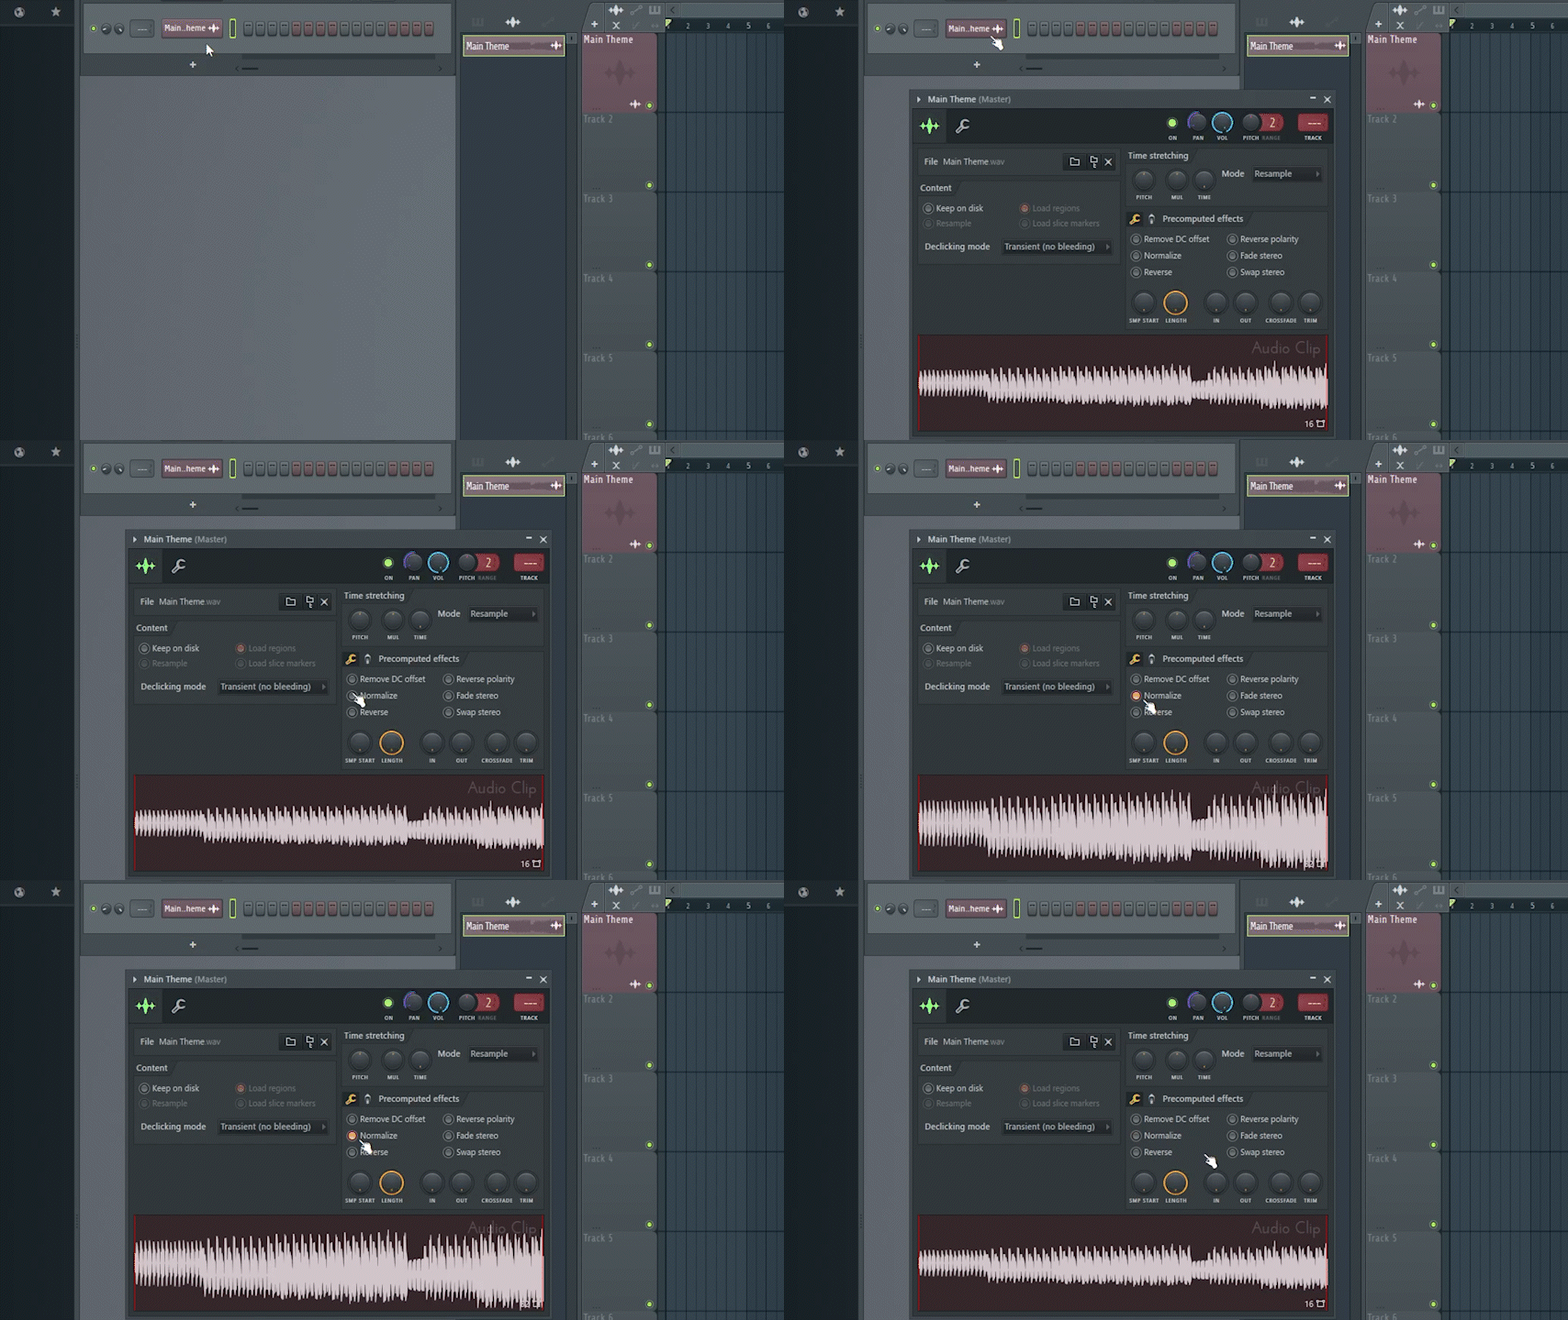
Normalization is a tool to apply an even amount of “gain” to the entire recording or clip, matching it to a target level, (the norm)
2 reasons you might normalize are:
- Maxing out the volume – If you have a quiet audio file you may want to make it as loud as possible (0 dBFS ) without changing its dynamic range.
- Matching the volume– If you have a group of audio files at different volumes you may want to make them all as close as possible to the same volume. It may be individual snare hits or even full mixes.
In order to access the normalize command, left click on the audio clip in the channel rack. Then click "Normalize"
Reverse Audio
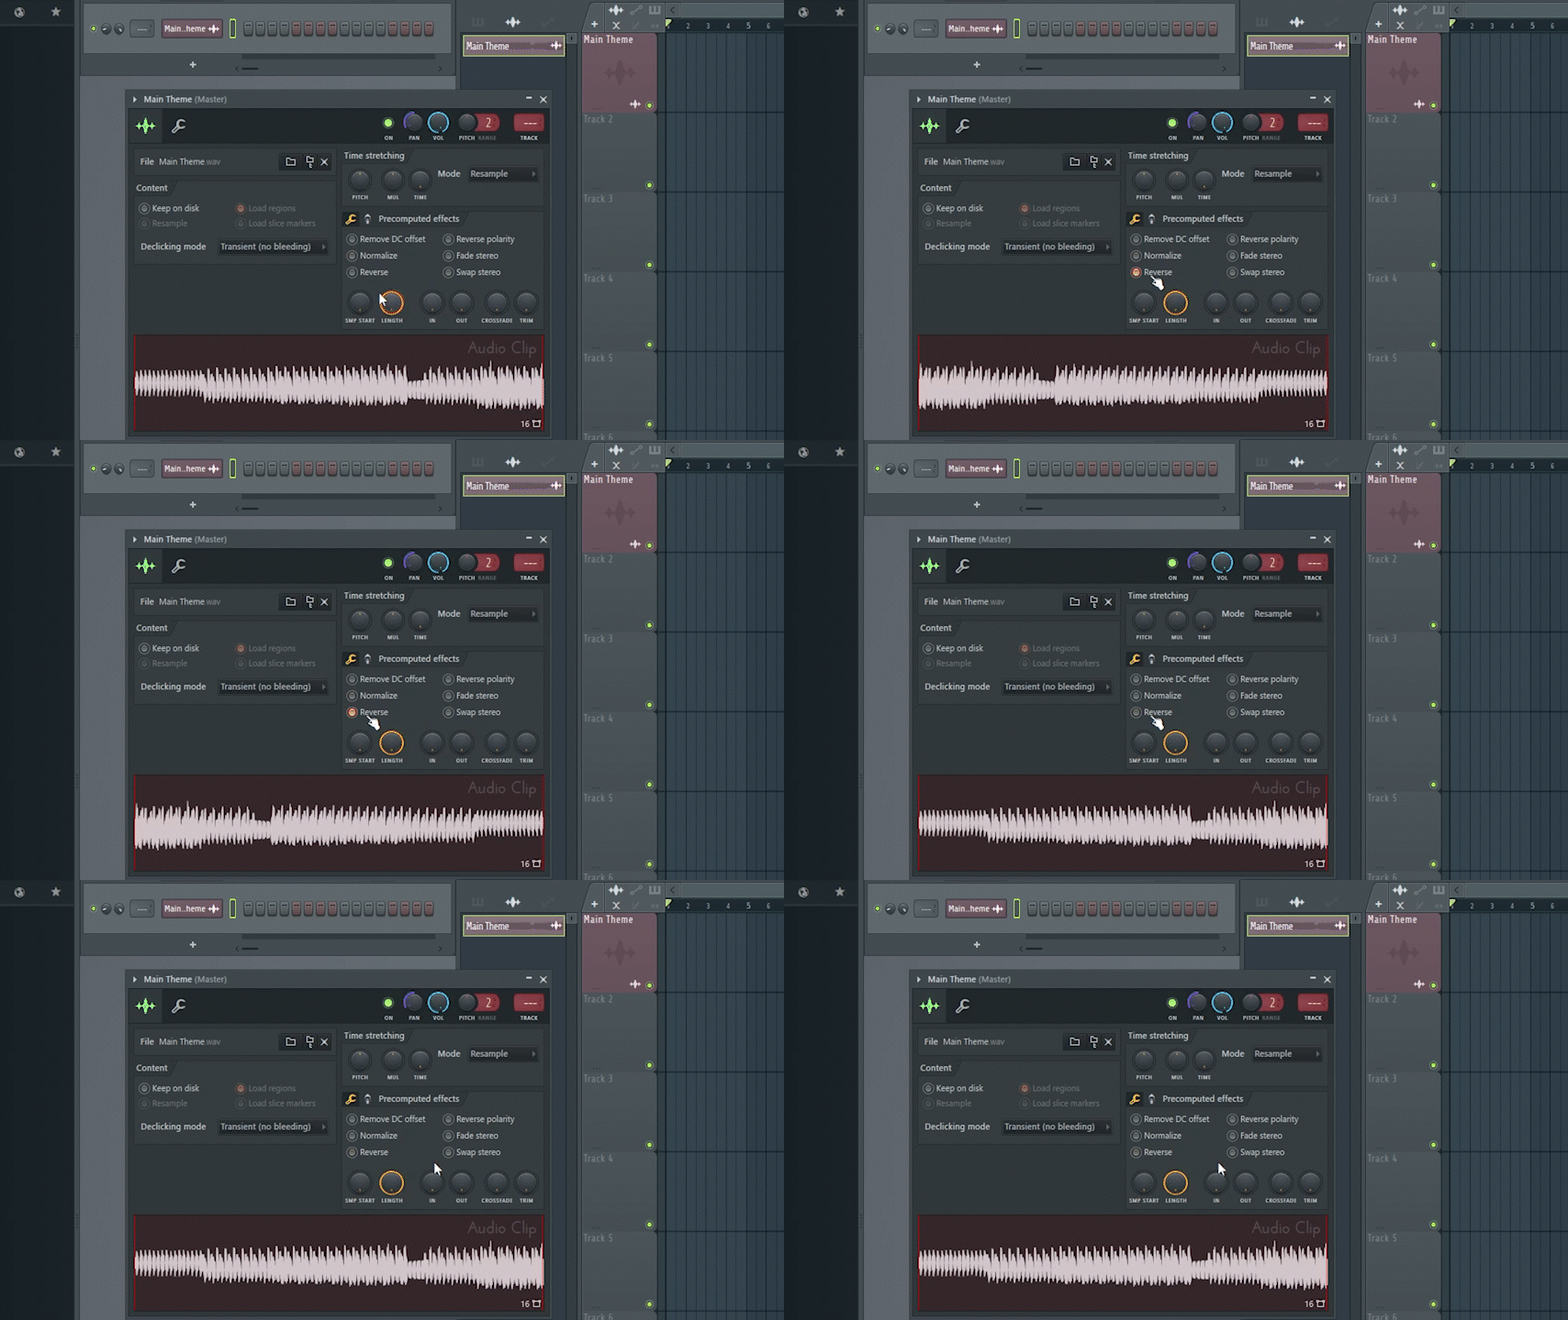
Turn your audio backwards with the"reverse" option in the audio clip settings, accessed by left clicking on the clip in the Channel Rack.
Using the Mixer
Content under construction
