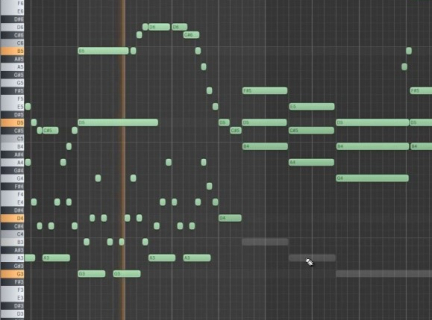
Working with MIDI in FL Studio

The following are some basics on MIDI and how to record and edit MIDI notes and information to help you create your song!
What is MIDI?
MIDI is:
information that controls virtual instruments on programs like FL Studio.
MIDI is not:
audio, and MIDI never sends audio signal!
Virtual instruments, samples, and plugins produce audio based on MIDI information.
MIDI information:
Note: Note or combination of notes
Timing: When you hit the note and when you release the note. (This is also called Note On and Note Off)
Velocity: How hard the note is played. Some virtual instruments change in volume and tenor depending on the intensity of velocity. Velocity helps capture the expressiveness of a musical performance.
Why use MIDI?
MIDI is fun, exciting and easy!
Using a MIDI controller, you can play any number of acoustic or electric instruments without having to spend time mastering playing skills and without having any previous experience!
MIDI is editable! You can fix mistakes, adjust notes and timing, and make the performance dynamic with velocity.
Recording MIDI
There are two different ways record MIDI: with a computer mouse, or with a MIDI keyboard.
1. Computer Mouse.
You can use the computer mouse to "draw" notes onto the piano roll:

2. MIDI Controller
You can live record MIDI with a MIDI keyboard or drum pad controller. This captures not only your notes, but how long you play them and how hard you play them.

Recording MIDI Setup
MIDI Keyboard Setup with FL Studio
Step by Step:
- Connect MIDI controller to computer using supplied USB cable
- Connect sustain pedal to keyboard if desired
- In FL Studio open MIDI settings (F10)
- Under input, enable Keystation 49 MK3 for the keyboard or AKAI MPD218 USB PAD CONTROLLER for the drum pad
- Test MIDI device by playing notes. You should see see "note on" "note off" indications in the Hint Panel if MIDI is functioning.
Recording using the MIDI Keyboard in FL Studio
Step by Step:
- Select the Channel you want to record to. (you may want to add a synth or instrument, the defaults are just drum samples.)
- Play a note on the controller to test the sound
- Switch playback mode to Pattern.
- Left click on the record button. When prompted, select "notes and automation".
- Optional, enable metronome and countdown before recording.
- Hit play button to start recording. Start playing the keyboard
- Hit Stop to finish recording.
Tip: To hear other patterns playing during your recording process, switch to Song playback mode and navigate the Playlist
Editing MIDI
MIDI Editing Basic Tools
Here are four common tools you'll use when editing MIDI in the Piano Roll.
- Draw - adds a single note to piano roll grid
- Paint - can paint multiple notes in succession onto the grid
- Slice - splits a note in into 2 parts at slice location
- Select - select a single note, or drag and create a marquee to select groups of notes
Perform the following editing functions in the Piano Roll with the pencil or paint tool selected.
Delete MIDI Notes
Right click on MIDI notes to delete them.

Change Note Position
Change the note position by left clicking on it and dragging it around the grid.

Adjust Length of Notes
Left click on the edge of the note and drag in or out to increase or decrease the length of the note.

Adjust the Velocity
Left click and drag the velocity handles at the bottom window of the piano roll to adjust the velocity of the notes.

