Audio Editing with REAPER
Now that you have something recorded, it's time to start thinking about doing some editing. This page has instructions and descriptions on some basic audio editing tools in REAPER.
Volume Adjustments
The most common form of audio editing and mixing is making volume adjustments. These are a few scenarios where you would want to adjust the volume:
- a person talking more quietly during a podcast than the other podcasters
- a loud instrument in a band recording drowning out the others
- a very low overall volume for a recording
In Reaper there are multiple areas to make volume adjustments. They are outlined below:
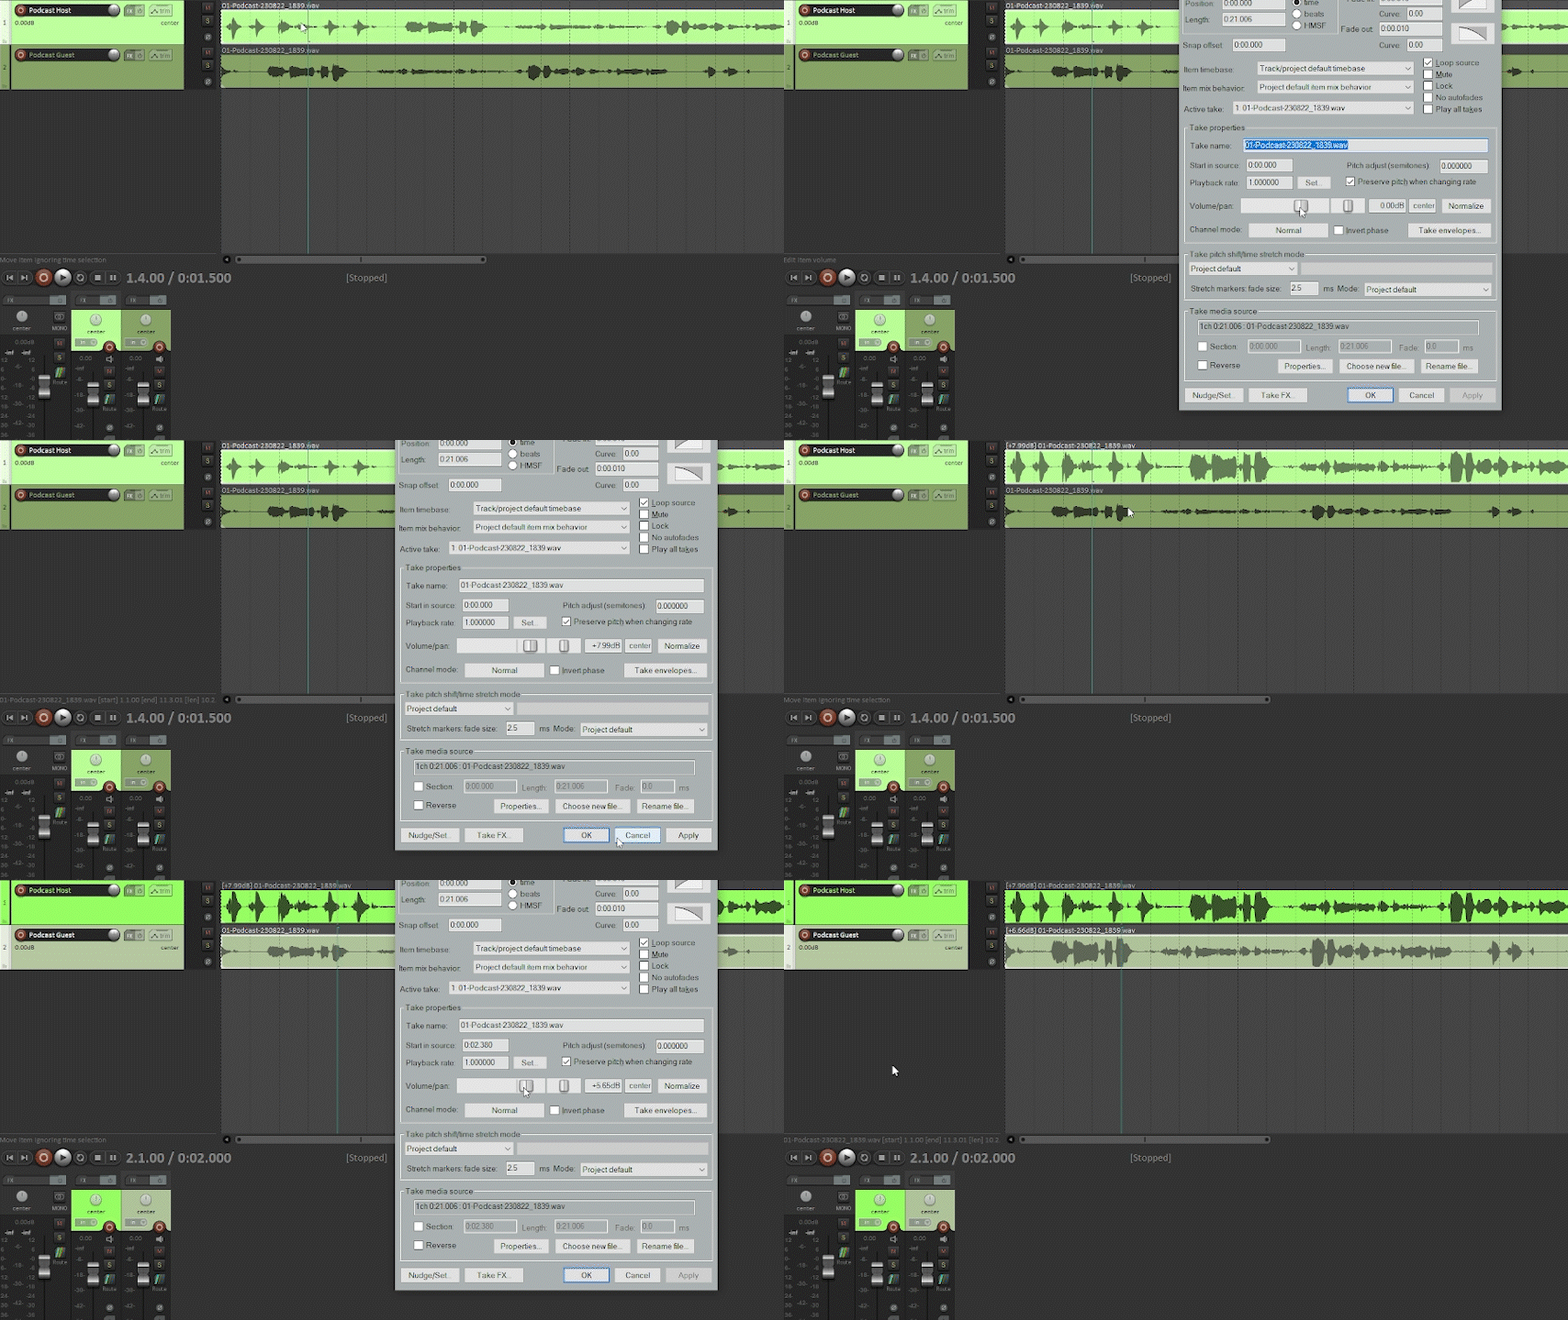
1. Individual Clip Volume Adjustment
Adjust volume for just that clip
2. Track Volume Adjustment
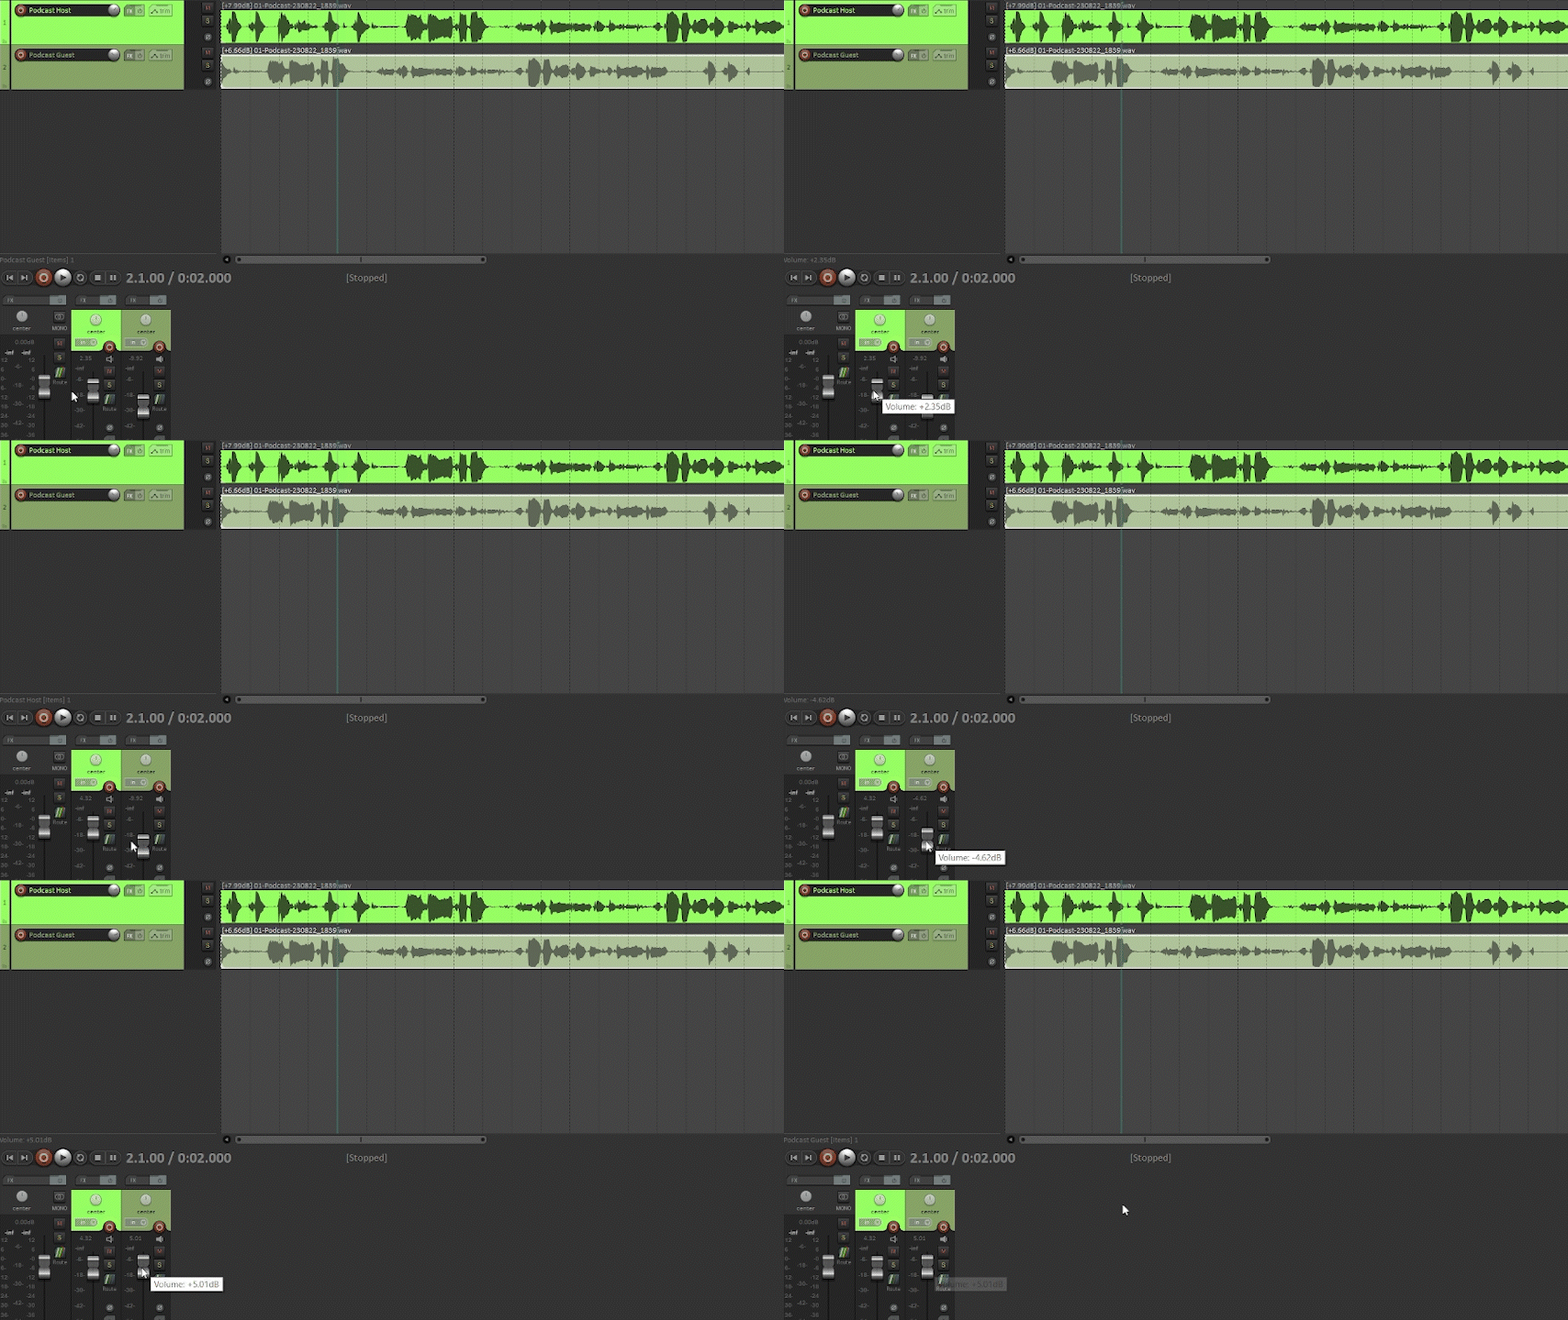
Adjust volume for the entire track, which adds the same volume adjustment to all clips located on that track. There are two locations to adjust this:
a) the track bar
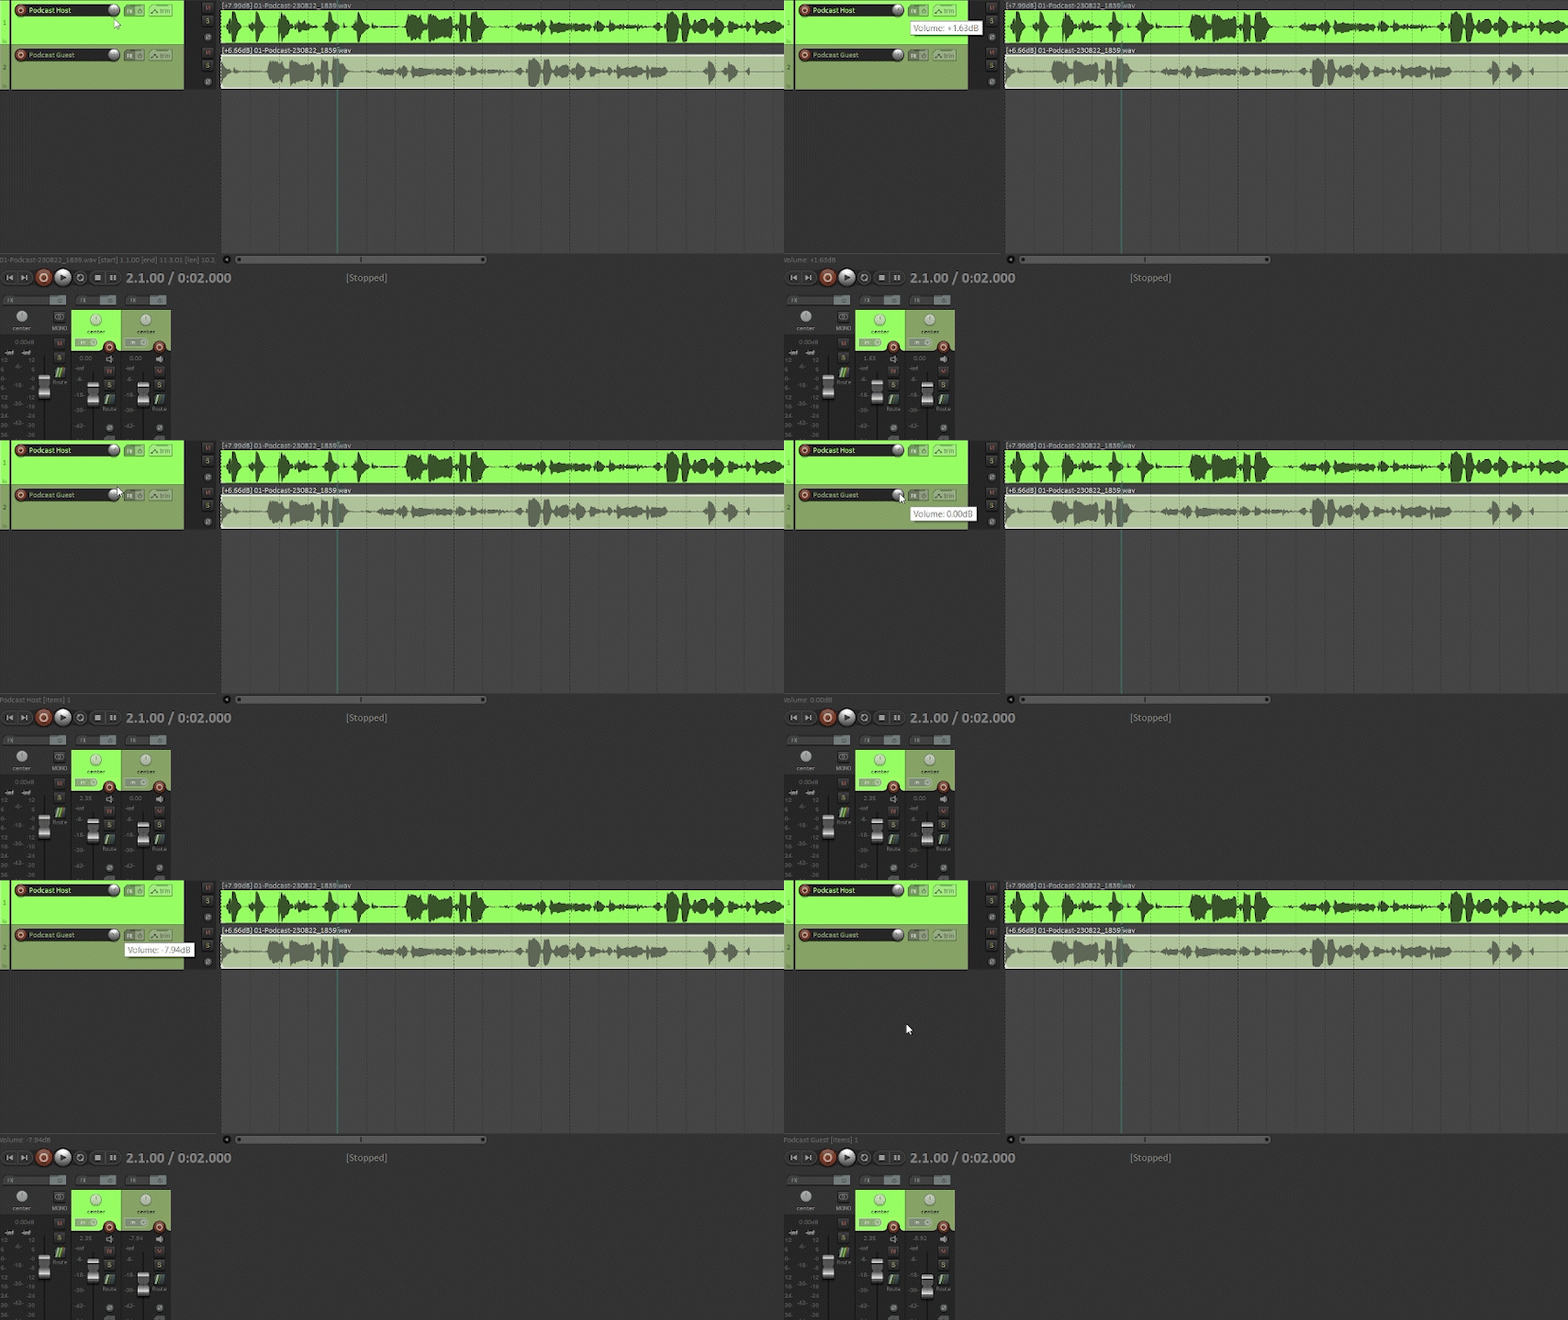
b) the mixer
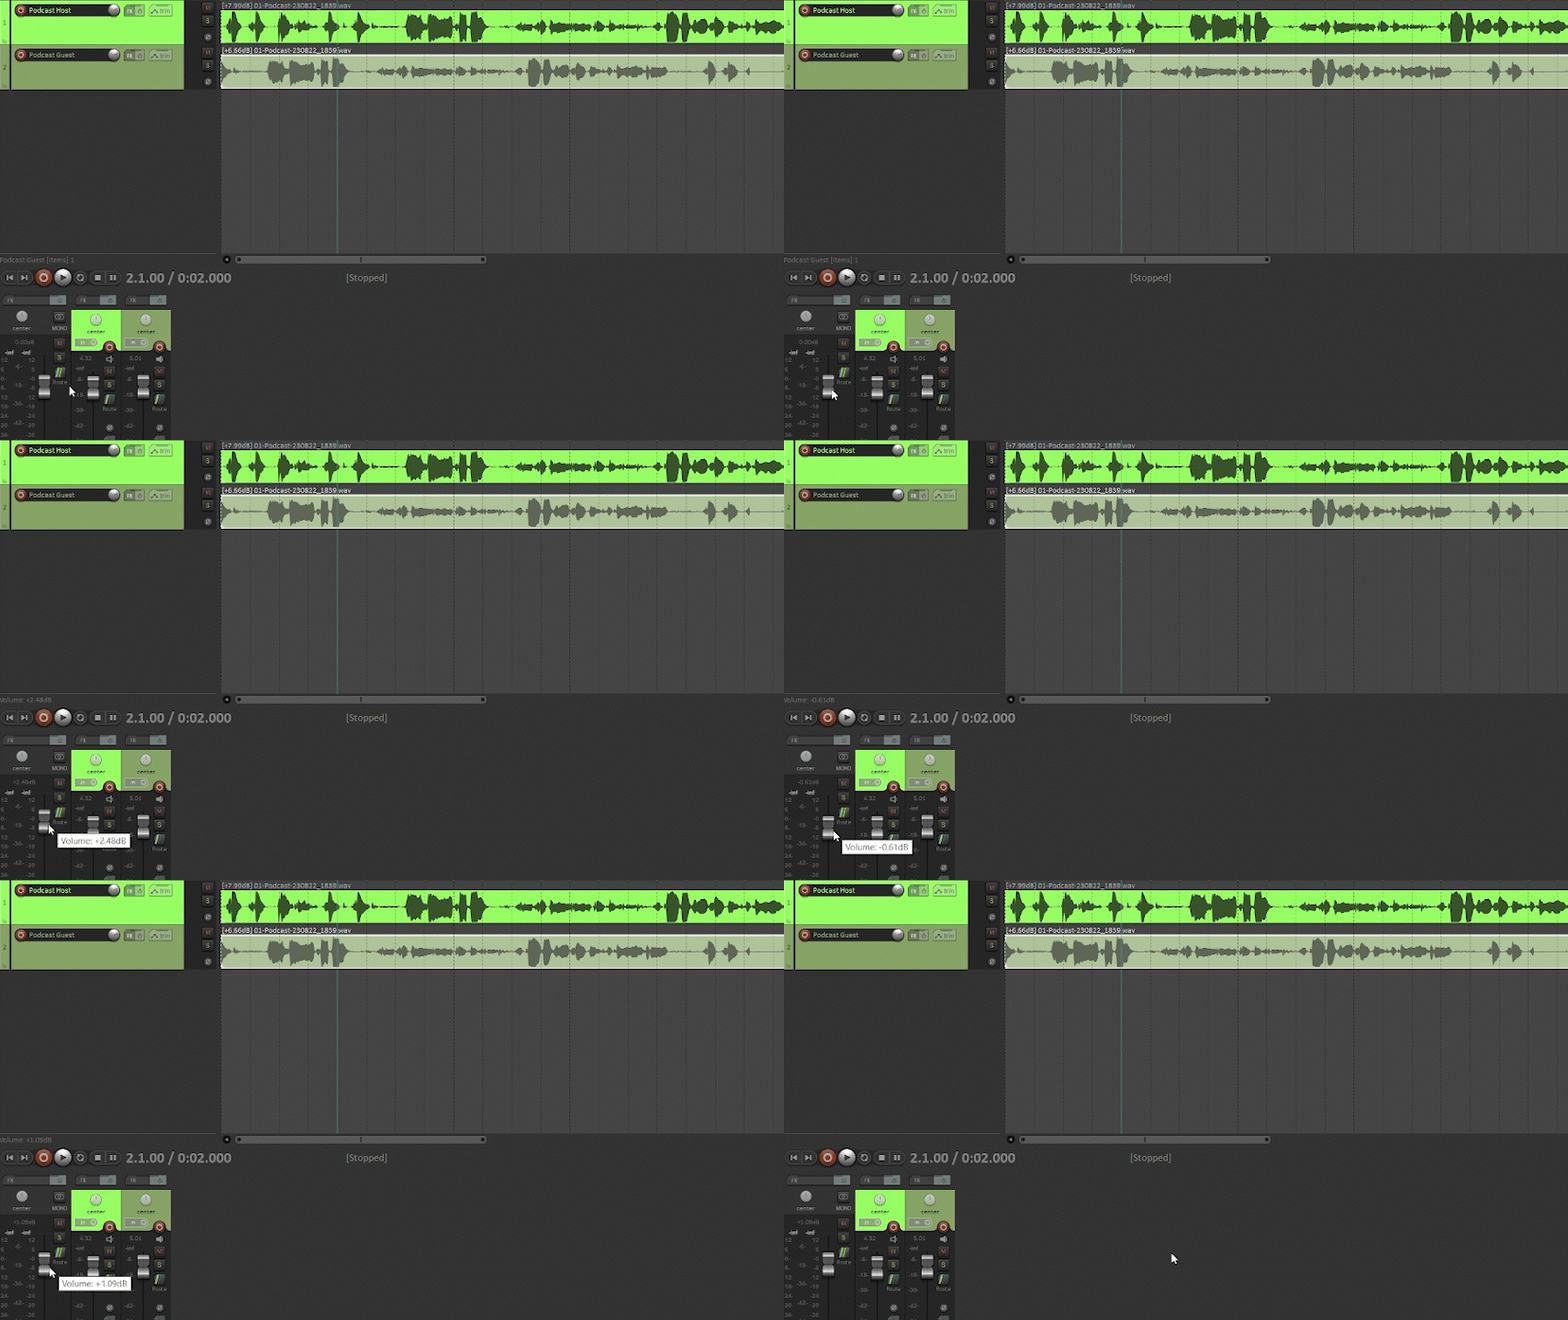
3. Master Volume Adjustment
Adjusting the master volume makes a volume adjustment to the entire mix.
Normalization
Normalization
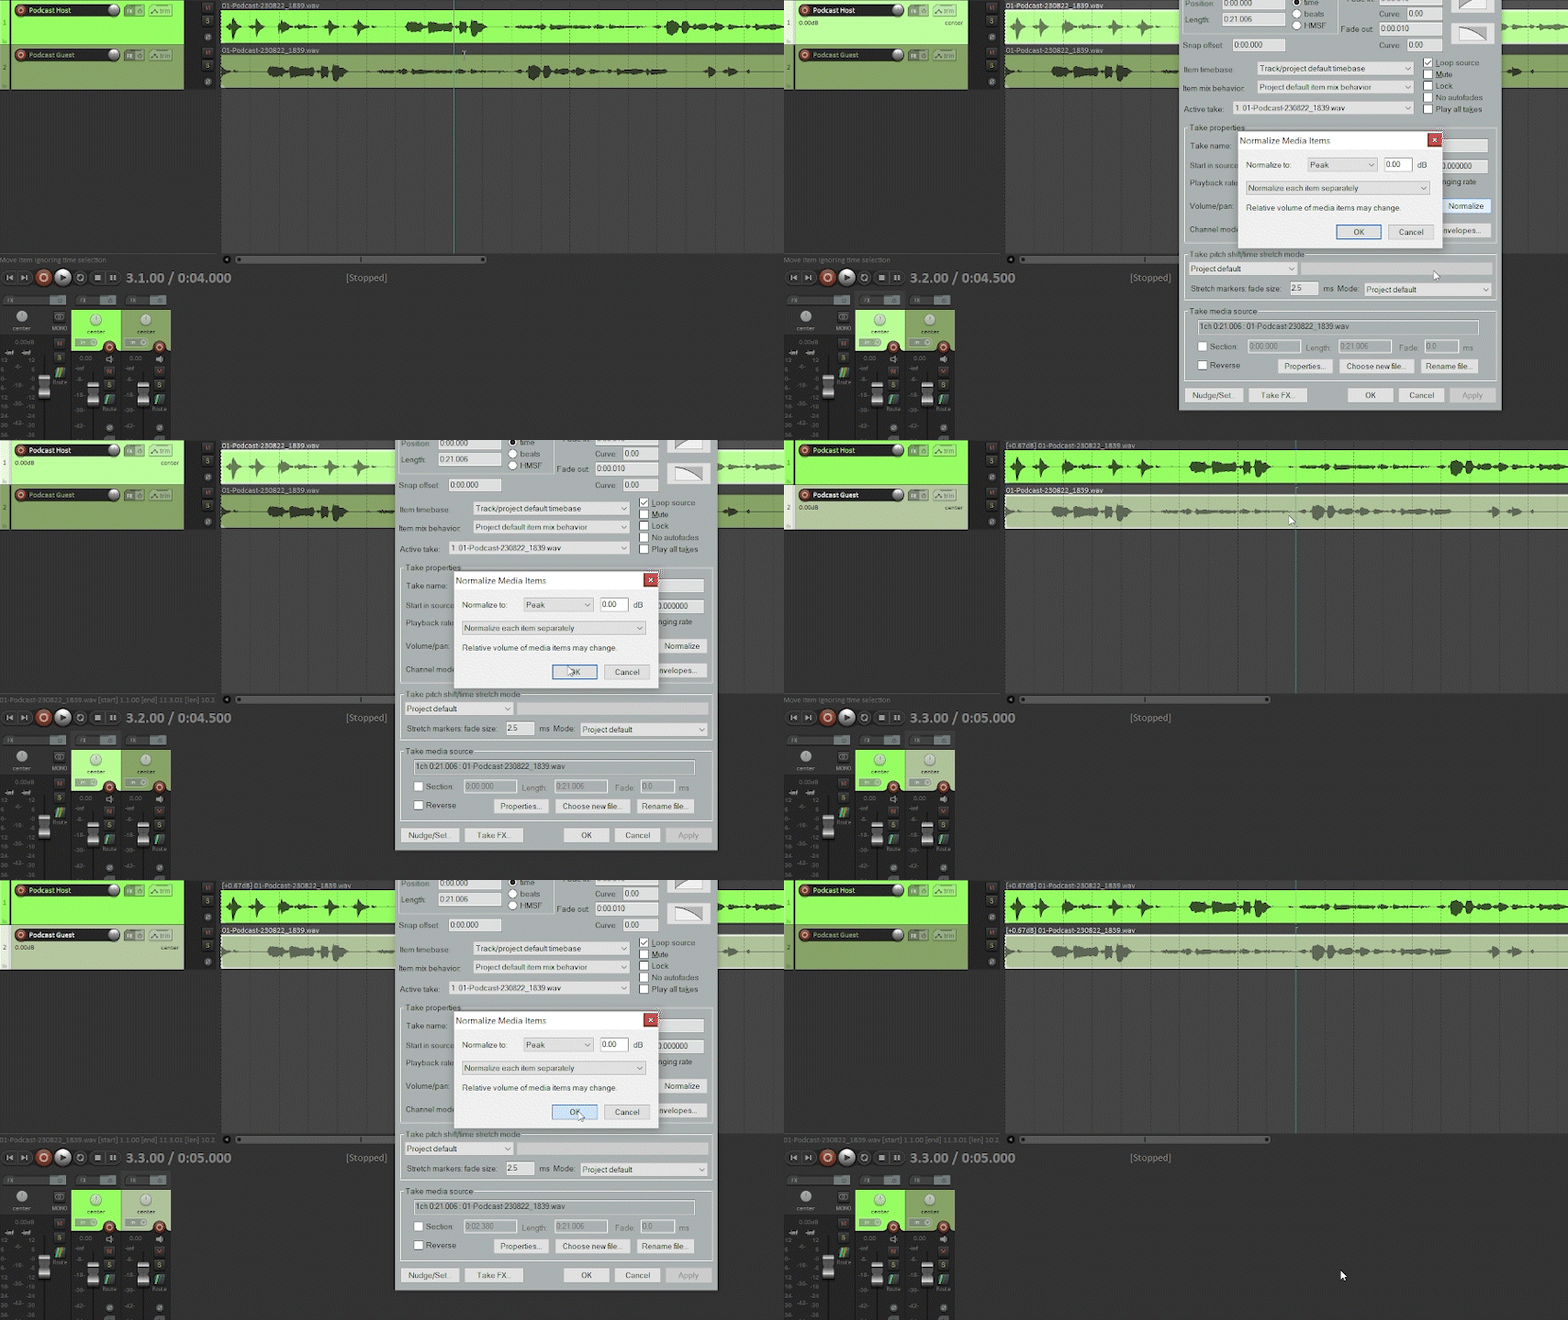
A tool to apply an even amount of “gain” to the entire recording or clip, matching it to a target level.
Two reasons you might normalize are:
- Maxing out the volume – If you have a quiet audio file, you may want to make it as loud as possible (0 dBFS) without changing its dynamic range.
- Matching the volume – If you have a group of audio files at different volumes you may want to make them all as close as possible to the same volume. It may be individual snare hits or even full mixes.
In order to access the normalize command, open the media item properties by double clicking on your clip.
Panning
Panning
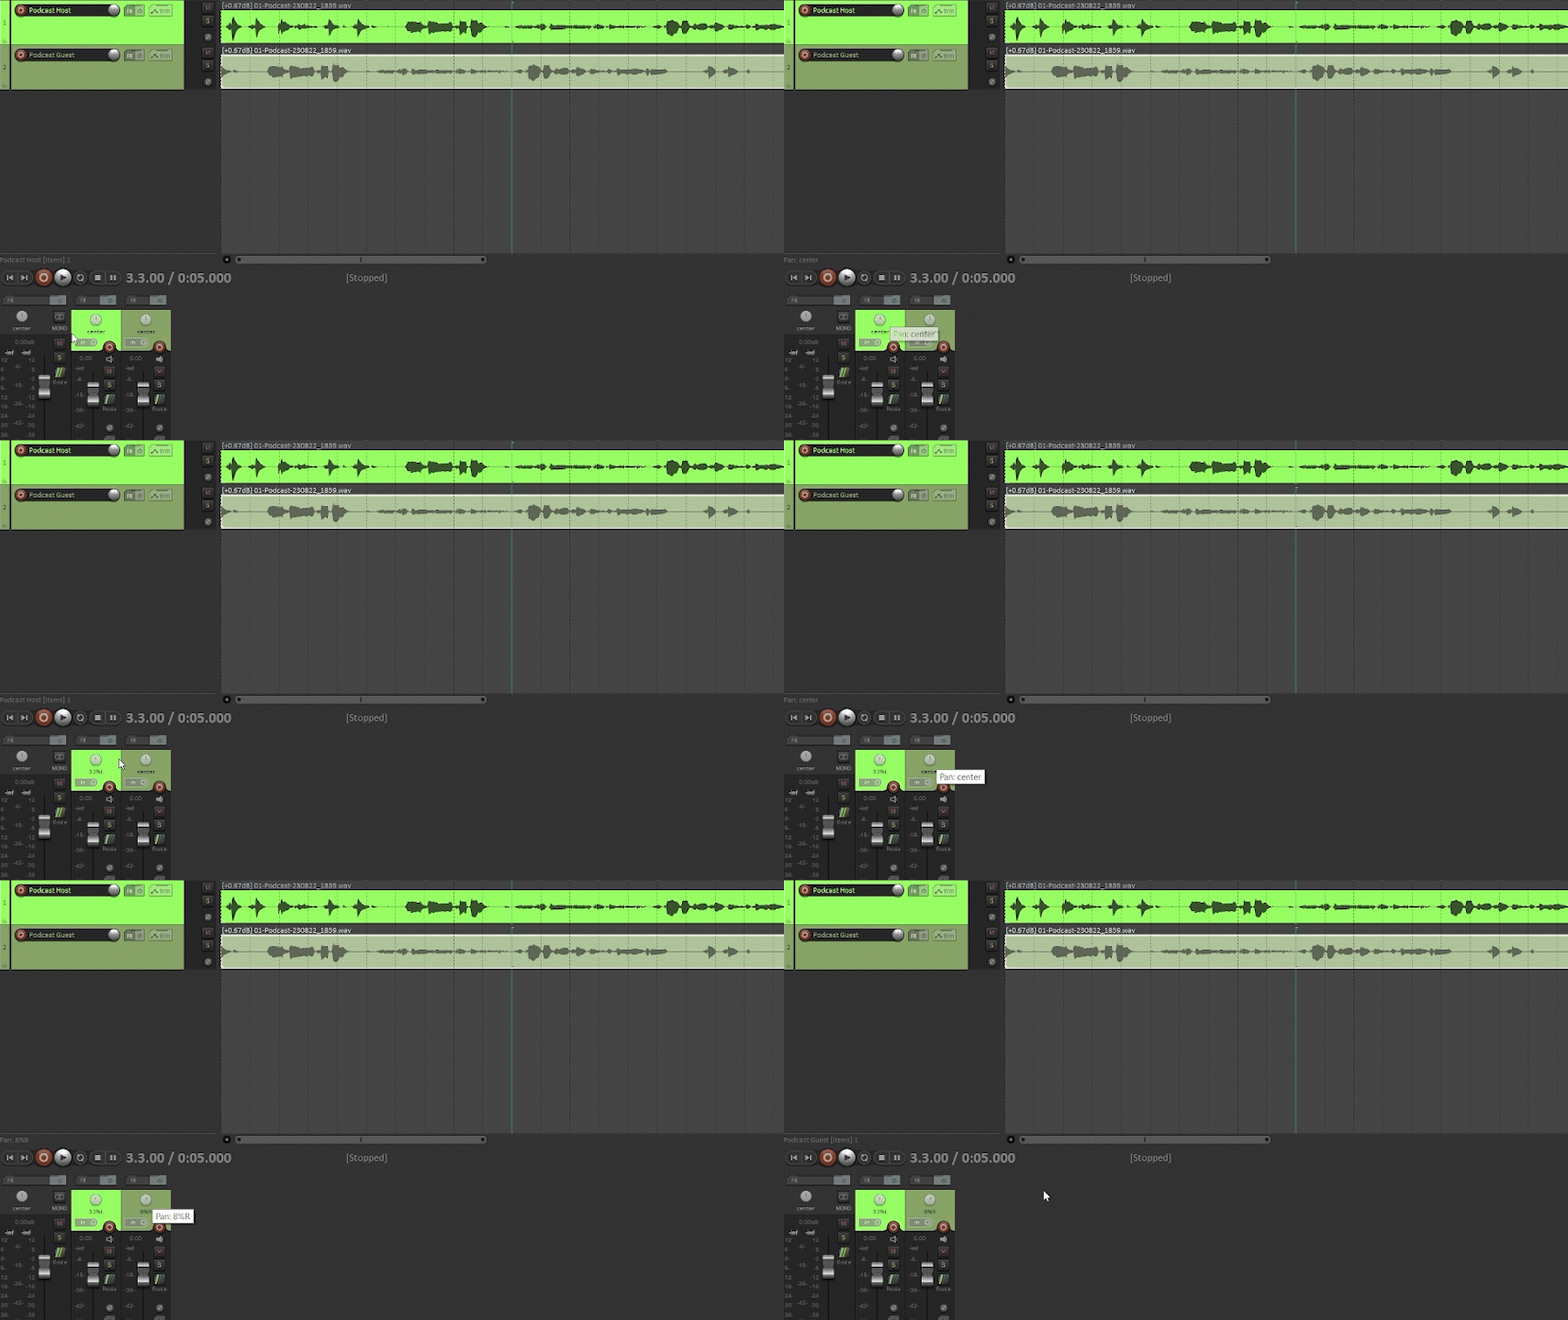
Use panning to adjust which side the audio on that track is played from, left or right. Using panning in a band recording can make your mix feel more like witnessing a live performance, since you can choose where each instrument is located in the stereo field.
Split and Trim
Split
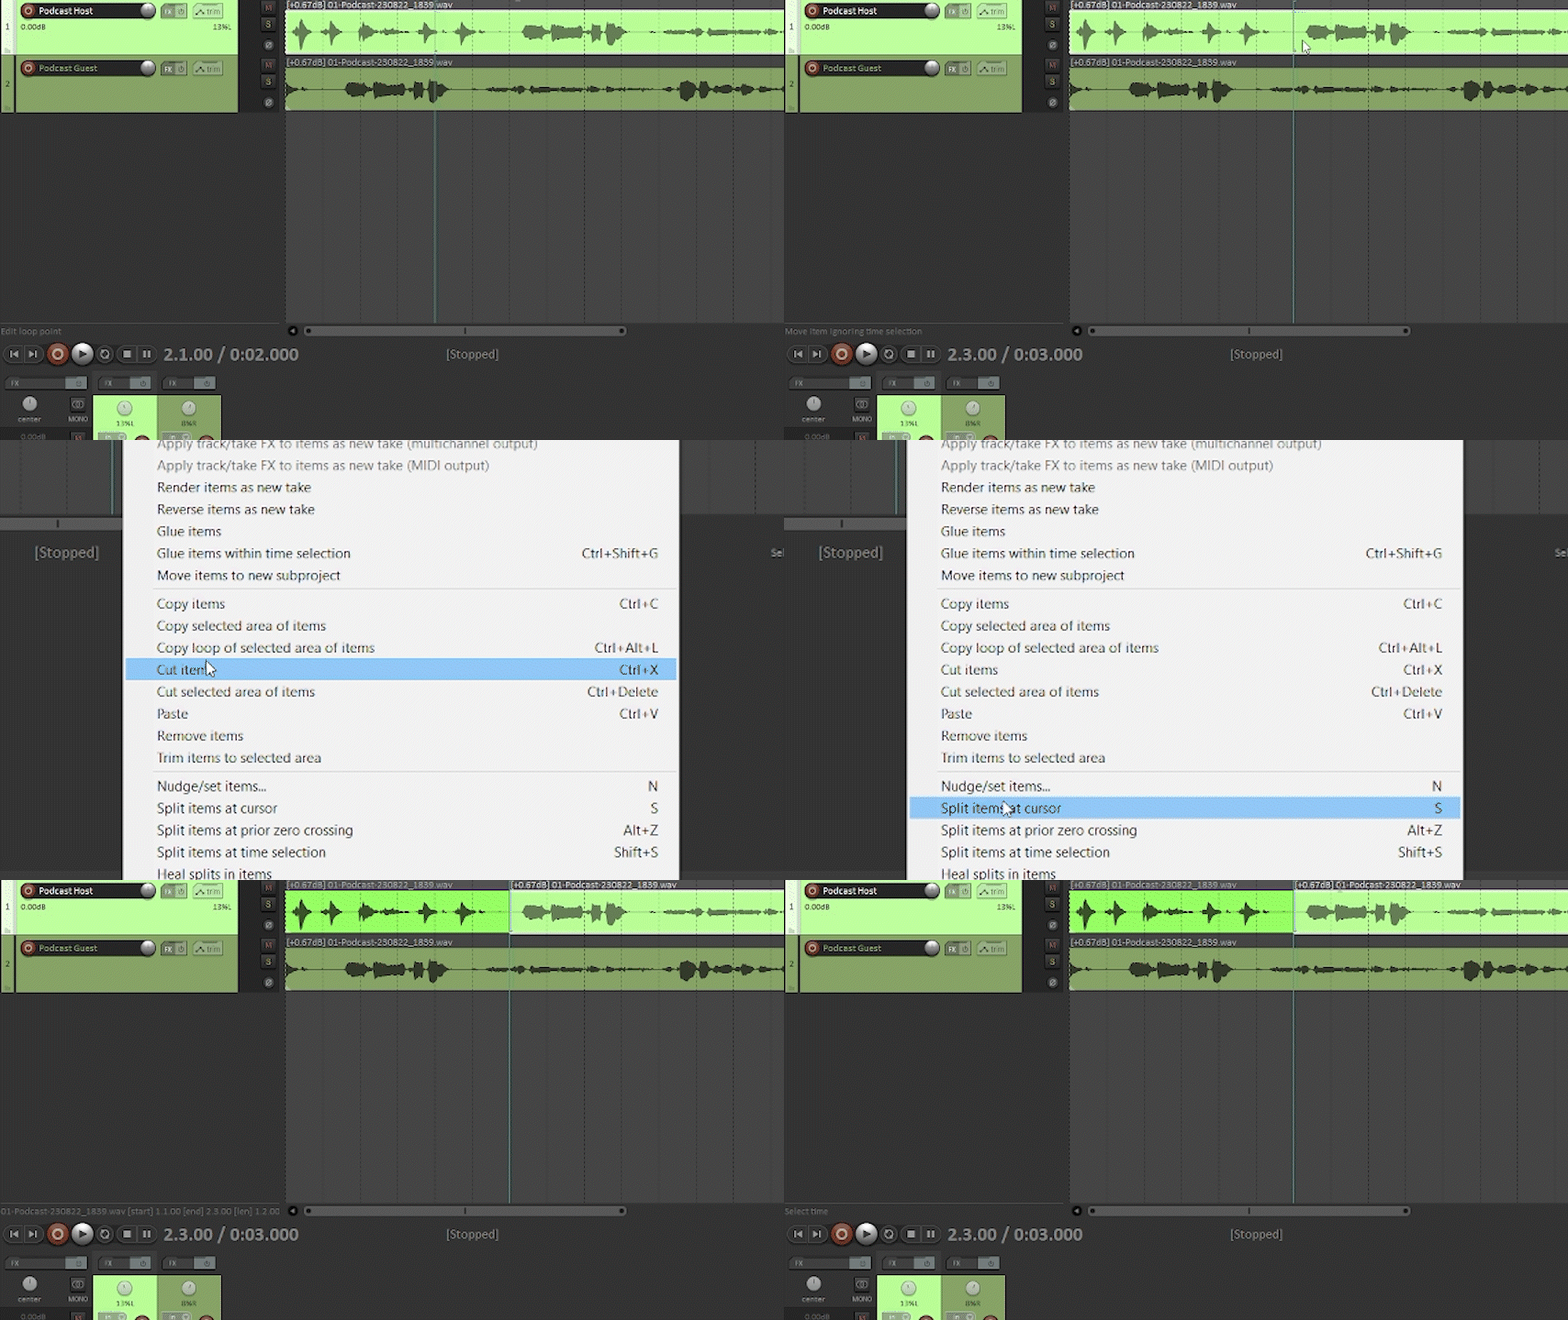
The Split tool divides one audio clip into two clips. The split occurs where the timeline cursor is currently located.
You can right-click a clip and then select the command 'split items at cursor'. An easier way to do this in REAPER is to just hit the S key on your keyboard.
Trim
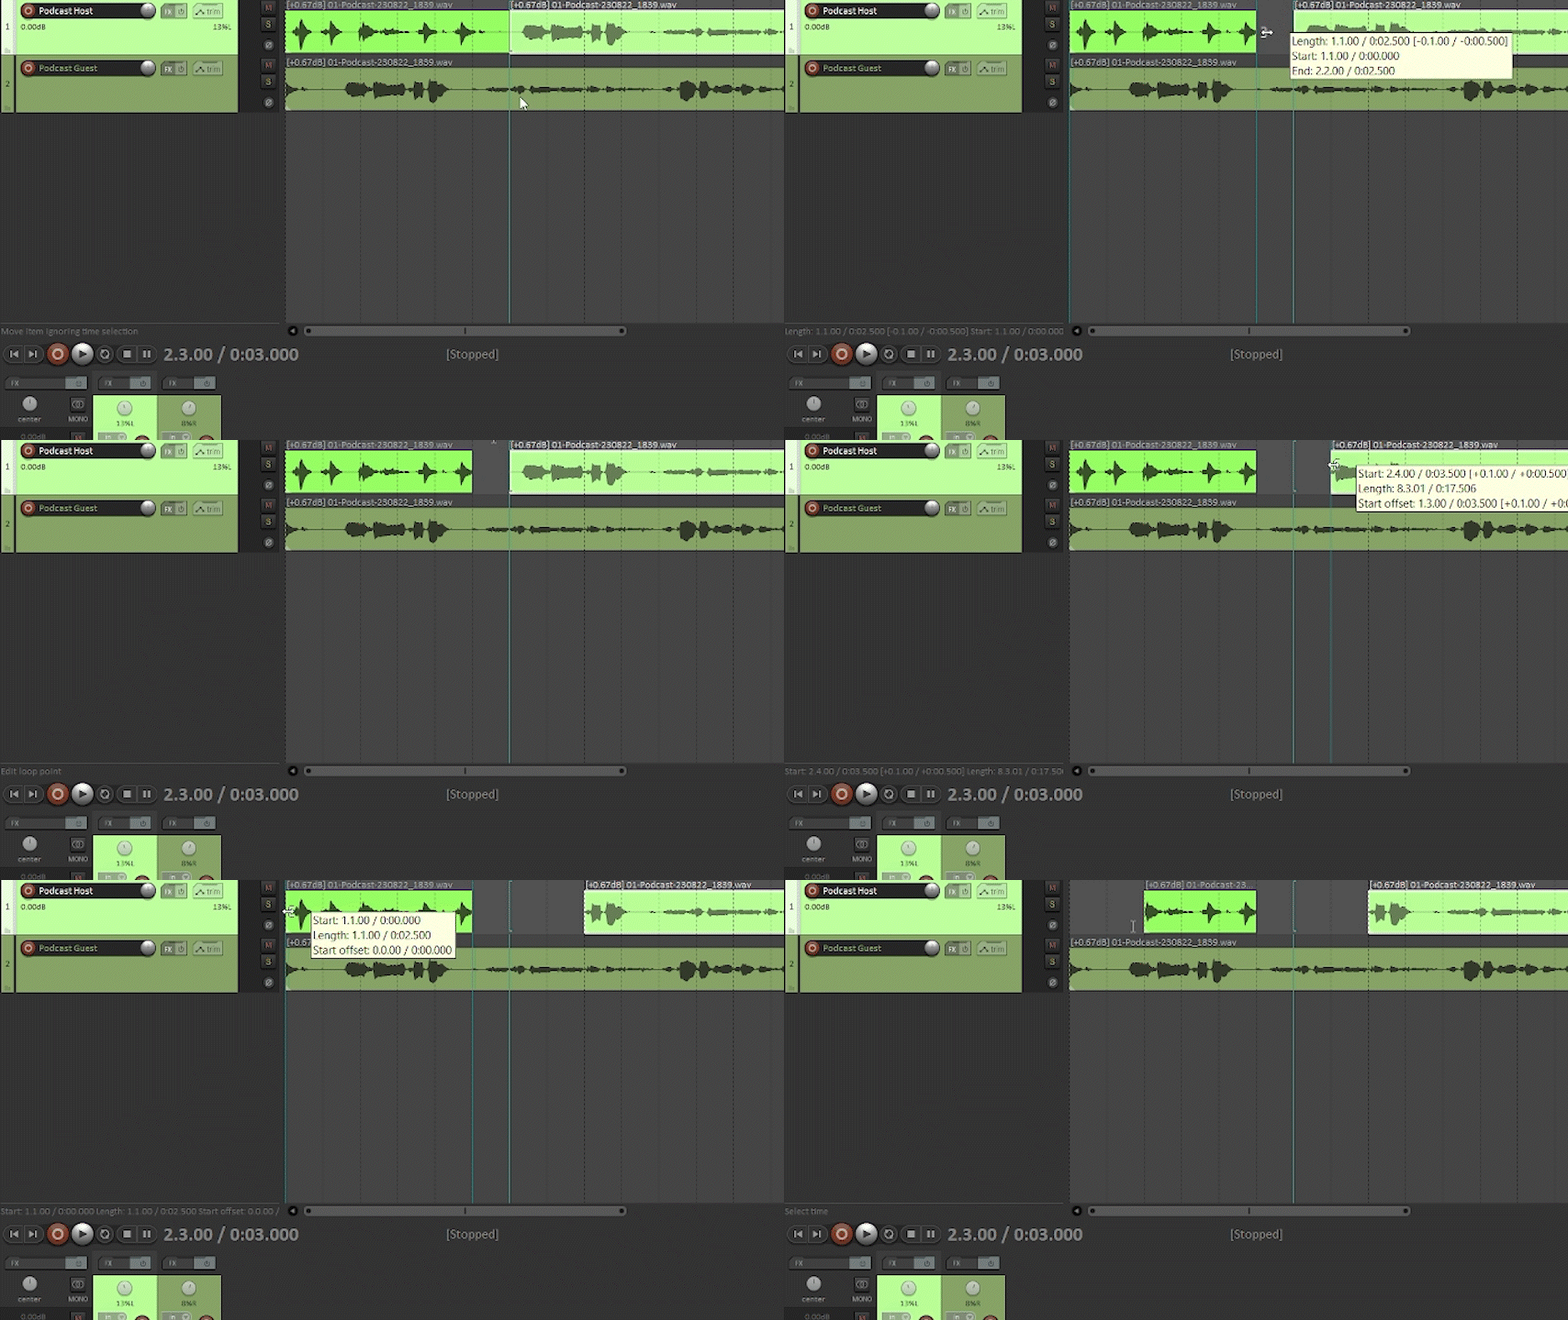
Trimming adjusts the length of your clip by shortening it either from the beginning or end.
If you hover your mouse pointer over the start or end of your clip, notice that the mouse pointer symbol changes to the Trim tool symbol, as shown in the example below. Then you can click and drag to trim your clip to the appropriate length.
Slide and Snap
Slide
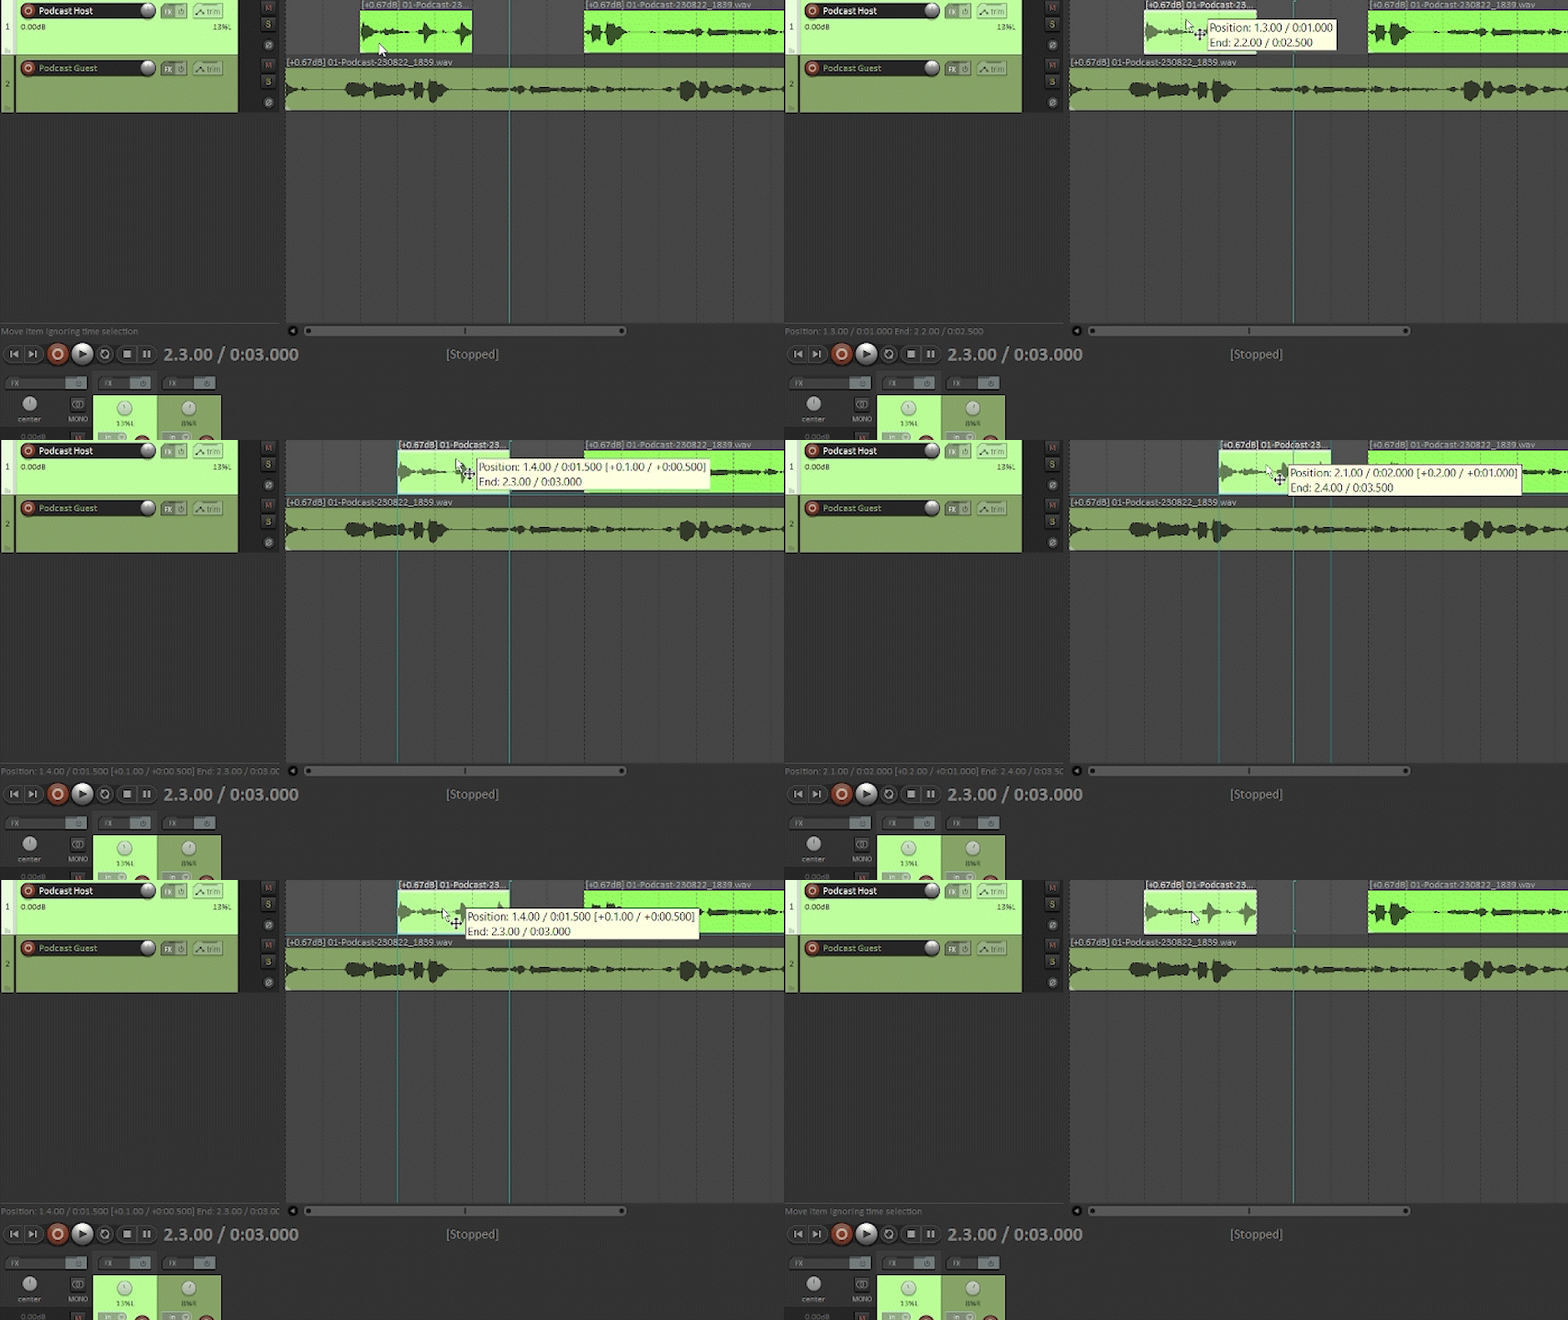
Drag your your clip around the timeline with the Slide Tool.
To do this, left click the clip and drag it to slide it around.
Snap
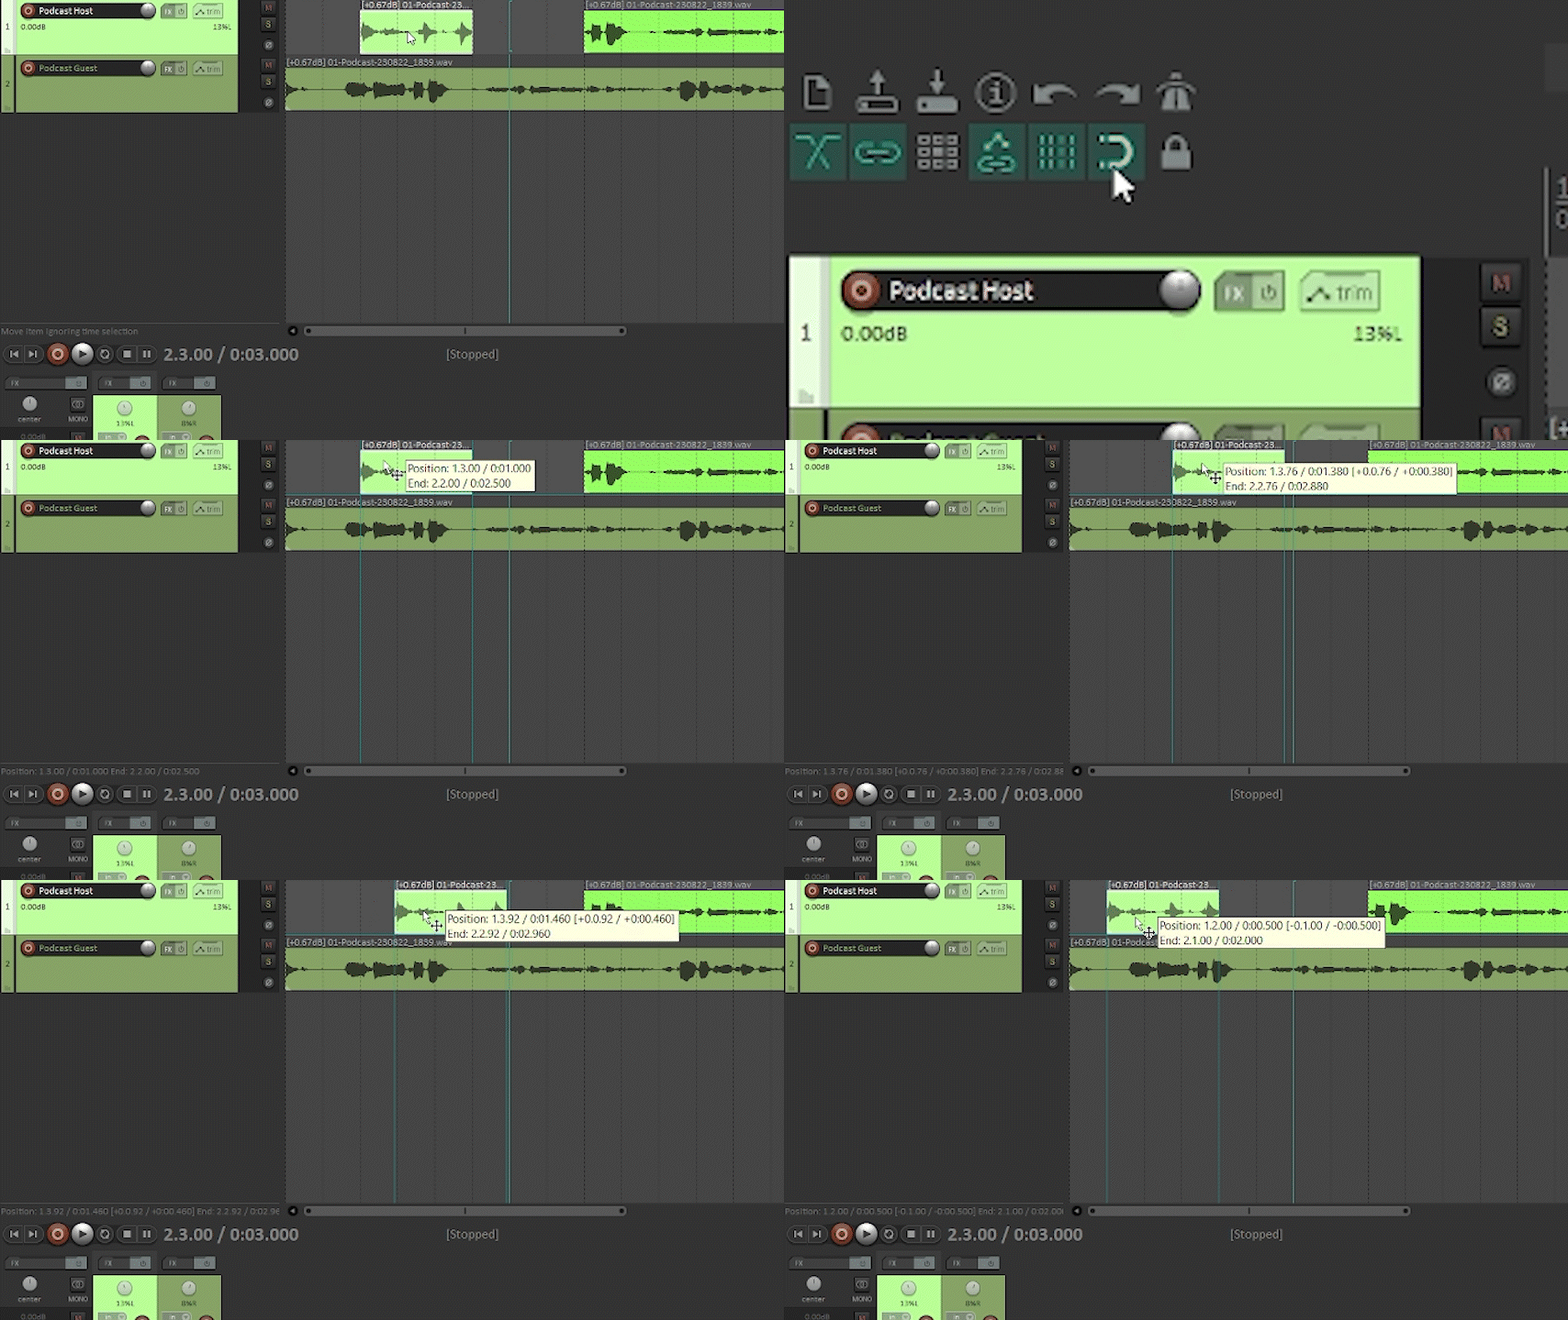
Normally, sliding occurs in set increments, snapping onto the grid in the timeline. But, to get more precise, fine-tuned edits, turn "snap to grid" tool off.
It will then be easy to customize the clip location. This is helpful for syncing vocals with music and inserting sound effects at just the right time in your podcast. Remember to zoom in to get even finer control of where to place your clip.
Copy, Paste, Undo
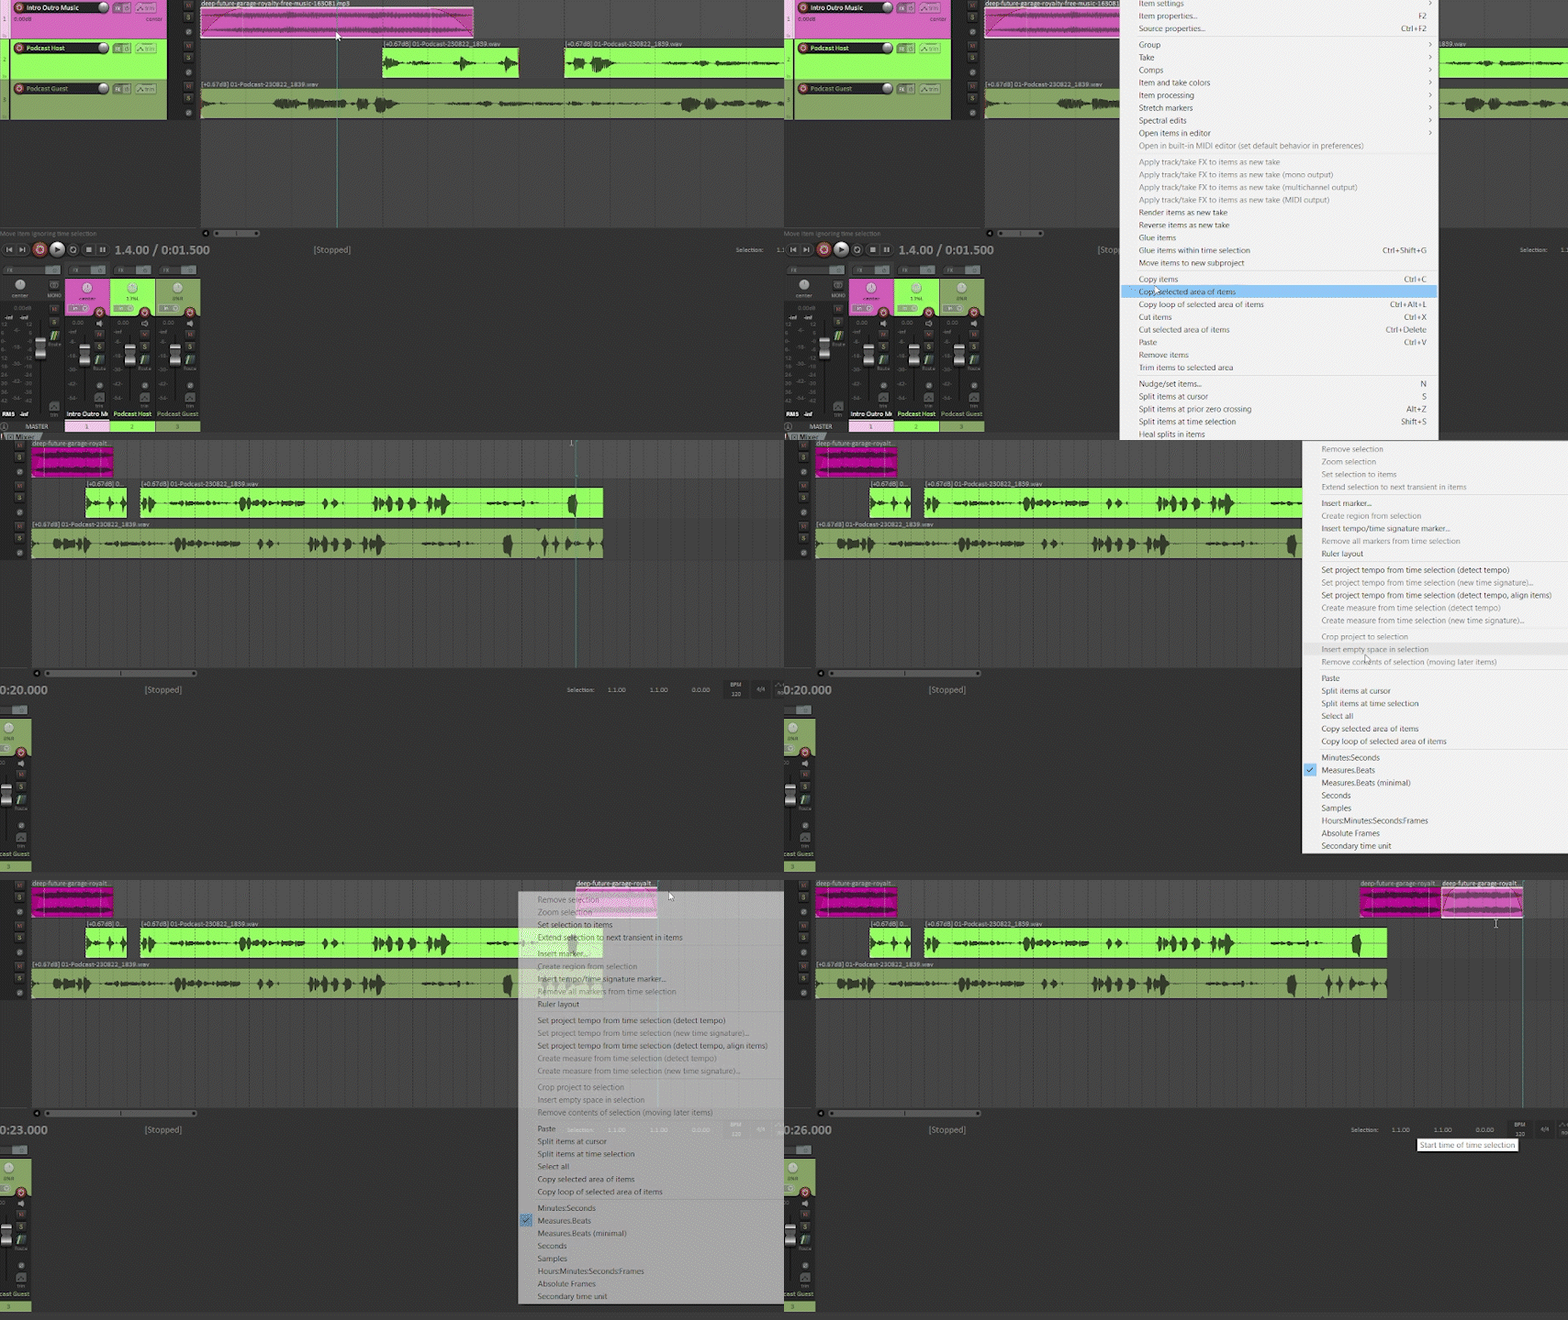
Just like editing a Word document, you can duplicate and move audio clips around by selecting, copying and pasting to another location on track, or a different track.
Copy and Paste
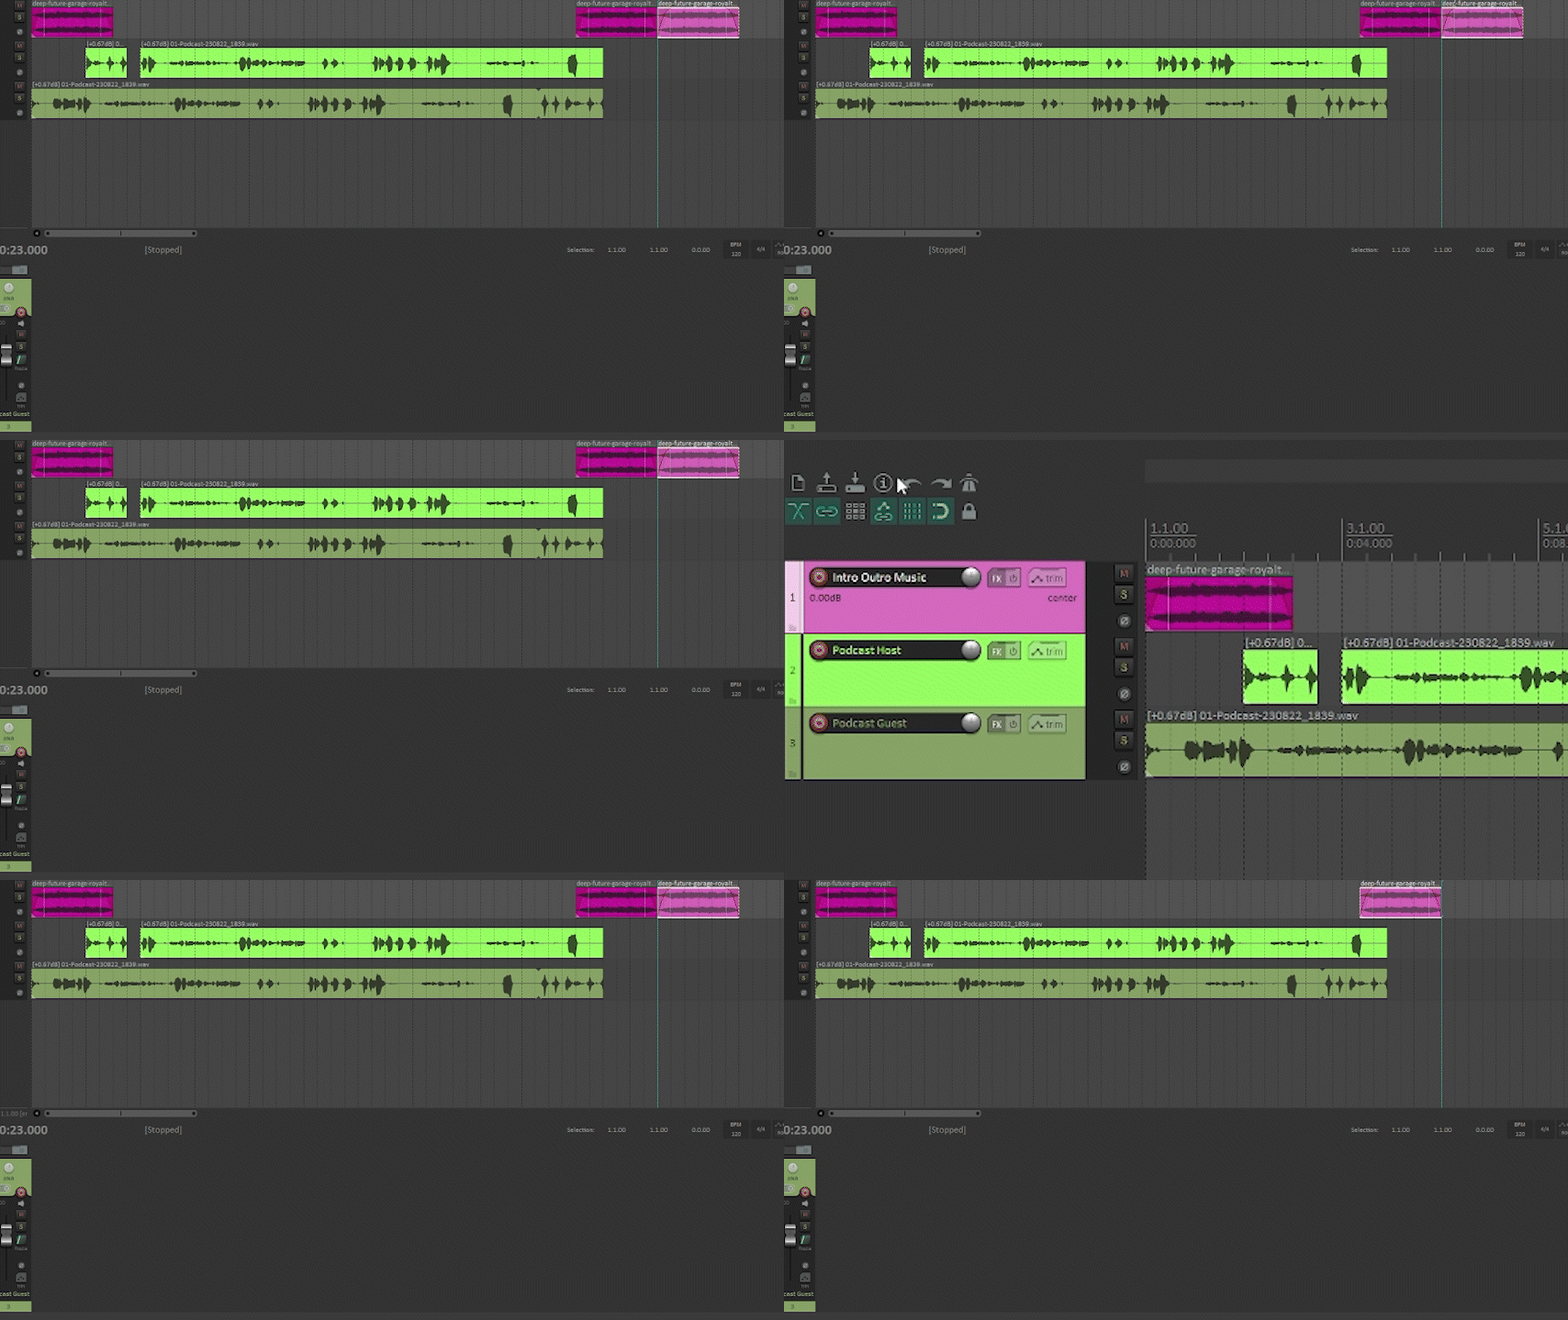
Undo
Fade and Crossfade
Fade
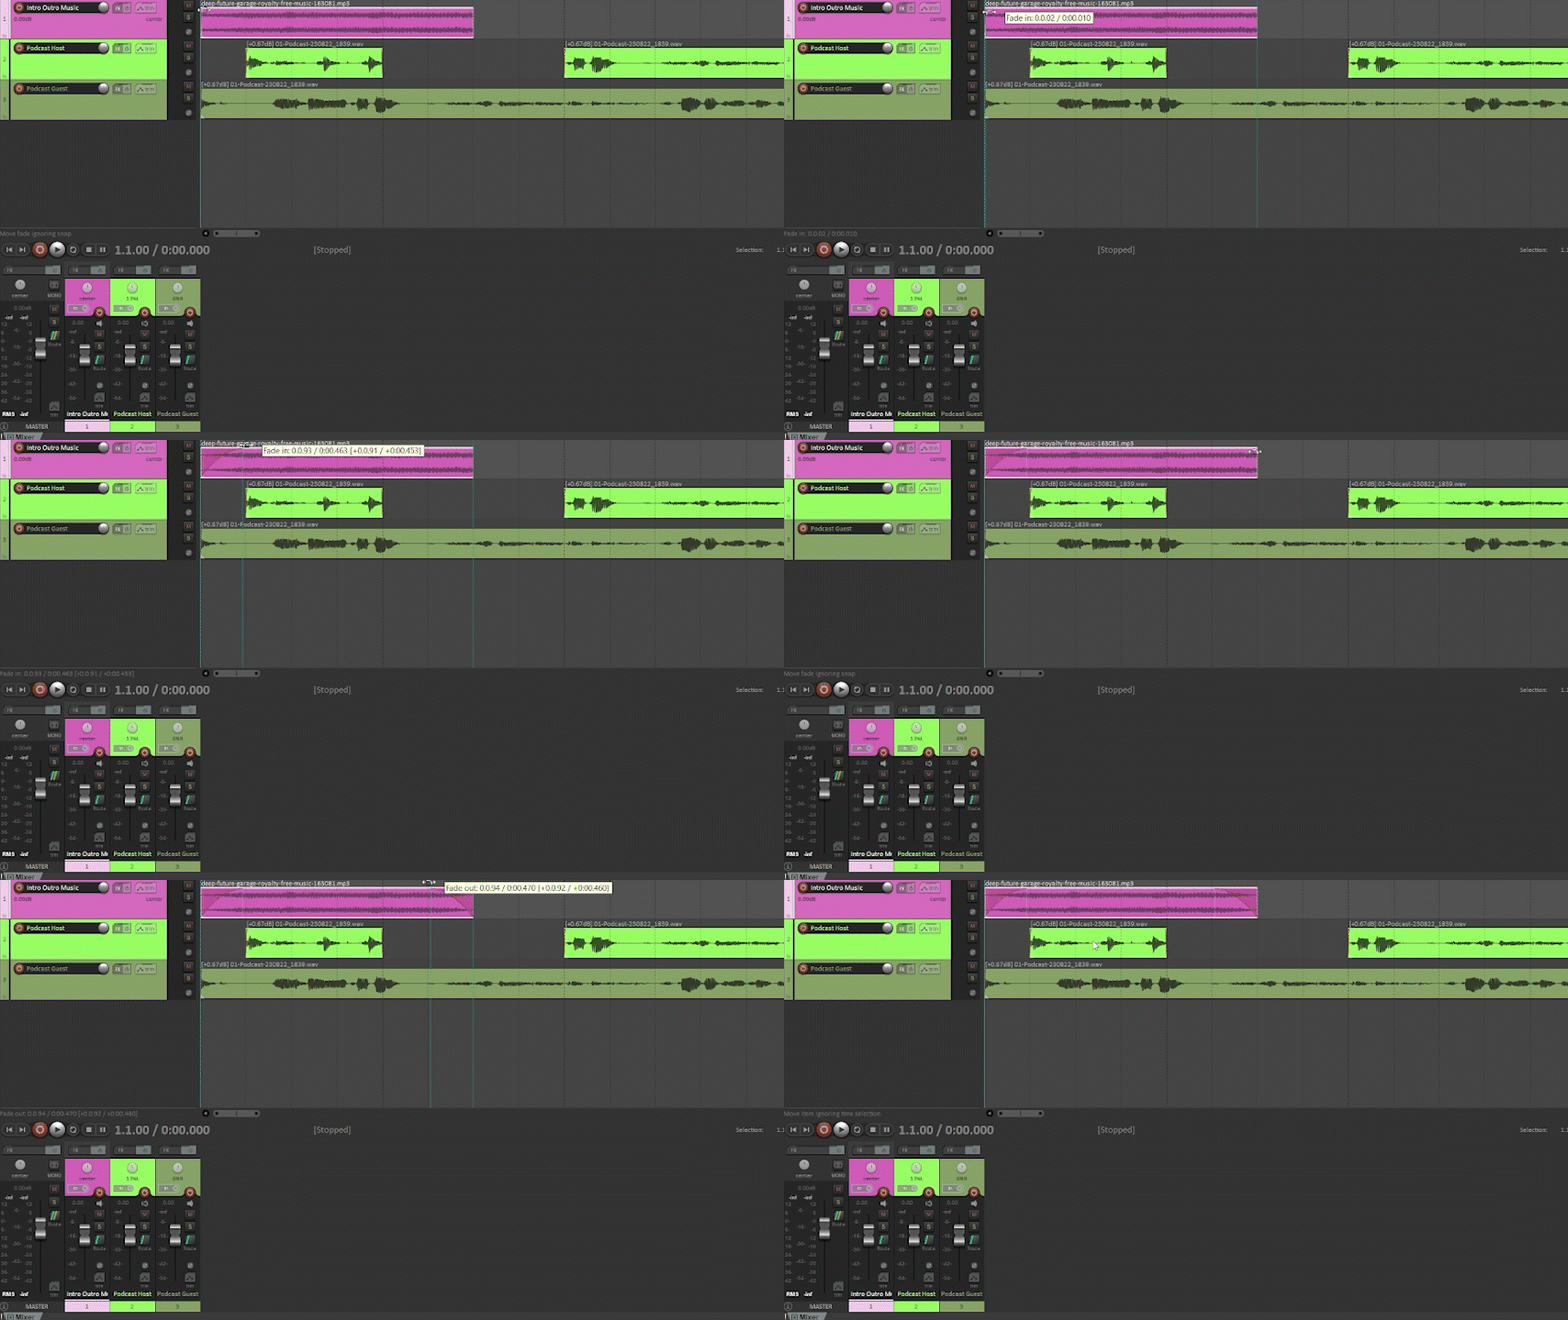
The Fade Tool will gently increase or decrease volume over time, from the start (fade in) or end (fade out) of the clip.
Hover mouse near top left or top right corner of clip to activate fade tool, then drag in the fade as seen below.
Crossfade
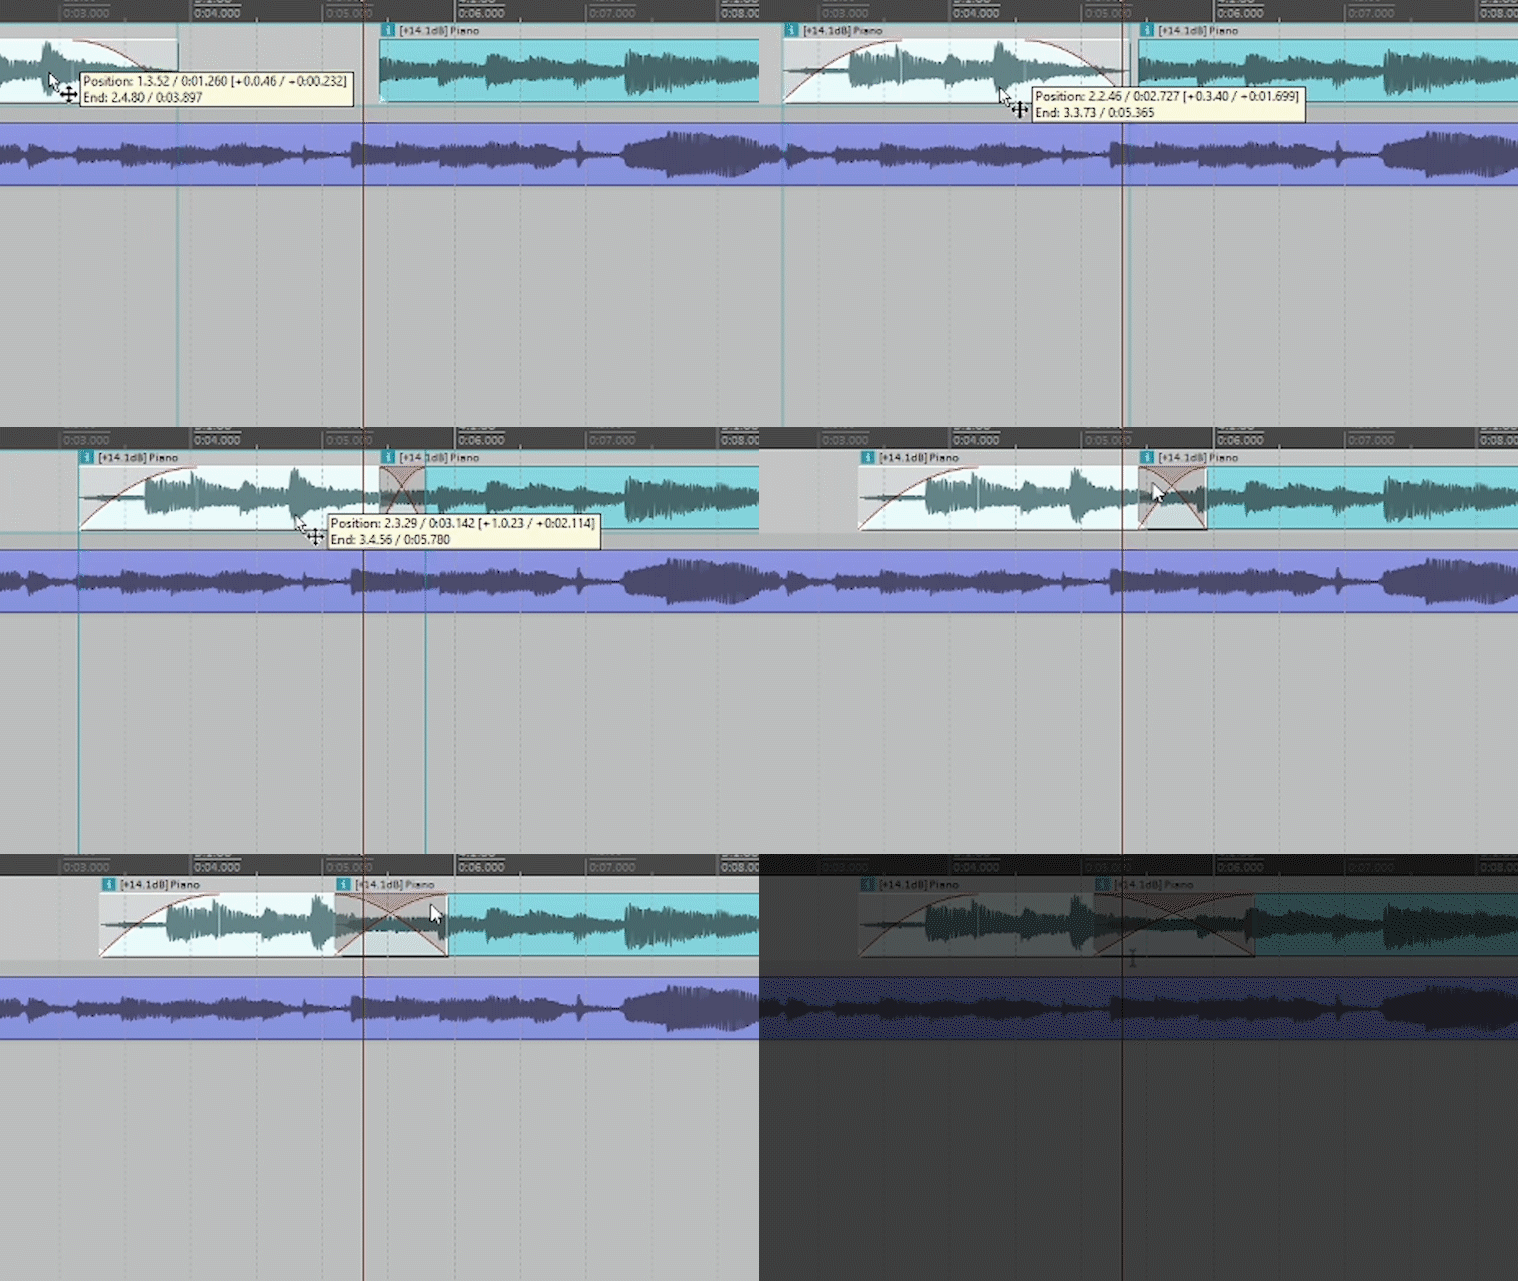
A crossfade blends two clips together, creating a smooth transition.
When you drag two clips in the same track together so that they overlap, REAPER automatically creates a crossfade, as seen below.
Envelope
Envelope Tool
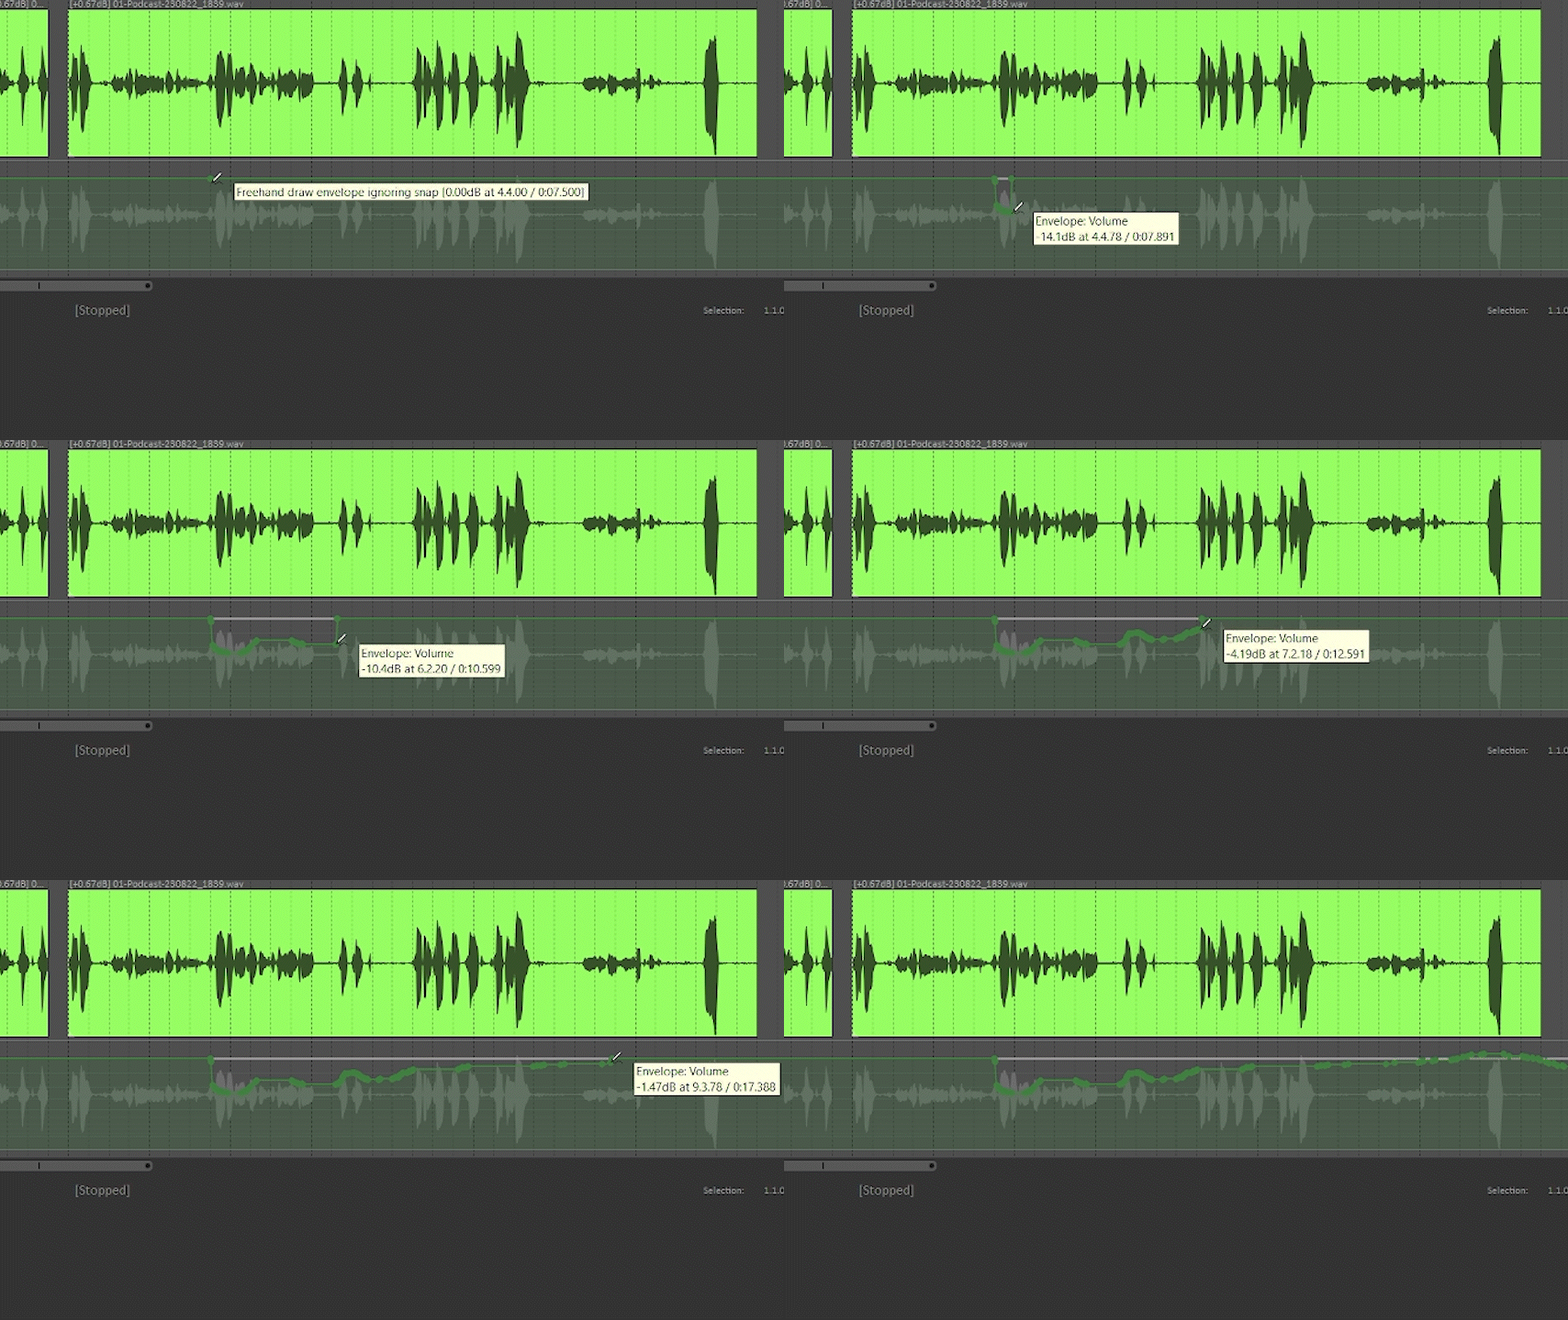
You can make adjustments to the level of volume, panning, or effect parameters with the envelope tool. You have great control and customization over the levels and can adjust them by creating keypoints, indicating what the level should be at particular time.
To open the volume envelope, simply hit the letter 'v' on your keyboard (or right click on the track track> select "envelopes"> select "toggle volume visible"). To create keypoints, hold shift and click at various points on the envelope waveform. To free draw keypoints, hold Ctrl down and draw by holding left click down on your mouse.
