Getting Started with REAPER
Before starting a recording or editing project, it is a good idea to spend a few moments familiarizing yourself with the basic setup and layout of the workspace.
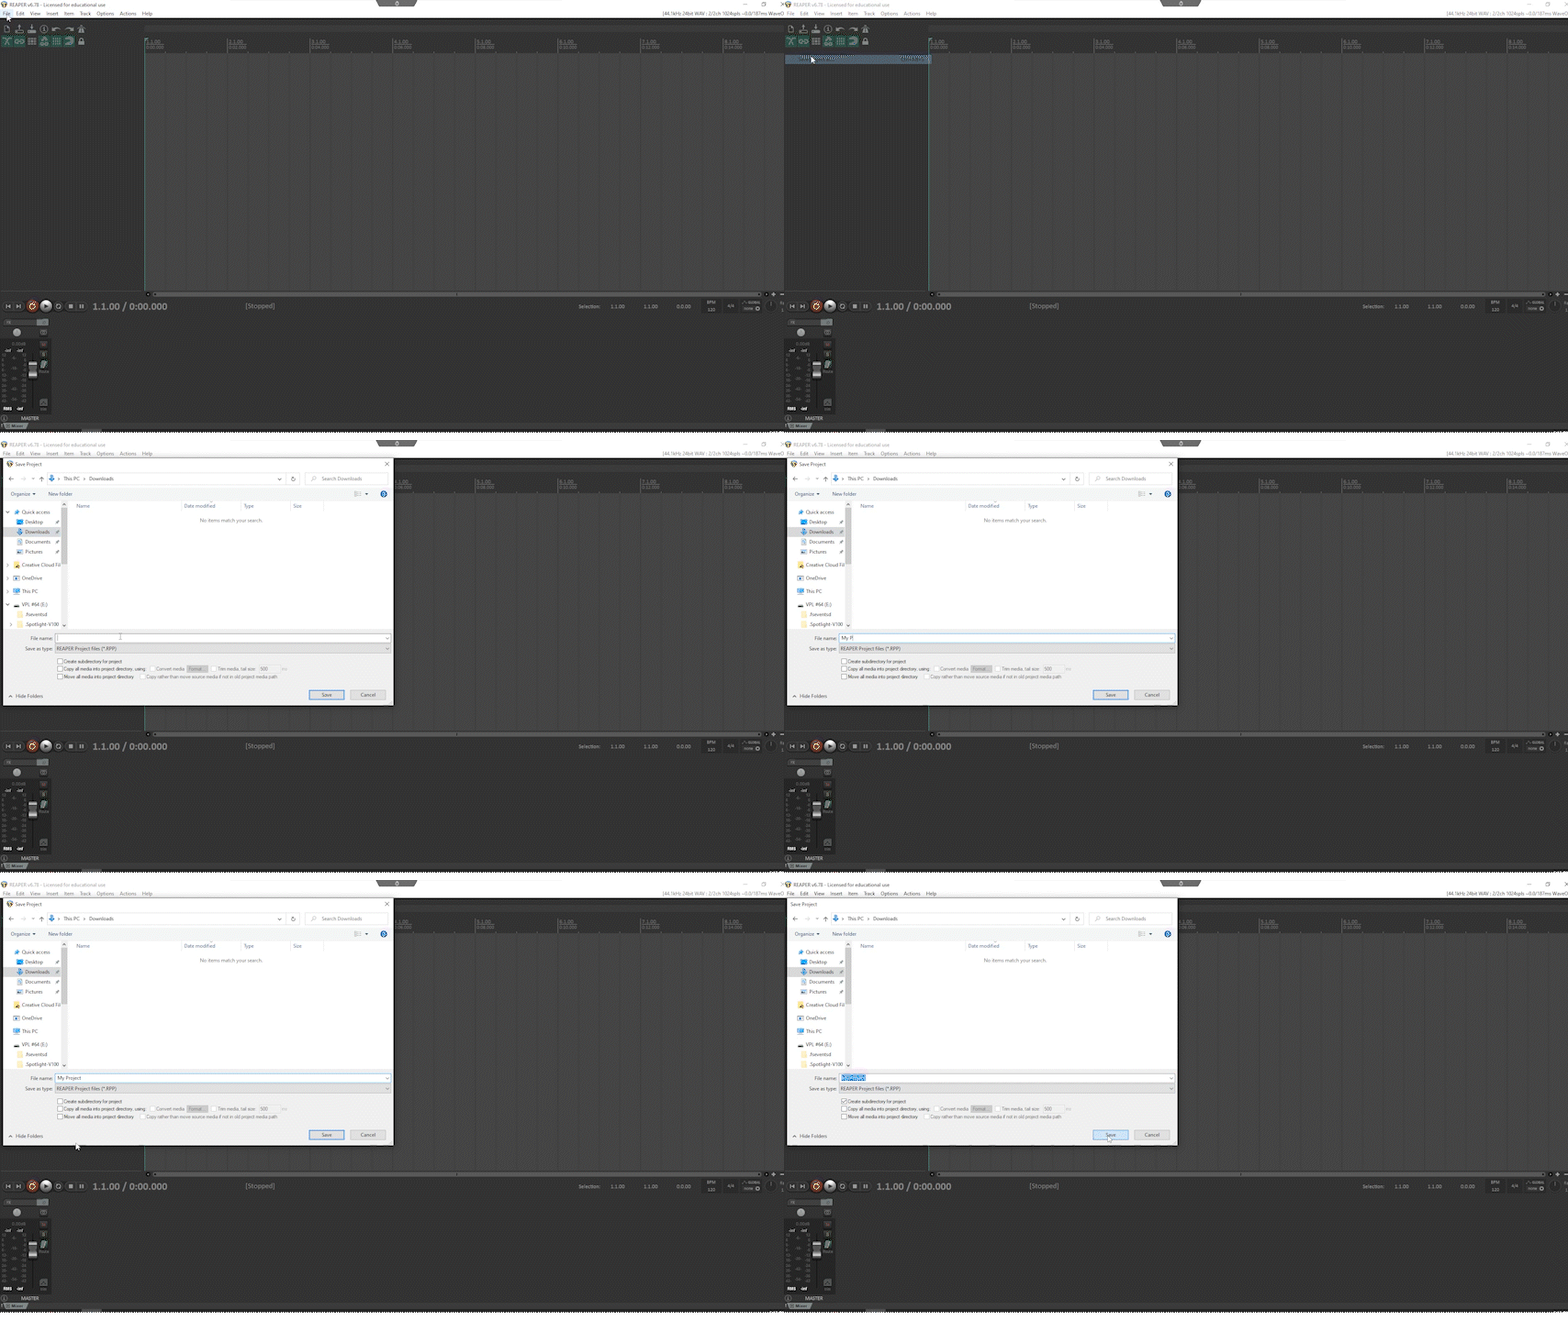
Open REAPER and Save a New Project
REAPER Layout and Workspace
Now, take a moment to familiarize yourself with the layout of the software and whereabouts of the key items in the image below.
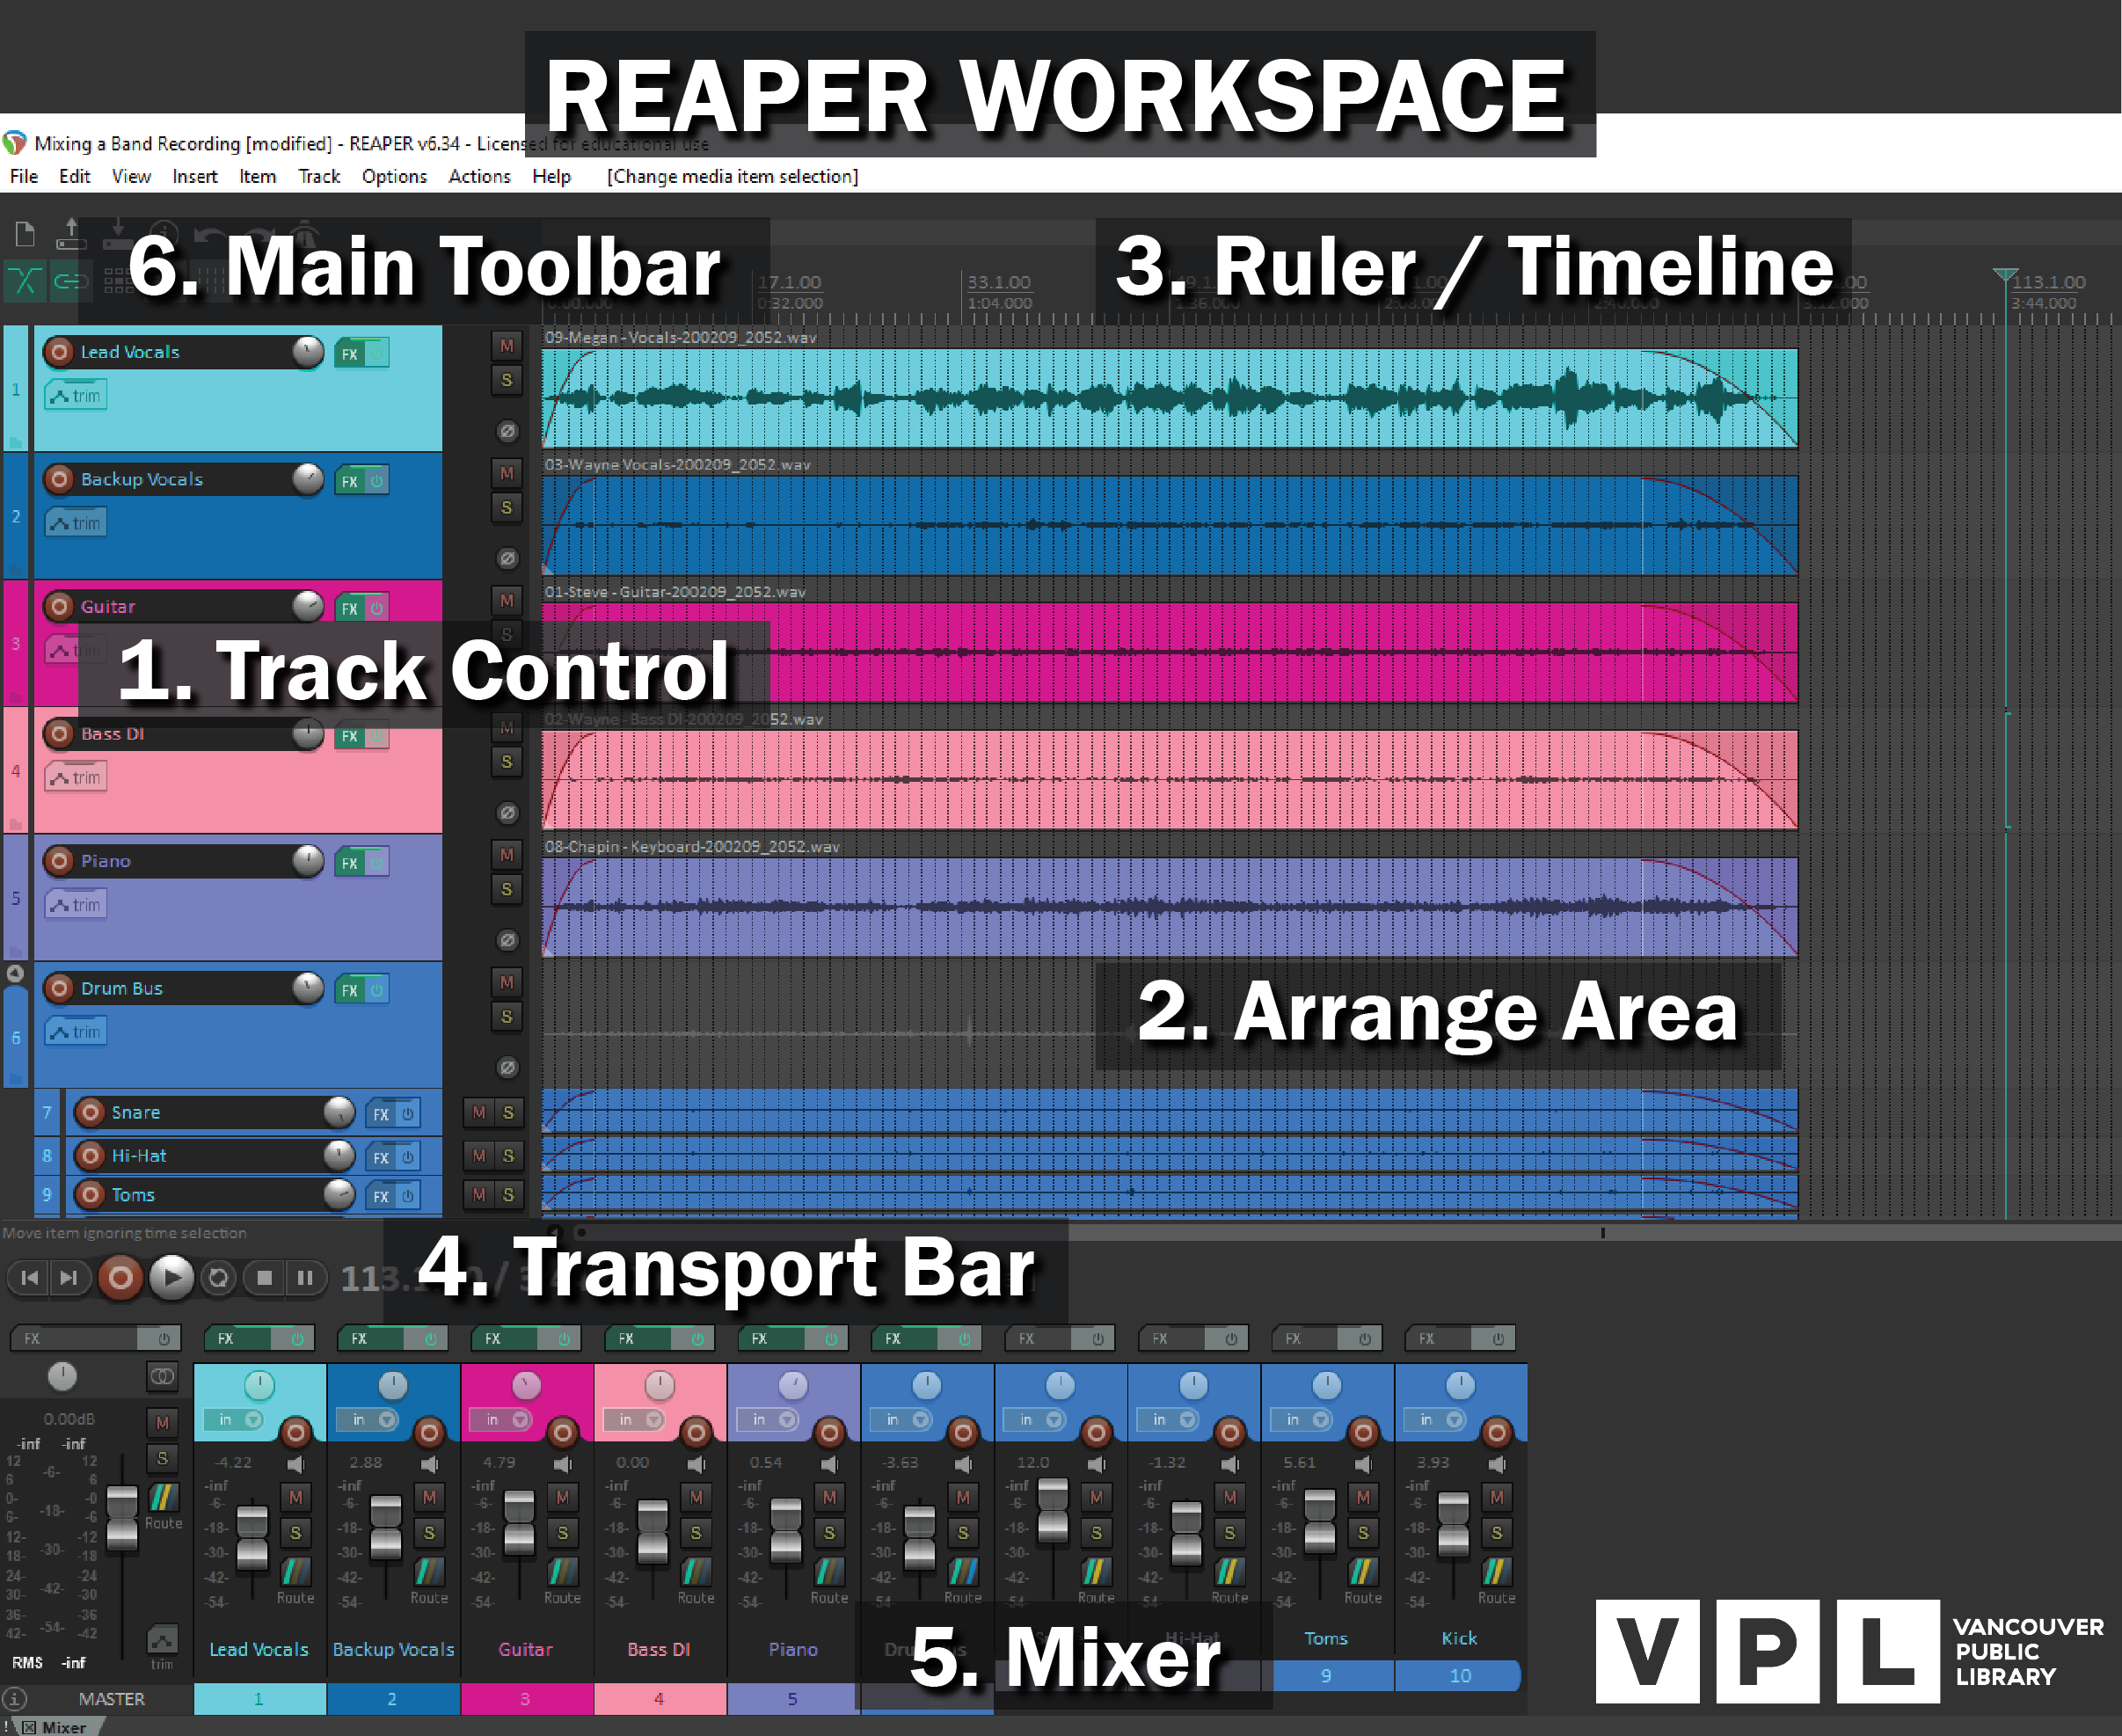
- Track Control Panel – create tracks for your audio here. You can name, colour, arm, adjust volume and pan for your tracks in this area as well as add effects.
- Arrange Area – the main window and workspace just to the right of your track control. Here you media items will show up after you record or import them. This is where you can edit your clips and see the audio waveforms.
- Ruler / Timeline – this runs across the top of the arrange area and helps you measure the length of your project and set the position / timing of your clips.
- Transport Bar – start, stop, pause recording and playback.
- Mixer – displayed across the bottom, the mixer corresponds to the track control panel, but displays the tracks differently, and with a few more options. Access to master track.
- Main Toolbar – these buttons adjust some tools settings in REAPER.
For a step-by-step guide on recording, please refer to the next section of this guide, Recording with REAPER.
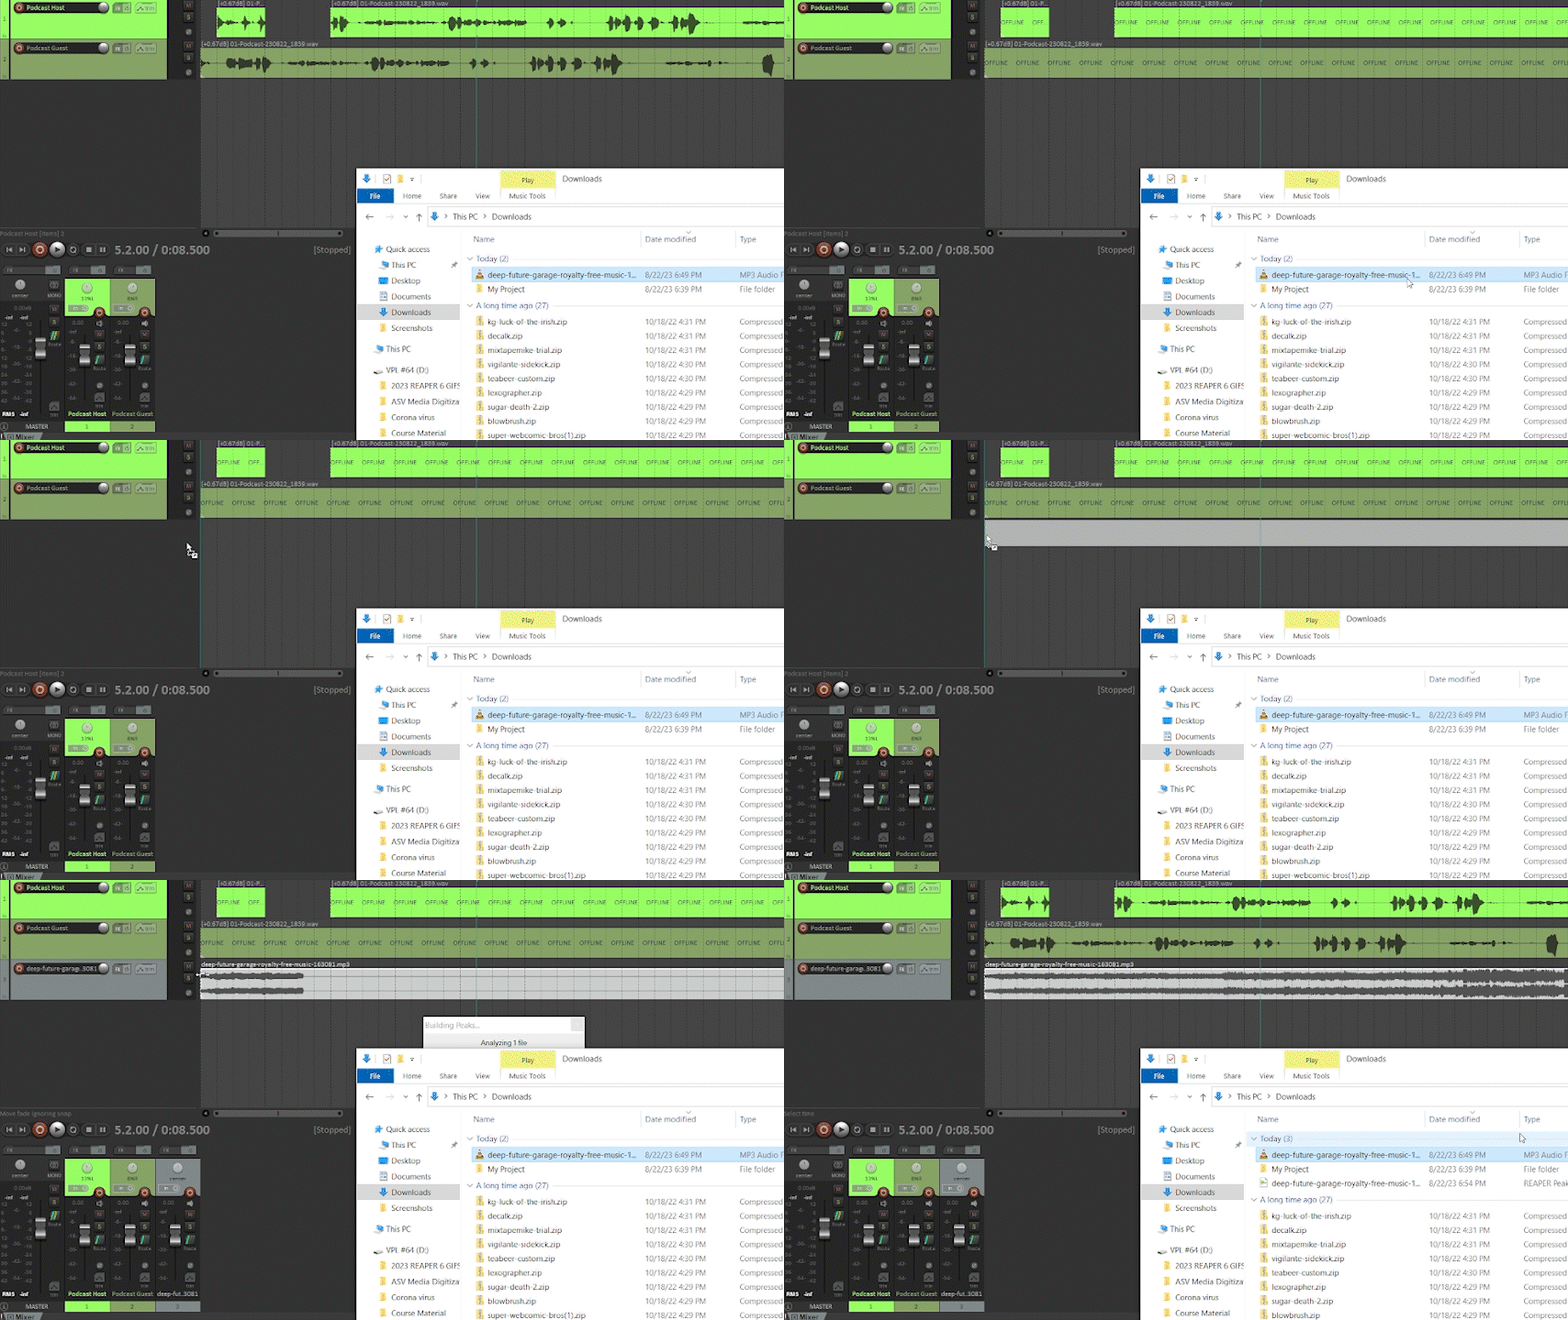
Import an Audio File
Drag an audio file onto the timeline to import it into your project.
Track and Project Organization
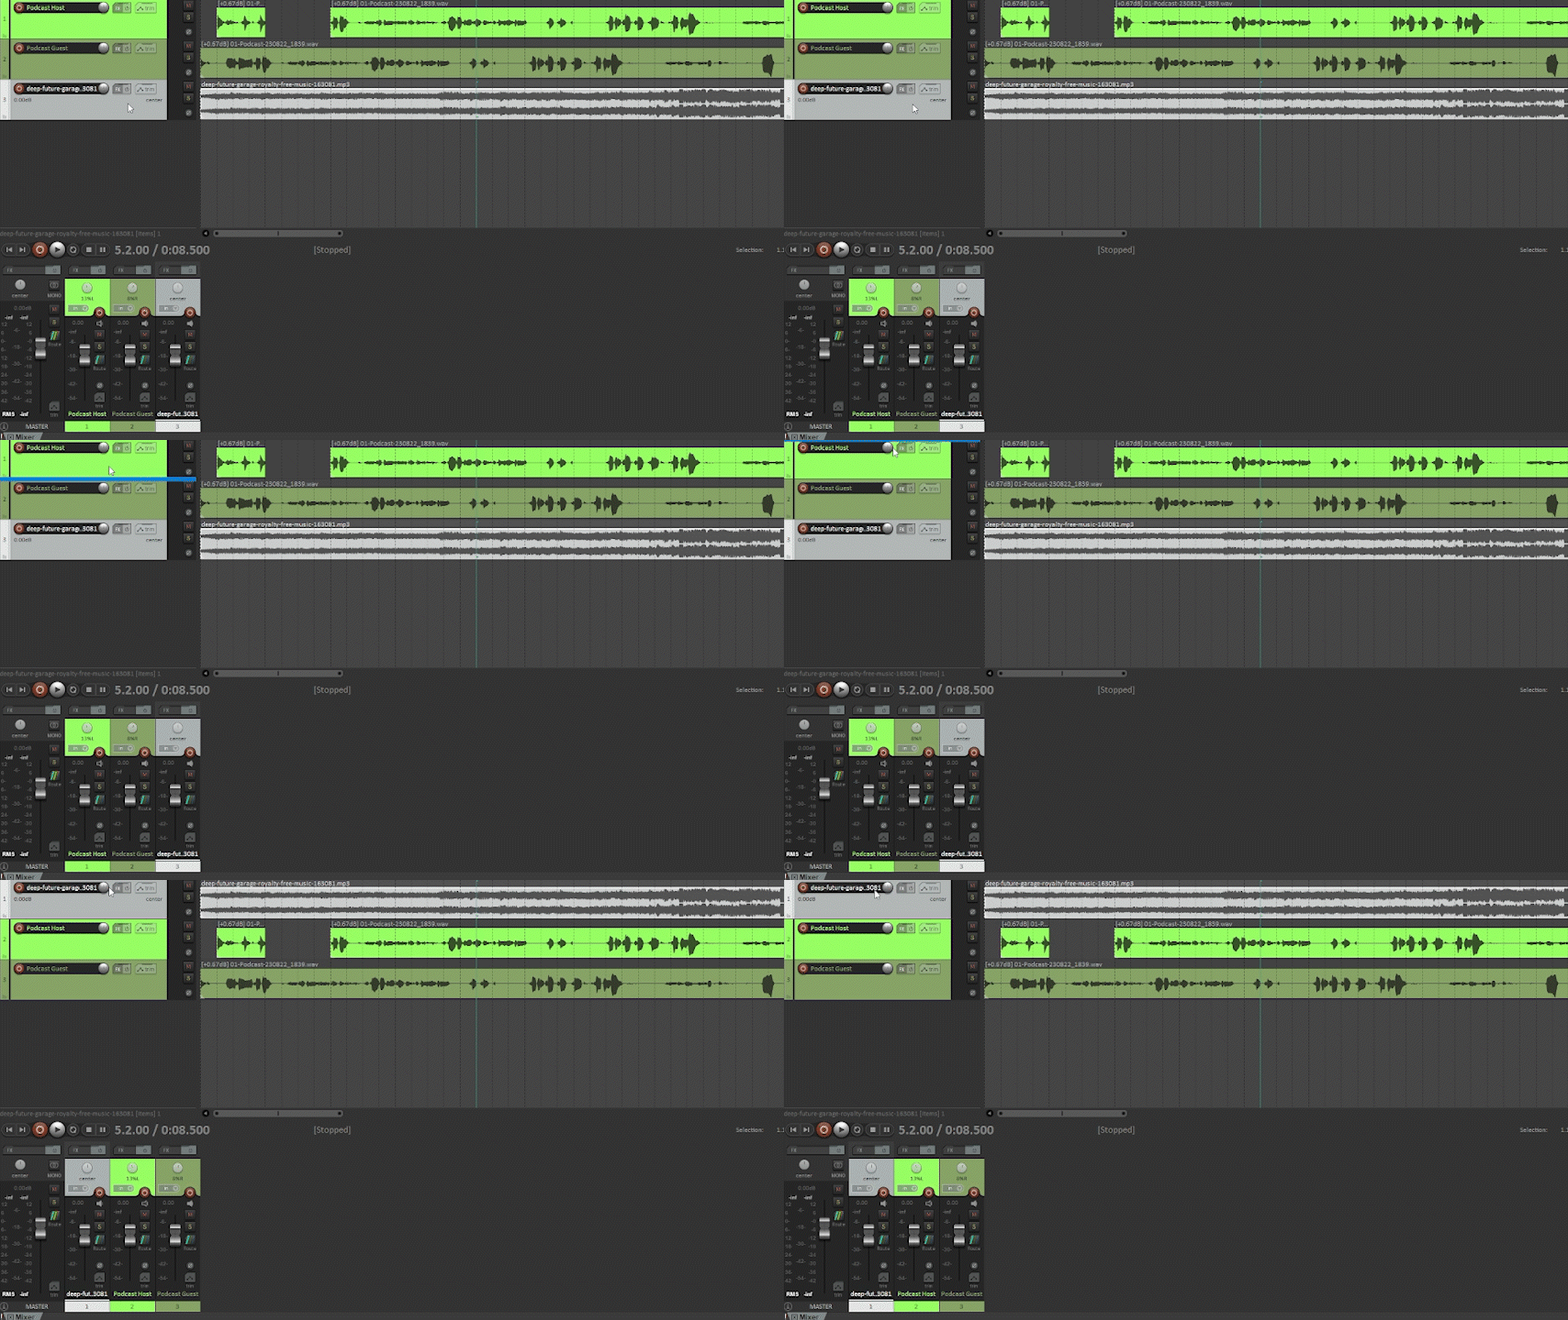
Reorder Tracks
Adjust order of tracks by clicking and dragging the track up or down.
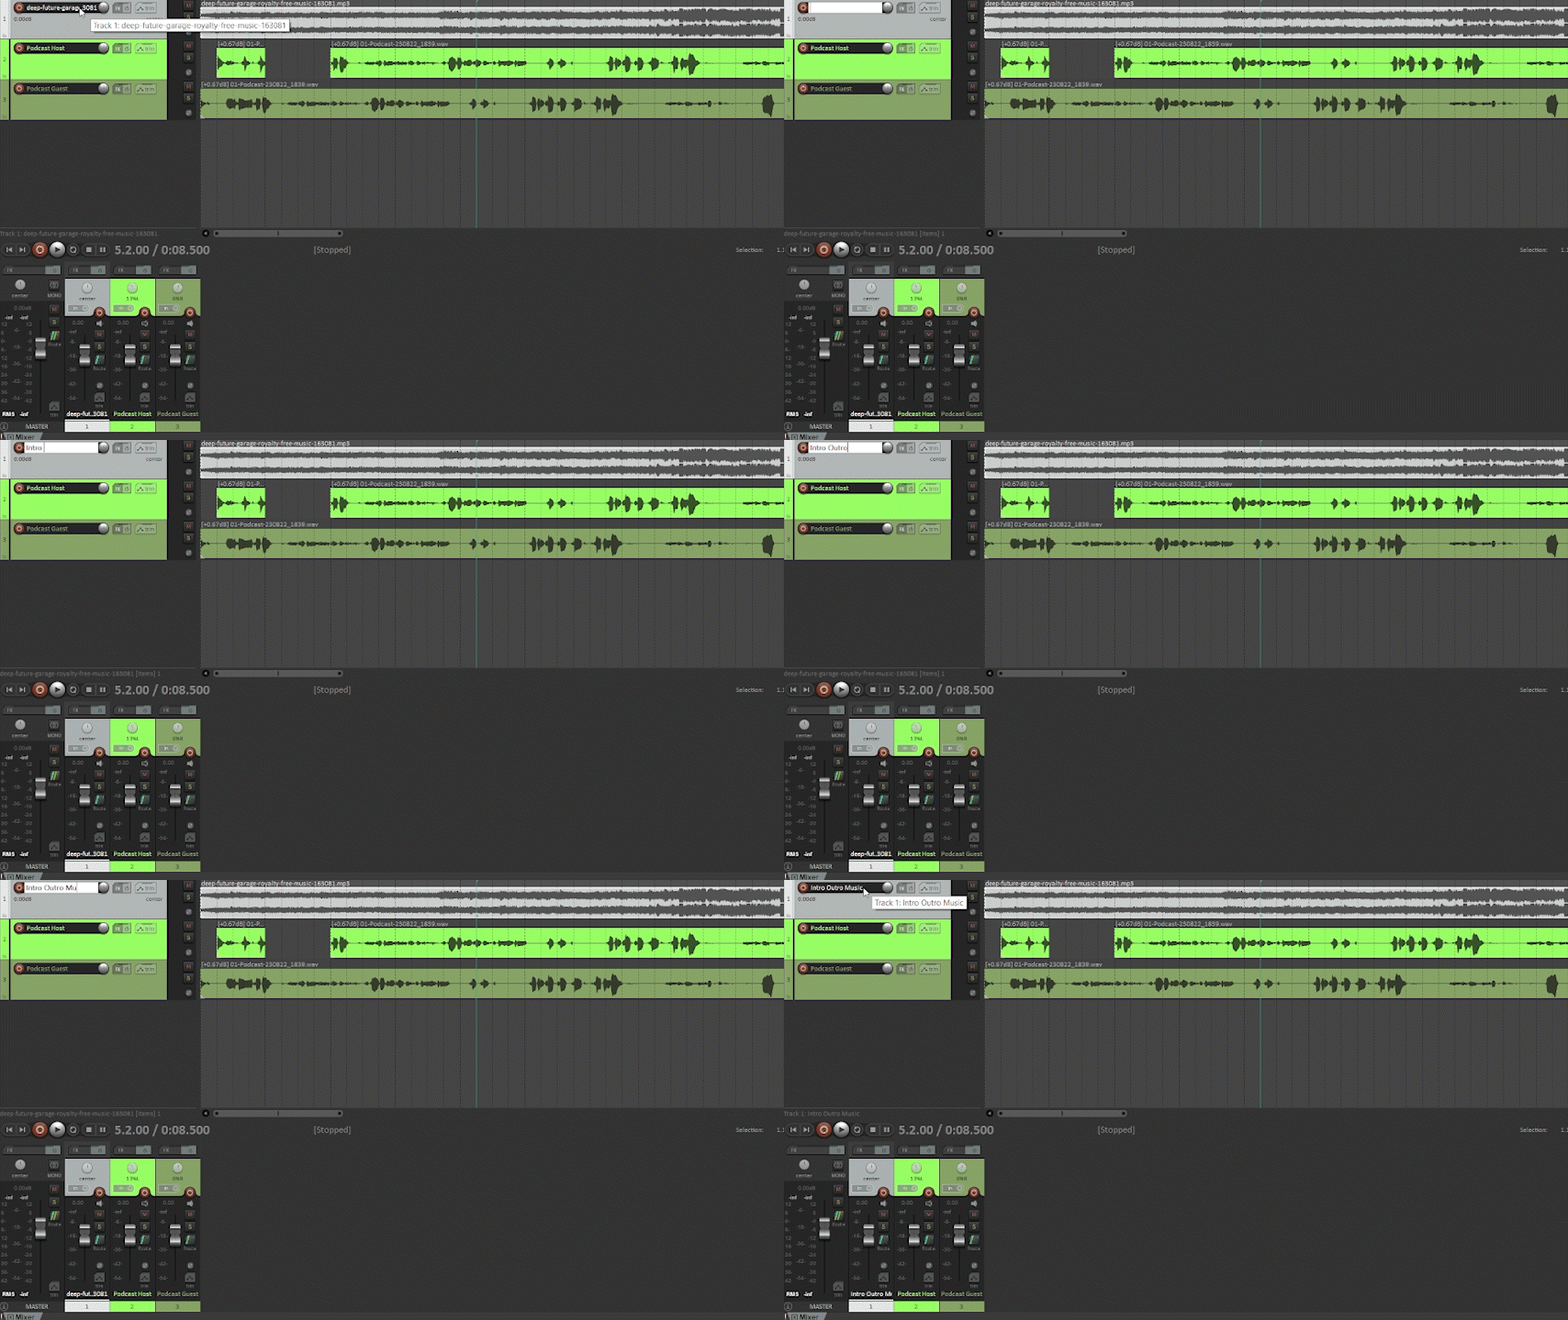
Name Tracks
It's always helpful to name tracks for clarity and organization.
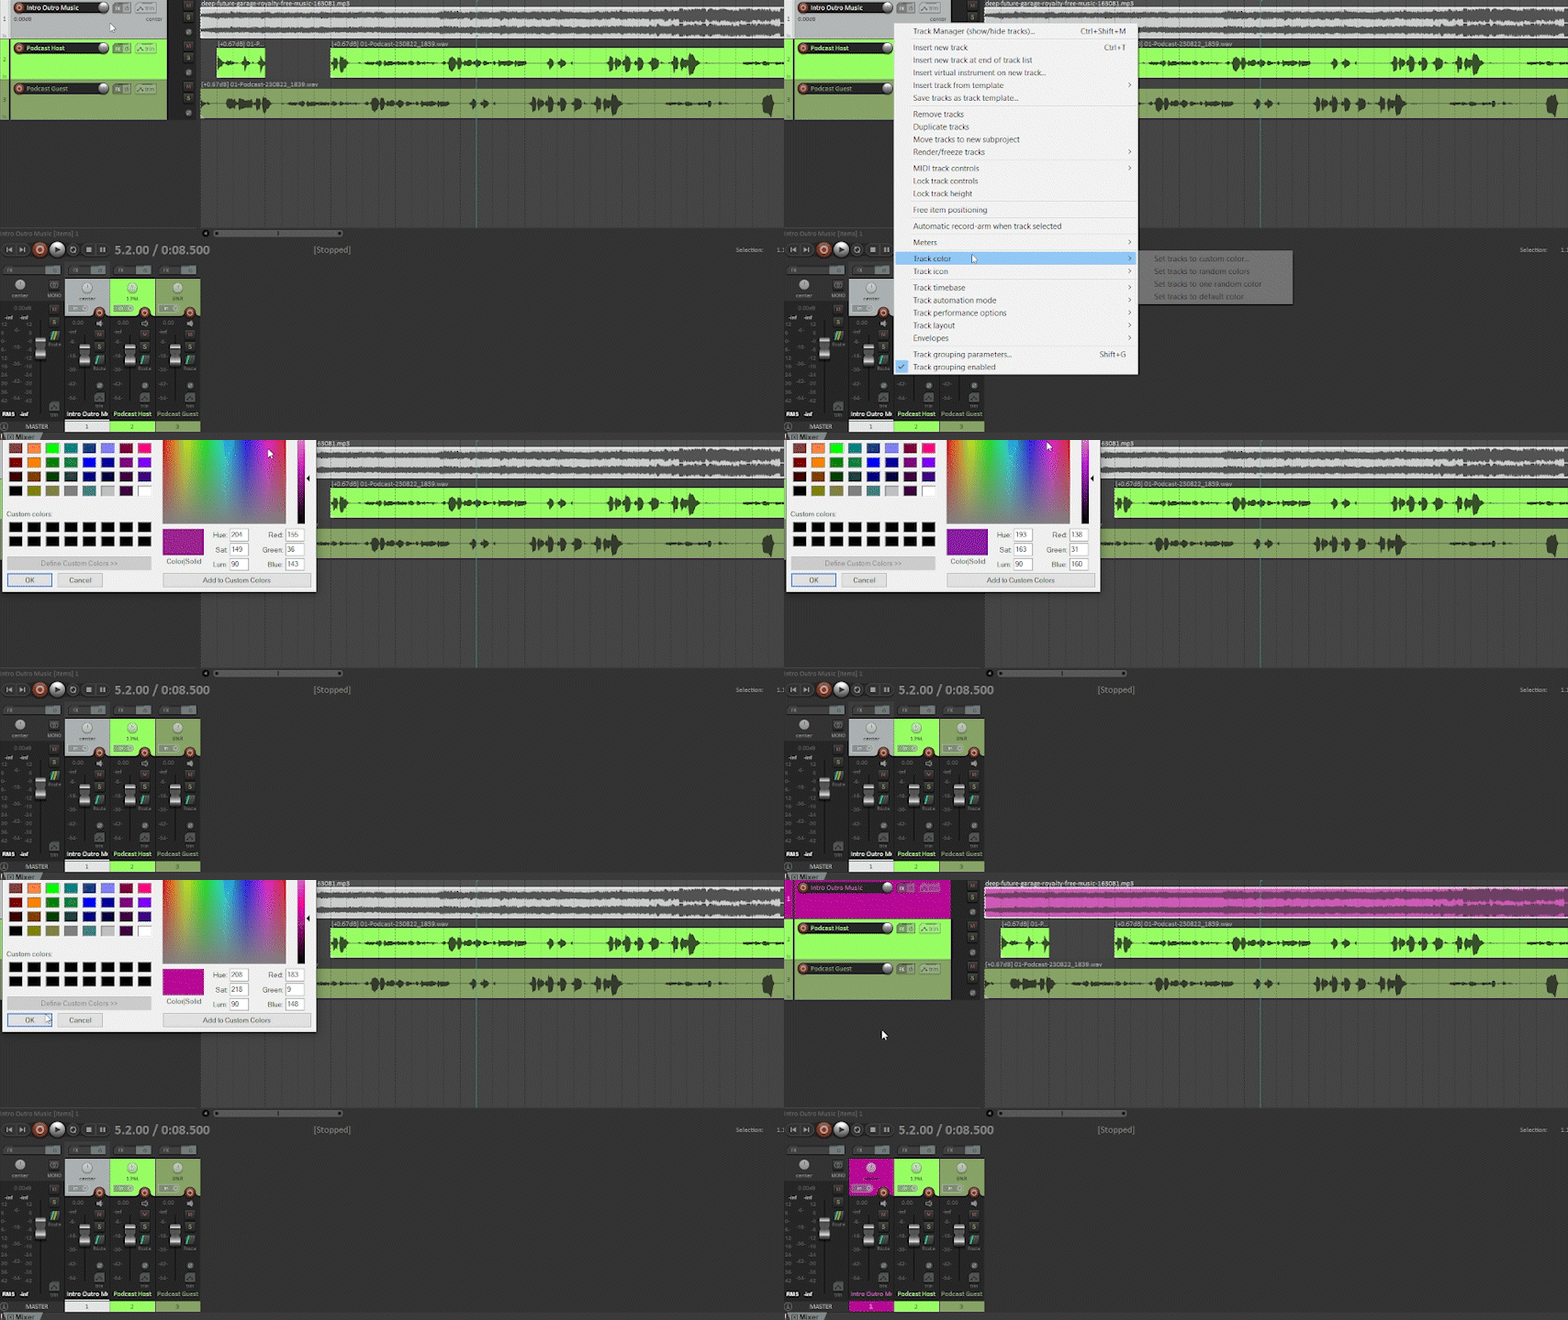
Colour a Track
Colouring tracks make them visually distinct and easier to identify.
Zooming in and Out
Often when using REAPER, you will need to zoom in or out to see see the whole audio clip or zoom into just focus on a small part of it.
