Audio Effects in Audacity
This guide has information on how to add and use different audio effects in Audacity.
How to Add Effects
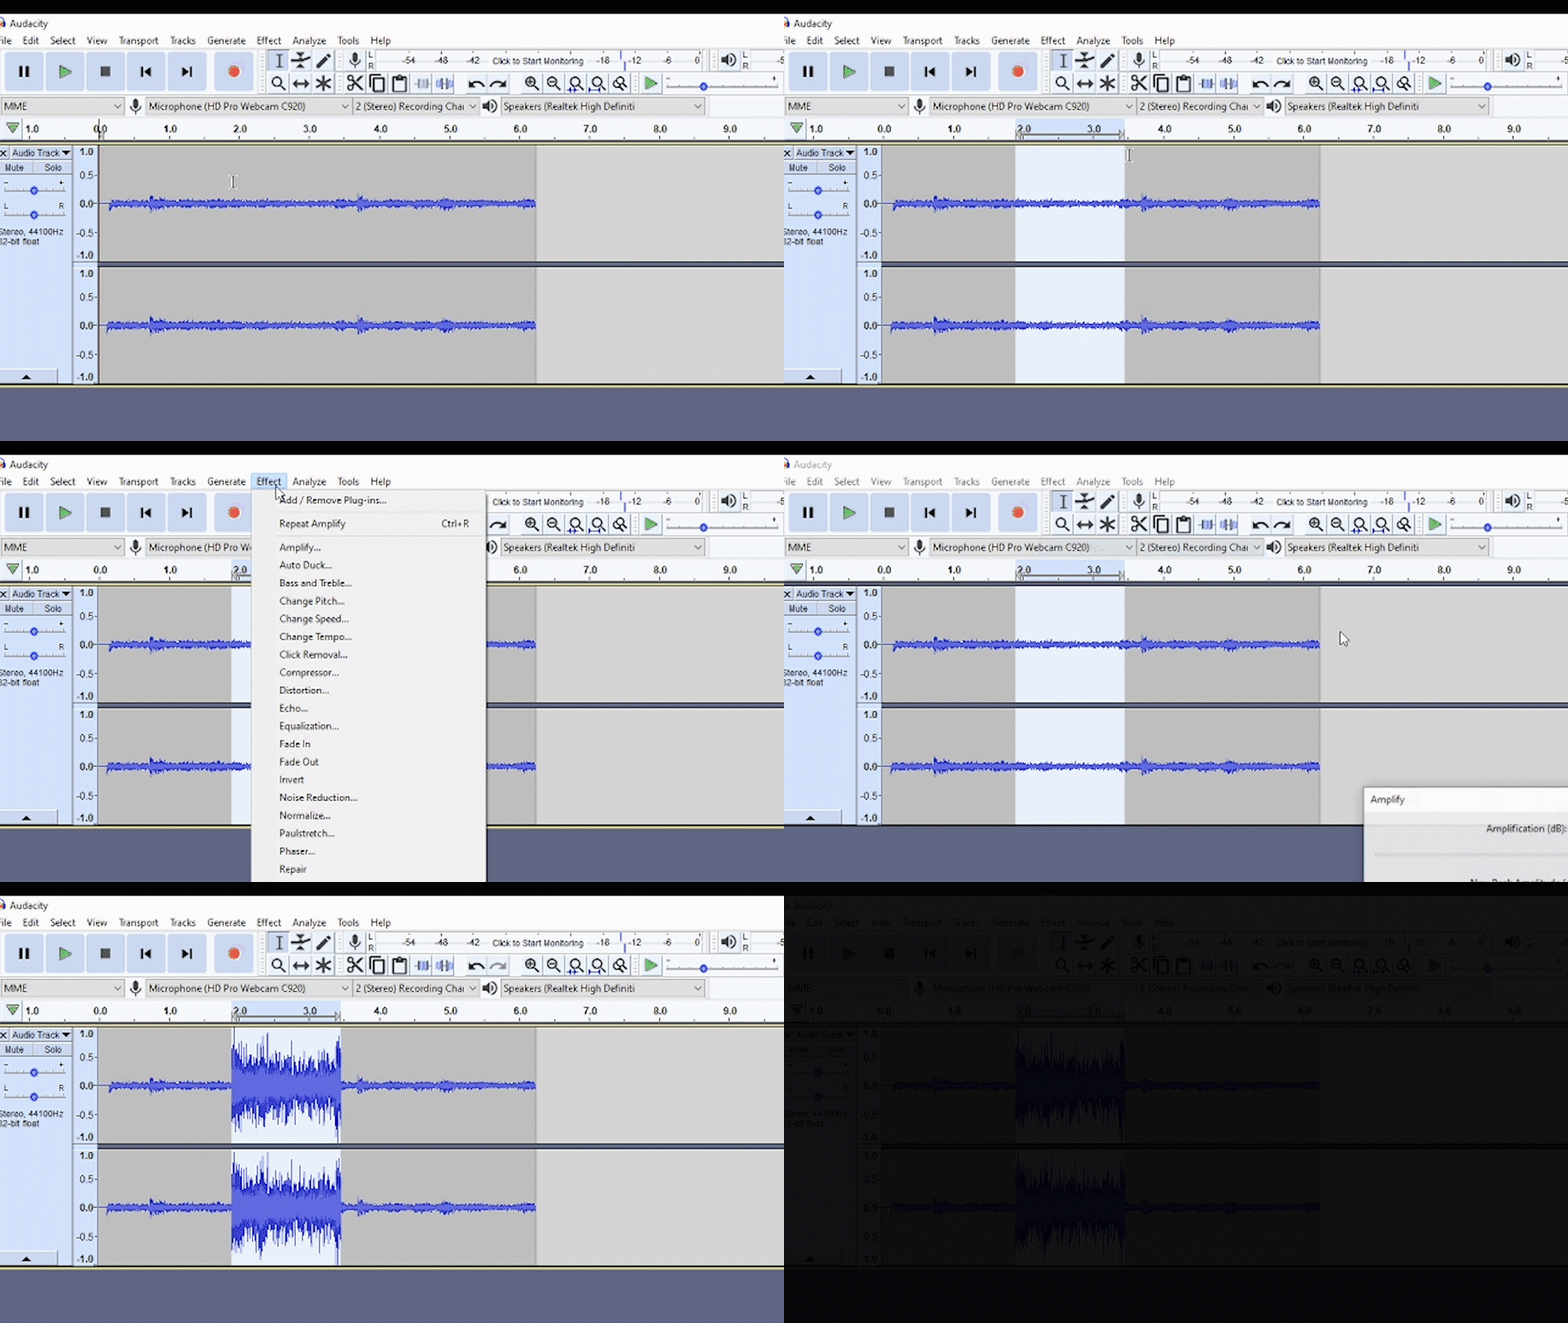
To add an effect in Audacity:
- Highlight to portion of audio you would like to add the effect to
- Click Effect
- Pick which effect you want, adjust parameters, and apply
Amplify
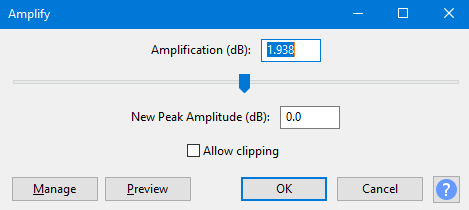
Use the Amplify effect to change the volume of the selected audio track or portion.
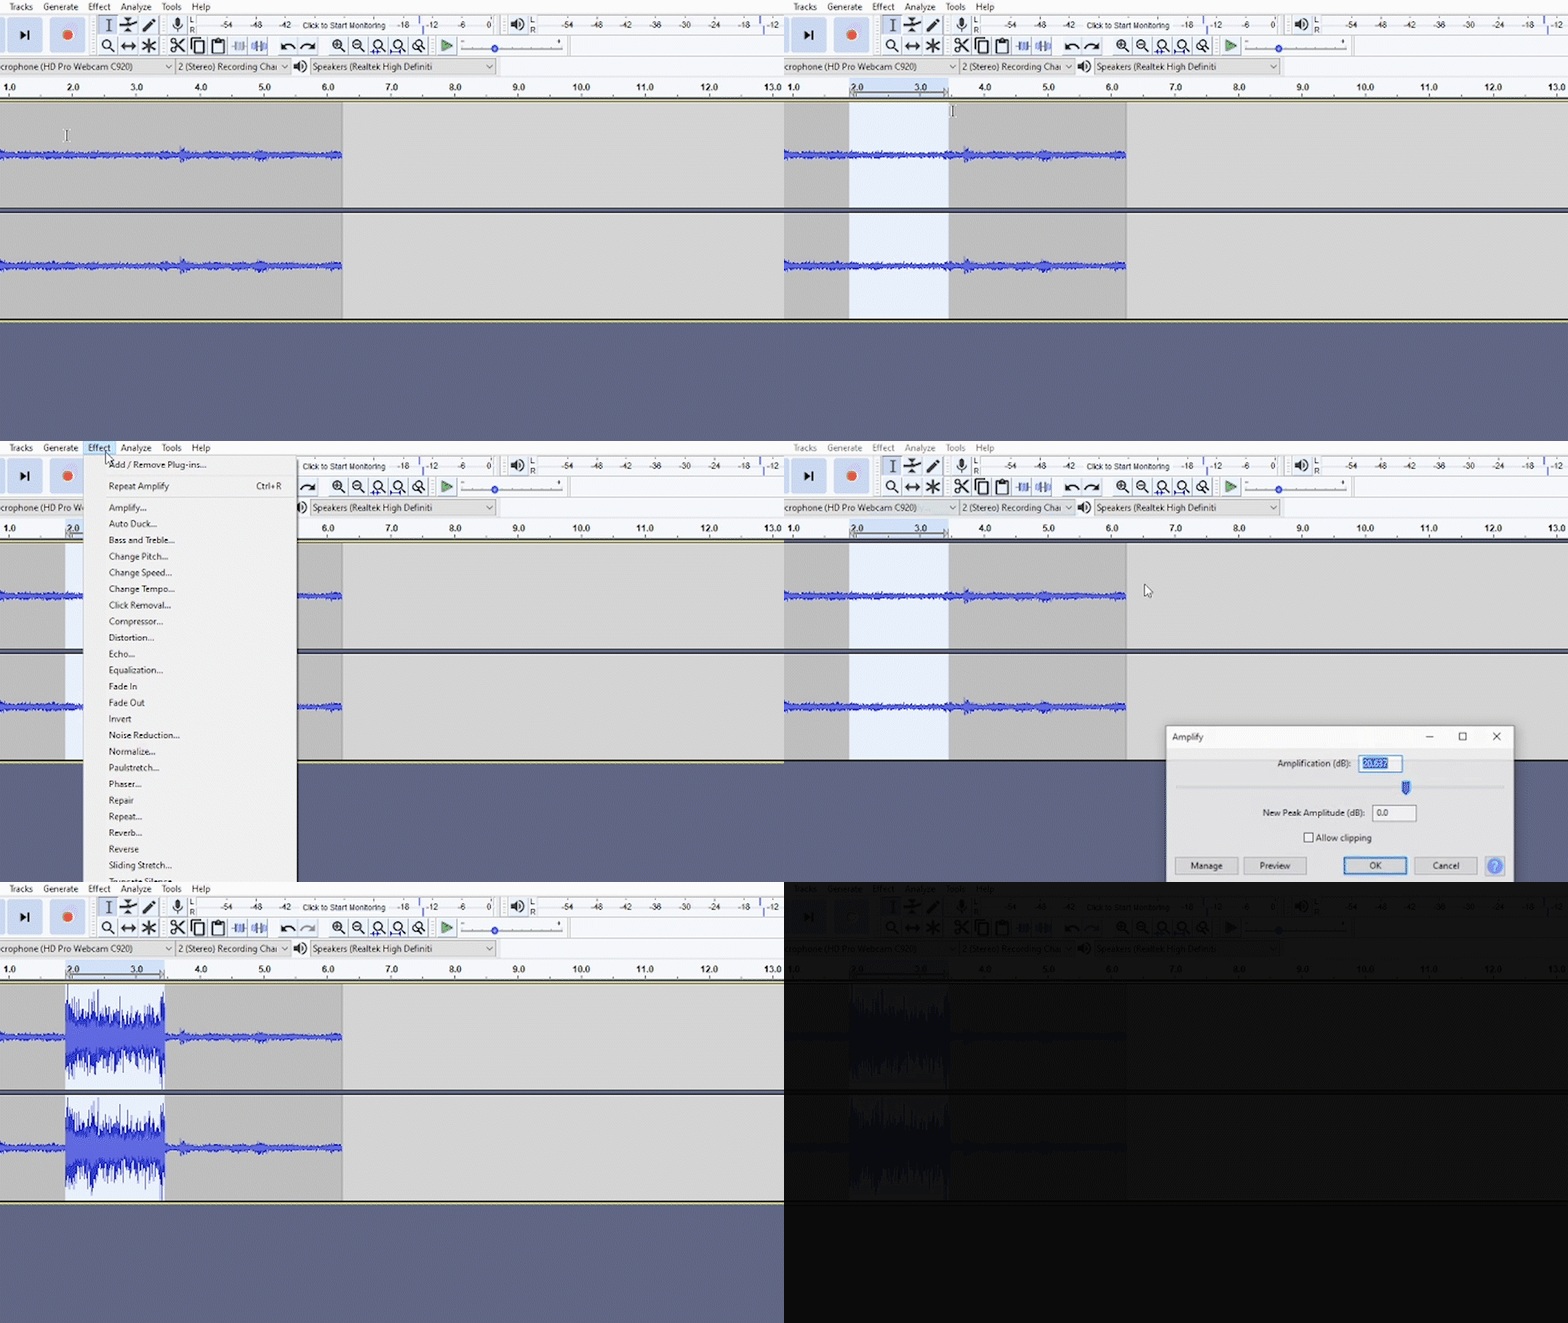
Type in a value or use the slider to increase or decrease the volume and select ok.
Fade In / Fade Out
“Fade In” takes the volume level of a clip from silence to full volume over a particular length of time. Simply select the part of the track that you want to fade, and select “Fade In” (Effect > Fade In):
“Fade Out” (Effect > Fade Out) does exactly the opposite. This is commonly used to fade out the background music at the end of the project. You can use a very short (less than a second) fade in or fade out to prevent the jarring appearance of background noise from a noisy clip, or a much longer fade out when fading out background music.
Normalize
A tool to apply an even amount of “gain” to the entire recording or clip, matching it to a target level (the norm).
2 reasons you might normalize are:
Maxing out the volume – If you have a quiet audio file you may want to make it as loud as possible (0 dBFS) without changing its dynamic range.
Matching the volume – If you have a group of audio files at different volumes you may want to make them all as close as possible to the same volume. It may be individual snare hits or even full mixes.
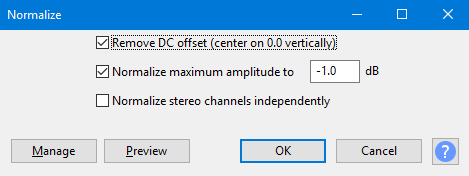
Access the Normalize effect in Audacity by Effect > Normalize. You can set a maximum volume level, or amplitude. Then apply the effect.
Reverb
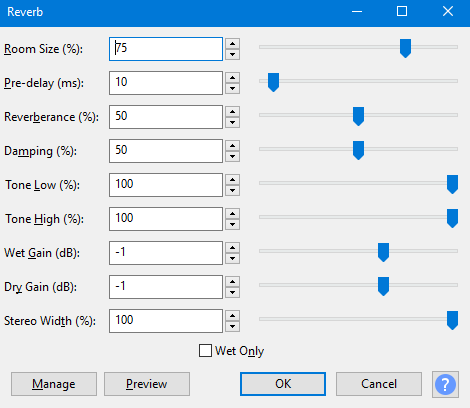
Reverb is an audio effect that can be described as the sound of the space. If you have ever yelled or clapped your hands in a large room, you have heard reverb. Most recordings are made in a studio, where there is little to no reverb. But you can add it with audio effects to make a vocal, instrument or sound effect sound more full.
To access the Reverb Effect in Audacity, go to Effects > Reverb.
EQ
Our ears can detect a large range of frequencies — from about 20 Hz to 20 kHz. Each element of your mix / audio recording has sound in different parts of that range.
EQ (or equalization) in music means changing the balance of these frequencies. The goal is to make everything sound balanced and clear.
EQ is important when recording multiple instruments so that each one has its own defined, clear lane / audio signal, and is the way to avoid audio masking, which is done by overlapping frequencies.
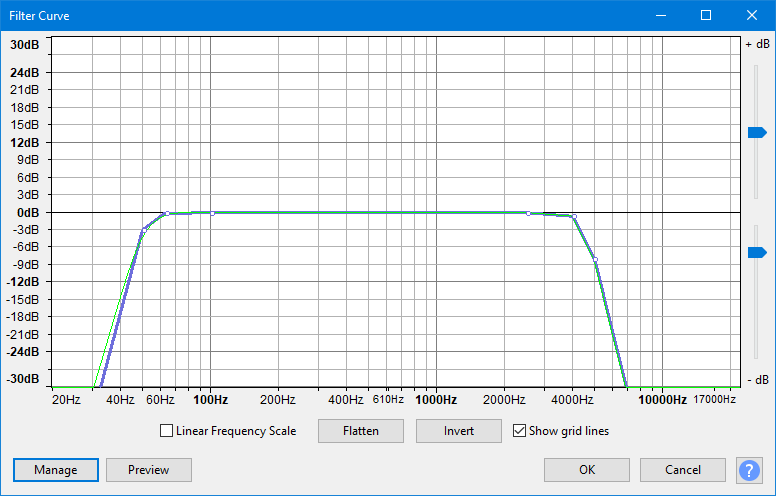
One effect in Audacity that you can use to equalize is called Filter Curve EQ
Noise Reduction
A noise reduction tool is a very useful tool. It removes unwanted drones or frequencies caused by noises in your environment, or by equipment malfunction, such as a loose connection or buzzy mic. In Audacity this effect is called Noise Reduction. In order for it to work, you need to feed it a sample of audio with only the noise you want removed. That is why recording some room tone is a good idea. Some recommend recording one minute of room tone before beginning, to have an easy sample to feed it.
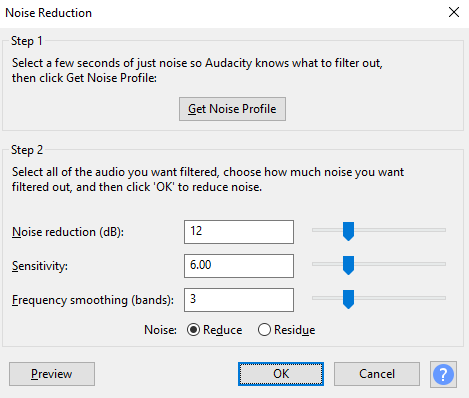
This is how to use it:
Step 1: Get Noise Profile
- Make a selection of the audio waveform which contains only the noise you want removed.
- Click Effect > Noise Reduction
- Click Get Noise Profile
Step 2: Reduce Noise
- Select the area you want to reduce the noise from.
- Click Effect > Noise Reduction
- Set the Noise Reduction parameters. This is often best done by trial and error, adjusting the sliders and using the Preview button to listen to a few seconds of audio after noise reduction.
Delay
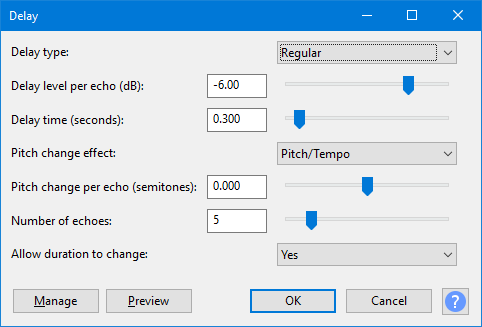
Delay is an effect that basically functions like an echo, repeating the audio at a customizable interval.
Compression
Audio Compression reduces the difference between the quietest and loudest part of the song or audio file.
Understanding how and when to use compression can be complicated. There are some great videos that delve into this online. For example, we recommend this video that clearly explains what audio compression is.
Here are some parameters used in audio compressors that you will need to know.
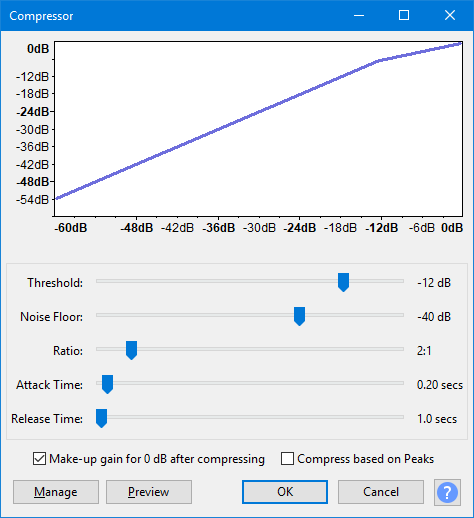
Threshold: Setting the threshold indicates where you want the compression to occur. For instance, if you set the threshold to -20dB, then compression will be applied to everything above -20dB and not applied to everything lower than -20dB. You can set the threshold to whatever point you desire.
Ratio: The Ratio determines how much gain / volume reduction is being applied when the compressor starts working. For example, if the ratio is set to 3:1, for every 3dB the volume goes over the threshold that you set, 1dB will be outputted. As a rule, high ratios make compression more noticeable / aggressive, whereas lower ratios produce more subtle compression. Using your ears, determine which ratio sounds best for your mix.
Attack: This is the reaction time of a compressor. It controls the length of time it takes for a compressor to kick in after the audio signal exceeds the threshold.
Release: This controls how long it takes for a compressor to relax the compression once your audio level has fallen below the threshold.
Auto Makeup Gain: This setting can be used to restore however much gain you reduced from the original signal using gain reduction. This enables you to accurately hear the difference between the original and the compressed sound.
